Sometimes the change you want is a little more shape around your face, with enough length left to feel familiar. Love layers offer that inviting middle ground: soft curves, a gently rounded outline and ends that move when you do. These 12 references help you choose the version you would enjoy styling, rather than simply falling for a freshly finished photograph.
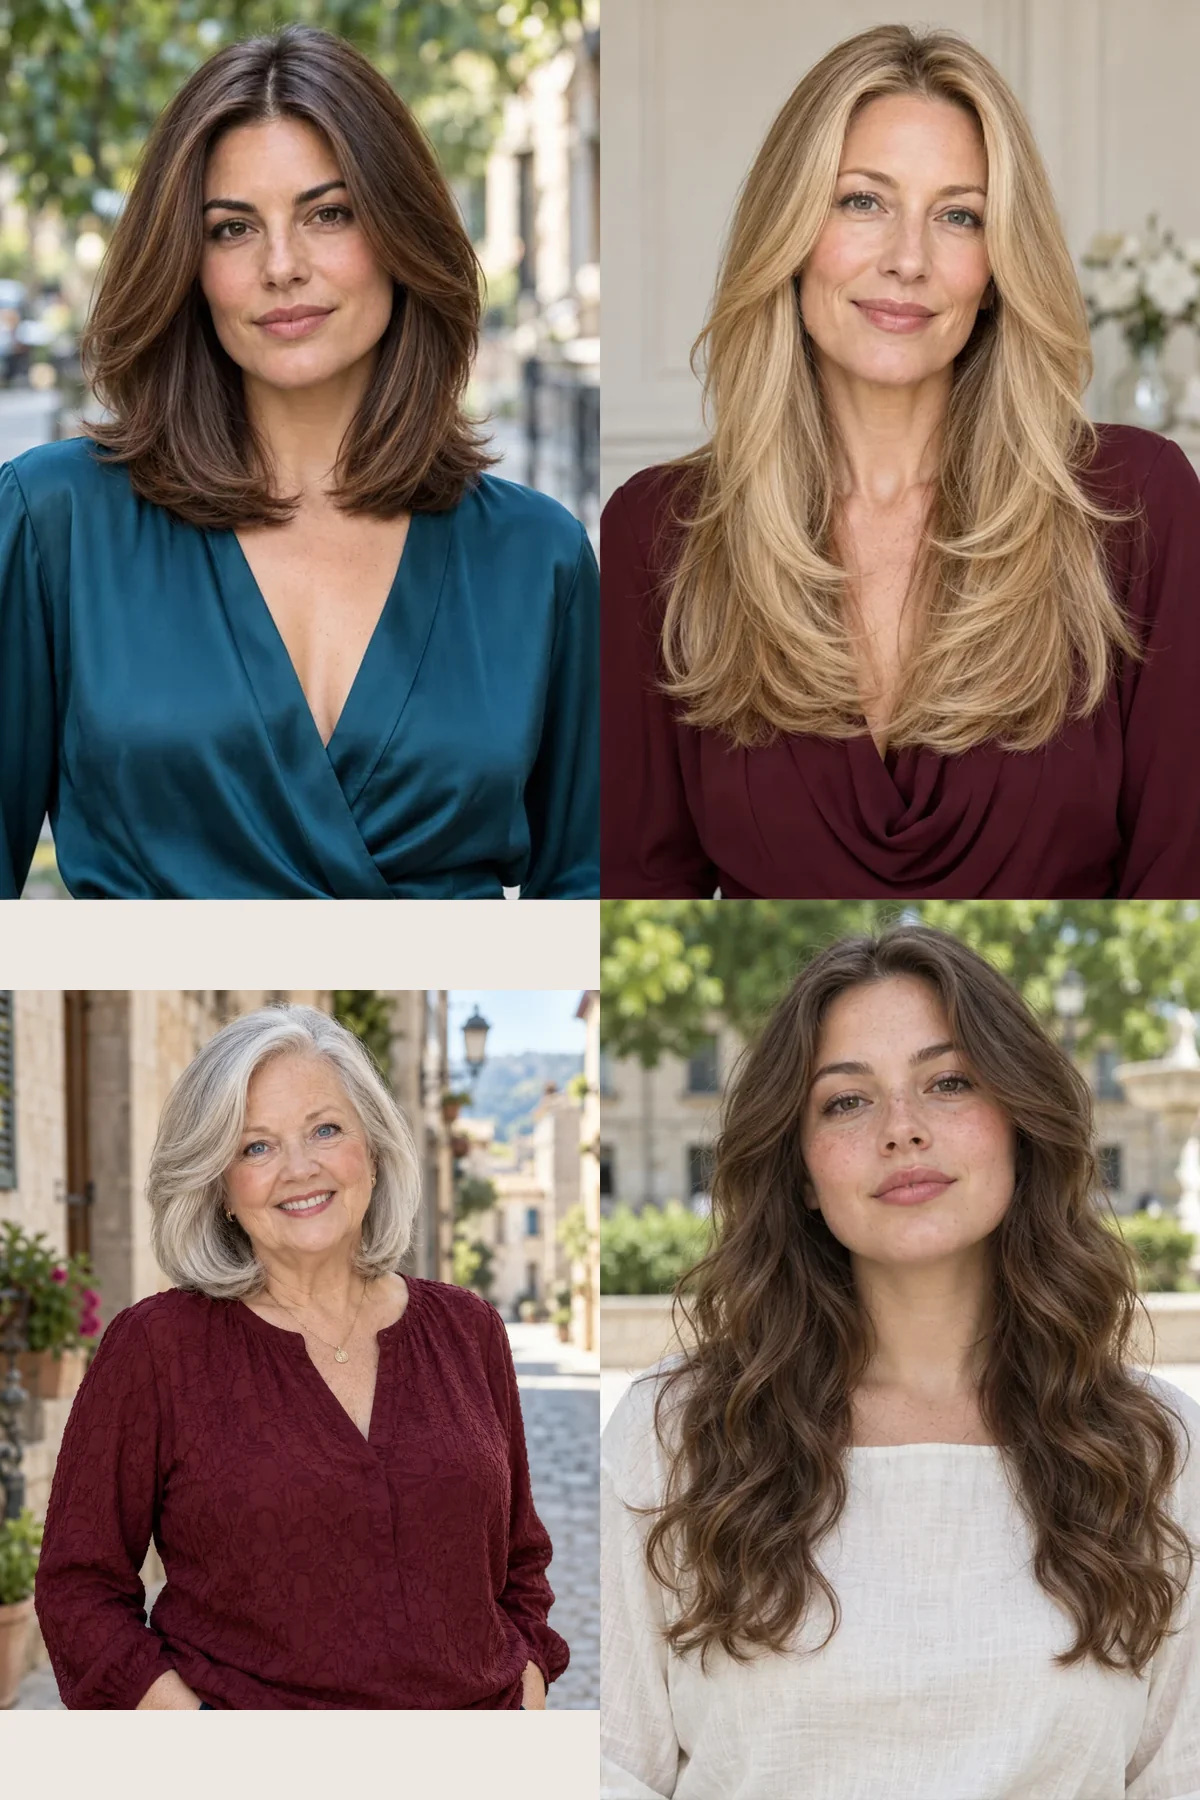
Love layers is a current name for a soft variation of the C-cut: connected layers curve around the face, build a rounded upper outline and narrow toward the lower lengths, suggesting a heart rather than tracing a literal heart into the hair. It overlaps with Rachel-style layering; salon names are not standardized, so the reference and your stylist's explanation matter more than the label. Compared with a dramatic butterfly cut, the transitions here stay gentler and more connected. Heart-shaped layers describe the haircut's outline, not a requirement to have a heart-shaped face. The visible curve also depends on how the hair is dried and finished.
Find the one that feels like you: Start with the first look and let the photographs lead. Each style explains how the shape affects your features, the mood it creates and the exact words to take to your stylist.
Quick Facts
- Choose the dry landing point of the shortest connected layer before choosing a salon label.
- The rounded contour needs enough density; more layers do not automatically create more fullness.
- Straight hair usually needs directed styling to show a curve; natural waves produce a softer interpretation.
- These are twelve reference variations of one overlapping style family, not twelve official cutting techniques.
1. A Classic Collarbone Heart Contour
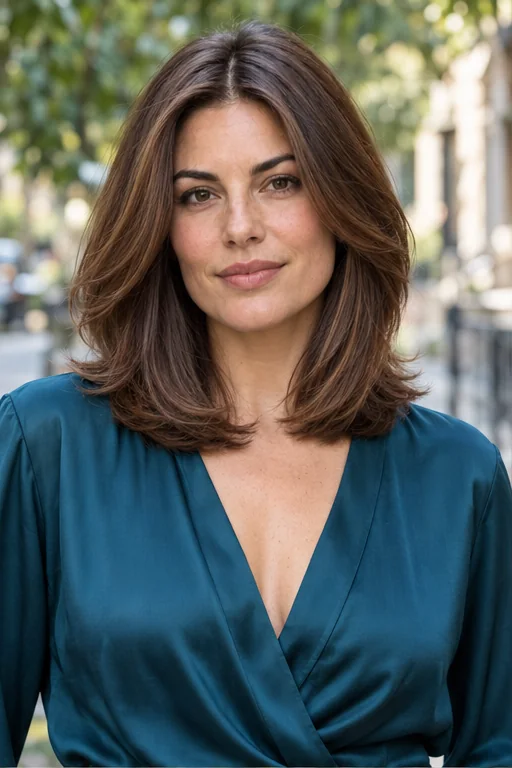
A center part opens into rounded sides, while connected pieces below the chin curve toward a collarbone-length edge. That gentle narrowing brings attention back toward your face and gives an everyday length a composed, quietly romantic feeling without a dramatic fringe. It is a useful starting reference when you like a polished finish and have enough density for the layers to remain connected, although the front may need reshaping after sleep. At the salon, request a collarbone outline with below-chin curves and a substantial lower edge, checking where the widest point falls. Guide the front away from the face before settling the lower ends inward, and let the shape cool before brushing it through.
Ask your stylist for: A collarbone outline with connected below-chin curves, softly rounded sides and a substantial lower edge.
2. Long Curves That Flow Into One Another
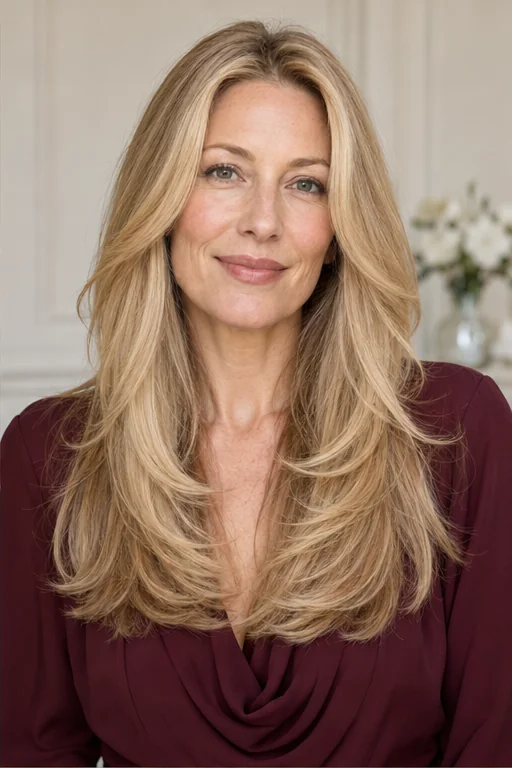
Here the curves flow through chest-length hair, with no abrupt shelf separating the face frame from the longer pieces. Keeping those transitions gentle lets you enjoy movement while the overall impression stays long and fluid, which can feel reassuring if a shorter layered cut would be too much change. The softly narrowing sides suit someone who wants a dressier outline but still enjoys wearing their length loose; check separately whether the shortest pieces will reach your usual ponytail. Ask for connected C-curves beginning below the chin, preserving the lower length and avoiding an isolated short tier. Style in manageable sections, then loosen the finish lightly so the layers move together rather than sitting like stacked rolls.
Ask your stylist for: Long connected C-curves from below the chin into the chest length, with gentle transitions and no isolated short shelf.
3. A Lower Curve With an Open Jawline
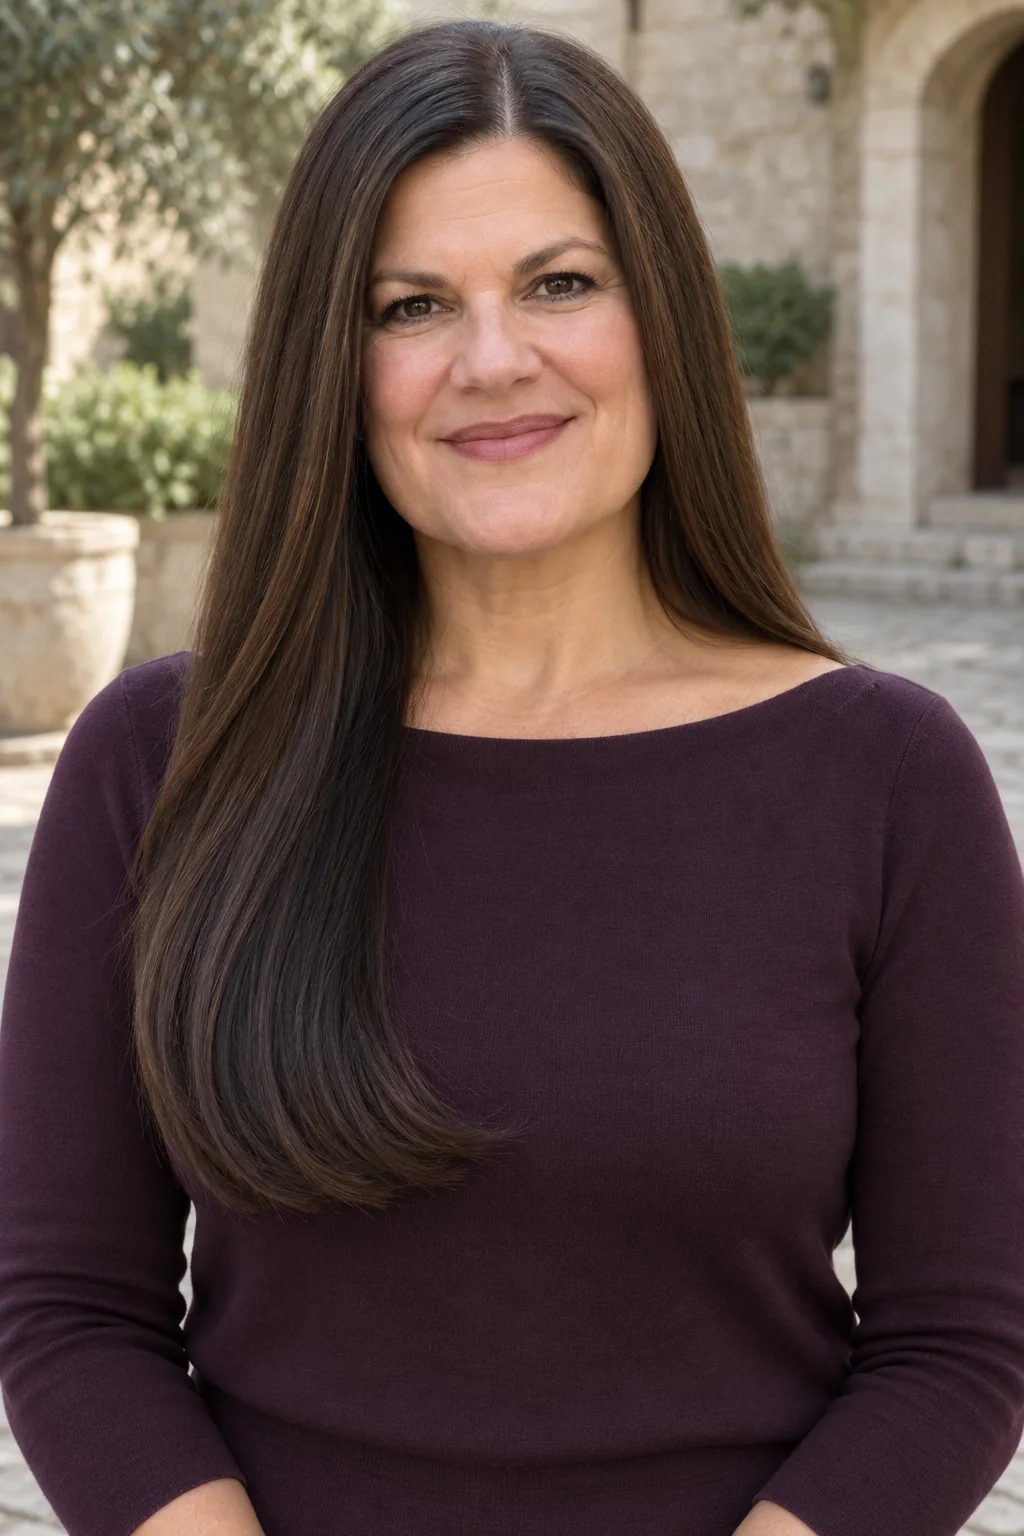
Smooth sections pass the jaw before the main rounded fullness appears below the shoulders, making this a lower, more elongated interpretation of the contour. Leaving space beside the cheeks can feel elegant and uncluttered when you prefer your face frame to stay subtle, while the curved lower lengths keep the hair from hanging like a flat curtain. Choose it if you enjoy longer hair and want the movement farther from your eyes, accepting that the shape may disappear when everything is tied back. Show your stylist the open jaw area and ask for the widest curve below the shoulders, blended into the chest length. Concentrate your finishing effort on those lower sections instead of repeatedly lifting the crown.
Ask your stylist for: Keep the jaw area open and place the main rounded fullness below my shoulders, blending it into chest-length ends.
4. A Compact Shoulder-Length Curve
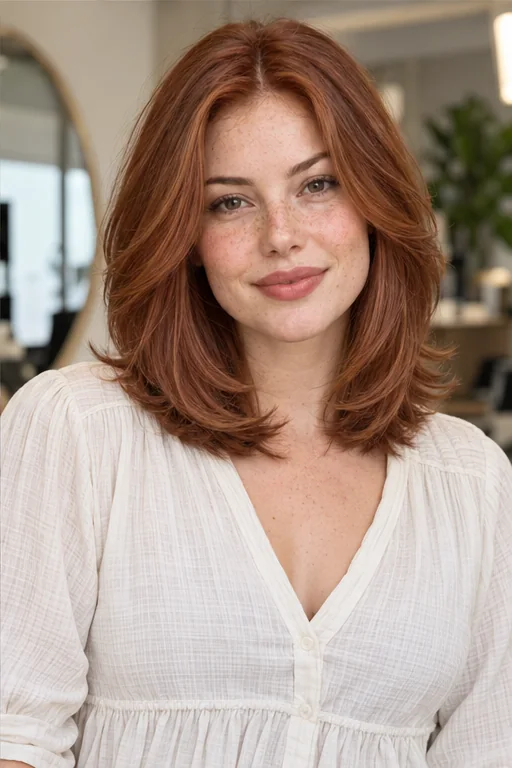
The outline finishes at the shoulders, compressing the rounded sides and inward ends into a smaller, lively shape. That shorter span makes the curve easy to notice and can bring a fresh, purposeful feeling to hair that has begun to feel heavy, without taking you into a short bob. Shoulder contact can also push the ends outward during the day, so consider whether you would enjoy that relaxed change or prefer to refresh the finish. Ask for a compact shoulder-length contour with connected below-chin layers, leaving enough length for the inward bend. Check the cut after it settles against your clothes; a photograph with every end held above the shoulders will not show its everyday behavior.
Ask your stylist for: Shoulder-length hair with a compact rounded side contour and connected below-chin layers, keeping enough length for the curve.
Pause and notice: Compare the widest point before comparing the overall length. Two haircuts can reach the same collarbone and still frame your face very differently.
5. Airy Ends Under a Rounded Upper Shape
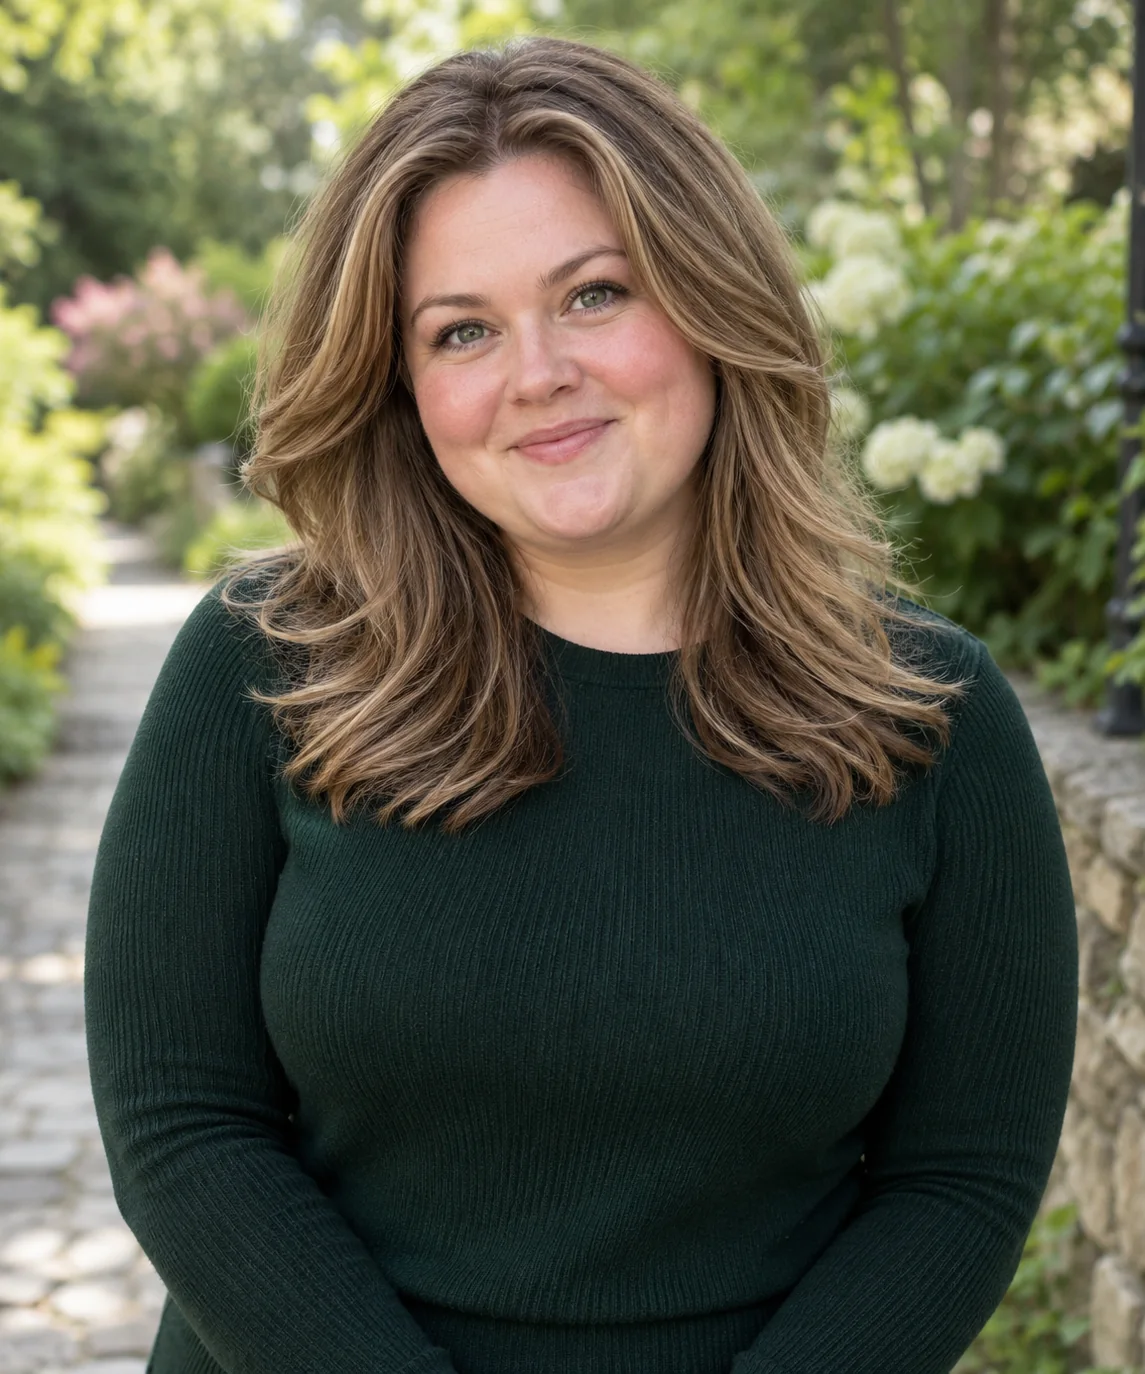
The upper sides stay rounded and connected, while the lower tips separate into fine, feathered strokes beneath the collarbone. That contrast makes the finish look light and animated, giving you a playful softness without turning the entire haircut into a choppy shag. It works best as a reference when your lower lengths can tolerate some separation; already sparse ends may look more fragile rather than more buoyant. Discuss a softly connected upper contour with lightly separated tips, and let your stylist decide how little refinement is needed instead of requesting aggressive thinning. Use a small amount of finishing product on the ends only, since a heavy coating can pull those delicate strokes into strings.
Ask your stylist for: Keep a rounded connected upper outline, with lightly separated lower ends and no automatic thinning through the whole cut.
6. Two Curved Tiers With a Soft Connection
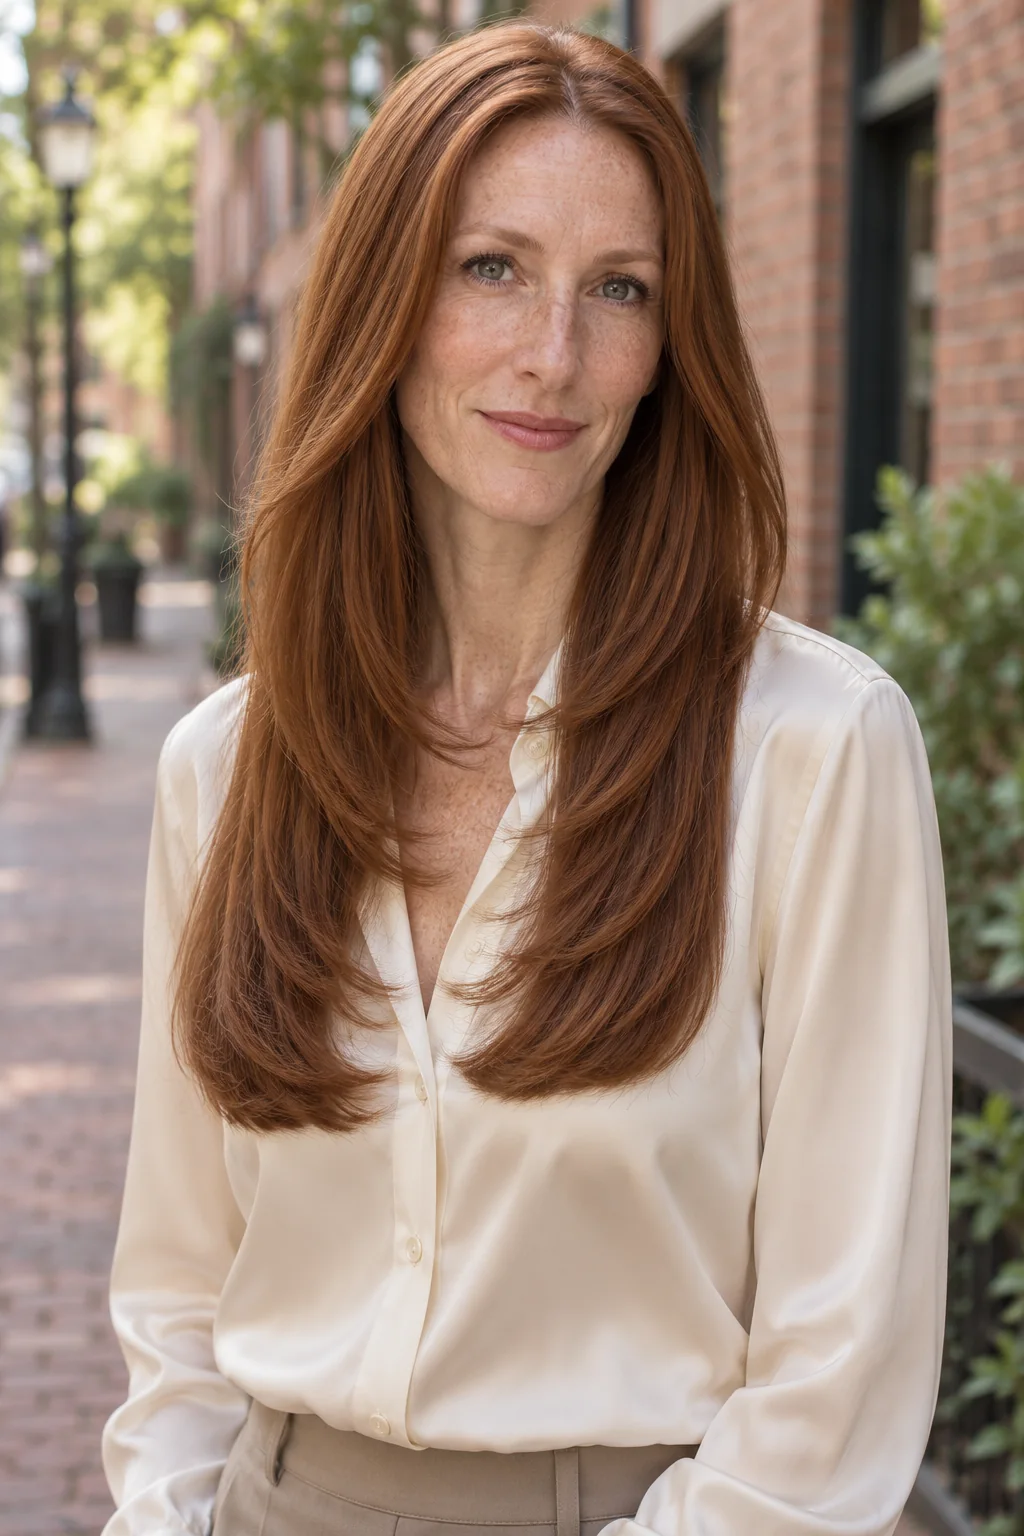
Two curved landing points make the layering more visible: a shorter bend below the chin and a longer inward arc across the chest. The repeated shape brings rhythm to otherwise long hair and can feel satisfyingly glamorous when you enjoy a finish with a little intention behind it. This version asks for more section-by-section styling than the seamless long contour, so choose it because you like seeing the tiers rather than expecting them to appear by themselves. Tell your stylist where you want both dry landing points, asking for a soft connection that avoids a disconnected shelf. Shape each tier separately, then check the result from the side as well as the front before deciding the bends are balanced.
Ask your stylist for: Two visible curved landing points, one below the chin and one at the chest, with a soft connection rather than a disconnected shelf.
7. A Dense, Smooth Curtain With Curved Edges
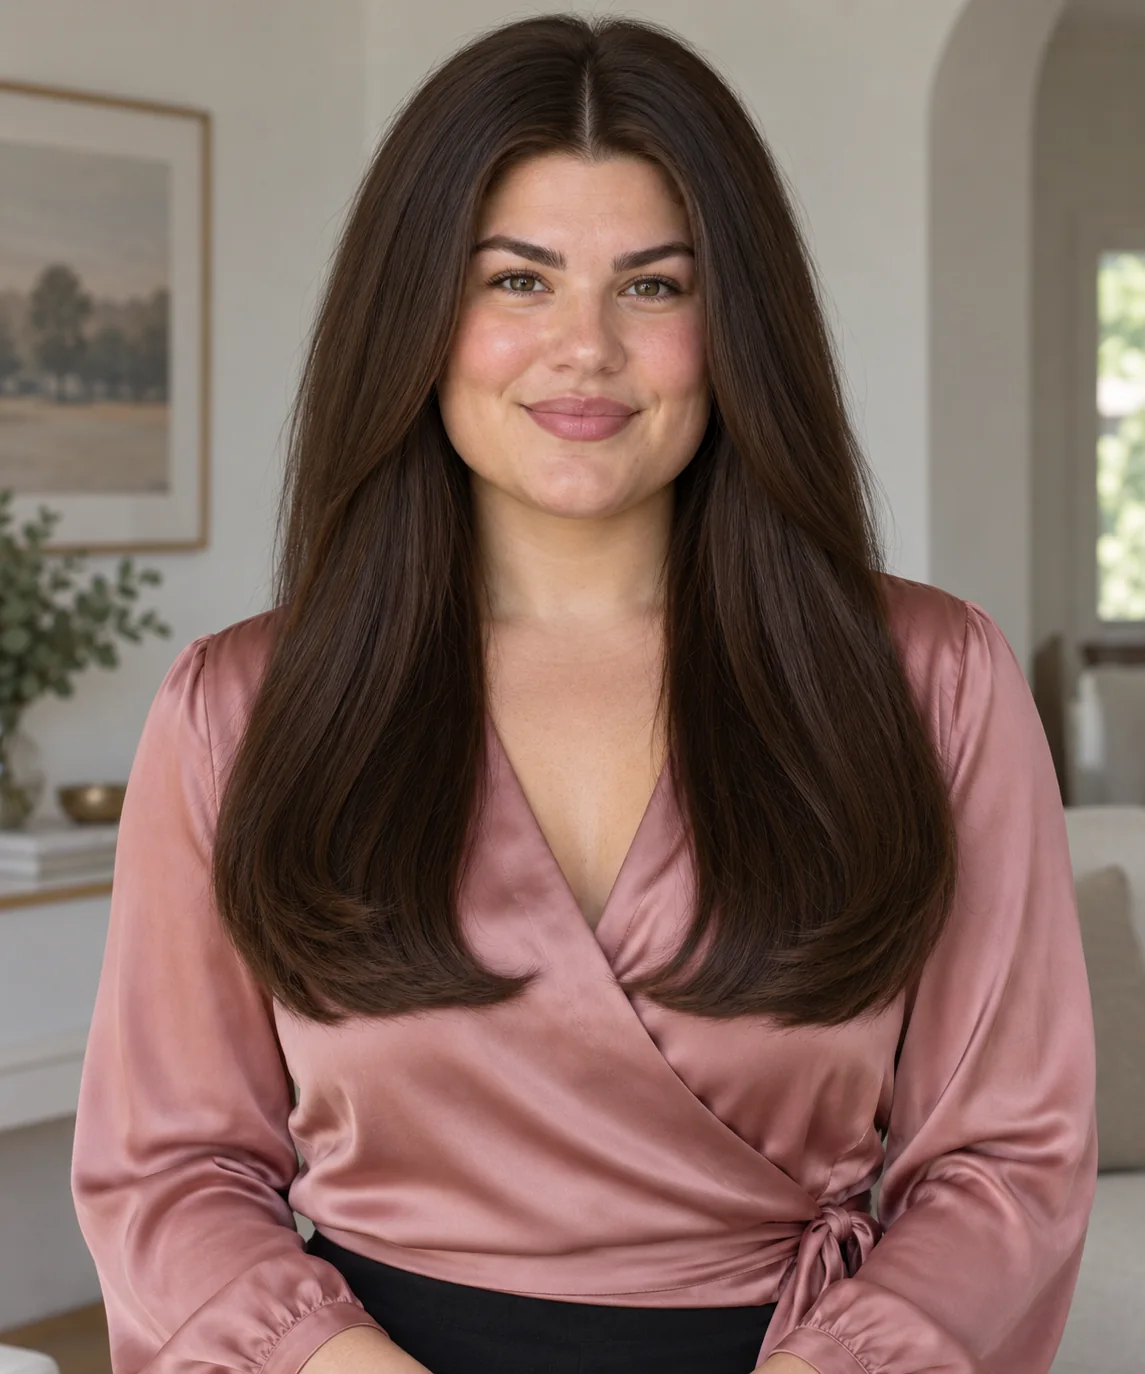
A broad, smooth upper outline narrows into substantial chest-length ends, letting density become part of the design instead of something to hide. The clean surface and weighty curved edges create a calm, assured impression, particularly appealing if you like your hair to look substantial with fewer flyaway details. Thick hair can take longer to dry, and removing lots of interior weight may change this full outline, so discuss the routine before asking for a lighter feel. Request a dense smooth curtain with a refined curved perimeter, checking that the lower lengths are not hollowed out. Dry in sections that your tools can manage comfortably, and judge the contour once the entire head is dry rather than only the front.
Ask your stylist for: Preserve a dense smooth curtain and solid ends, refining the curved outline without hollowing out the lower lengths.
8. A Restrained Curve for Finer Hair
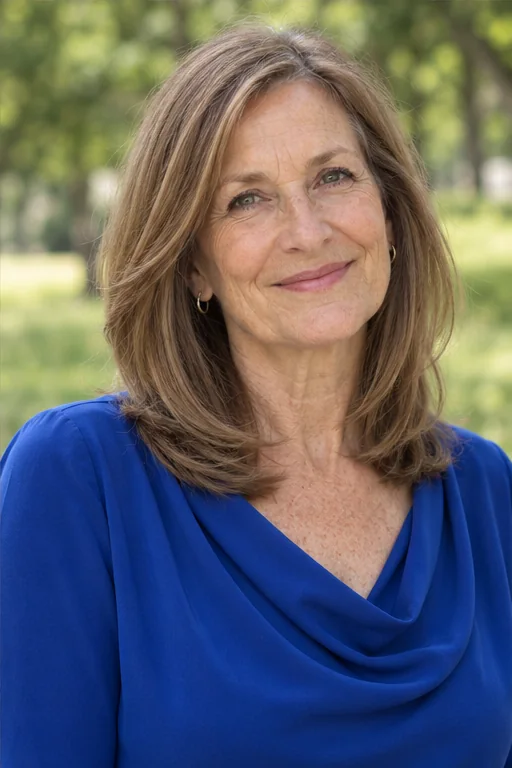
A solid collarbone edge supports a small amount of connected front layering, with a restrained bend rather than a large cloud of volume. Preserving that lower line can make finer hair look more considered and substantial, offering a reassuring way to try the curved outline without chasing a thick-haired reference. Fine strands and low density are different issues, so let your stylist assess how much hair can be moved into the face frame before deciding this is suitable. Ask for a firm perimeter and minimal connected curves, stopping before the lower edge becomes transparent. Use a light touch with styling products, and accept a subtler heart impression rather than cutting in extra layers to imitate fullness that is not there.
Ask your stylist for: Keep a solid collarbone perimeter and only restrained connected curves around the front; stop before the lower edge loses density.
Pause and notice: The reference should help you describe a shape, not persuade you to remove more hair than your density can support. A smaller curve can be just as intentional.
9. An Off-Center Sweep With an Uneven Frame
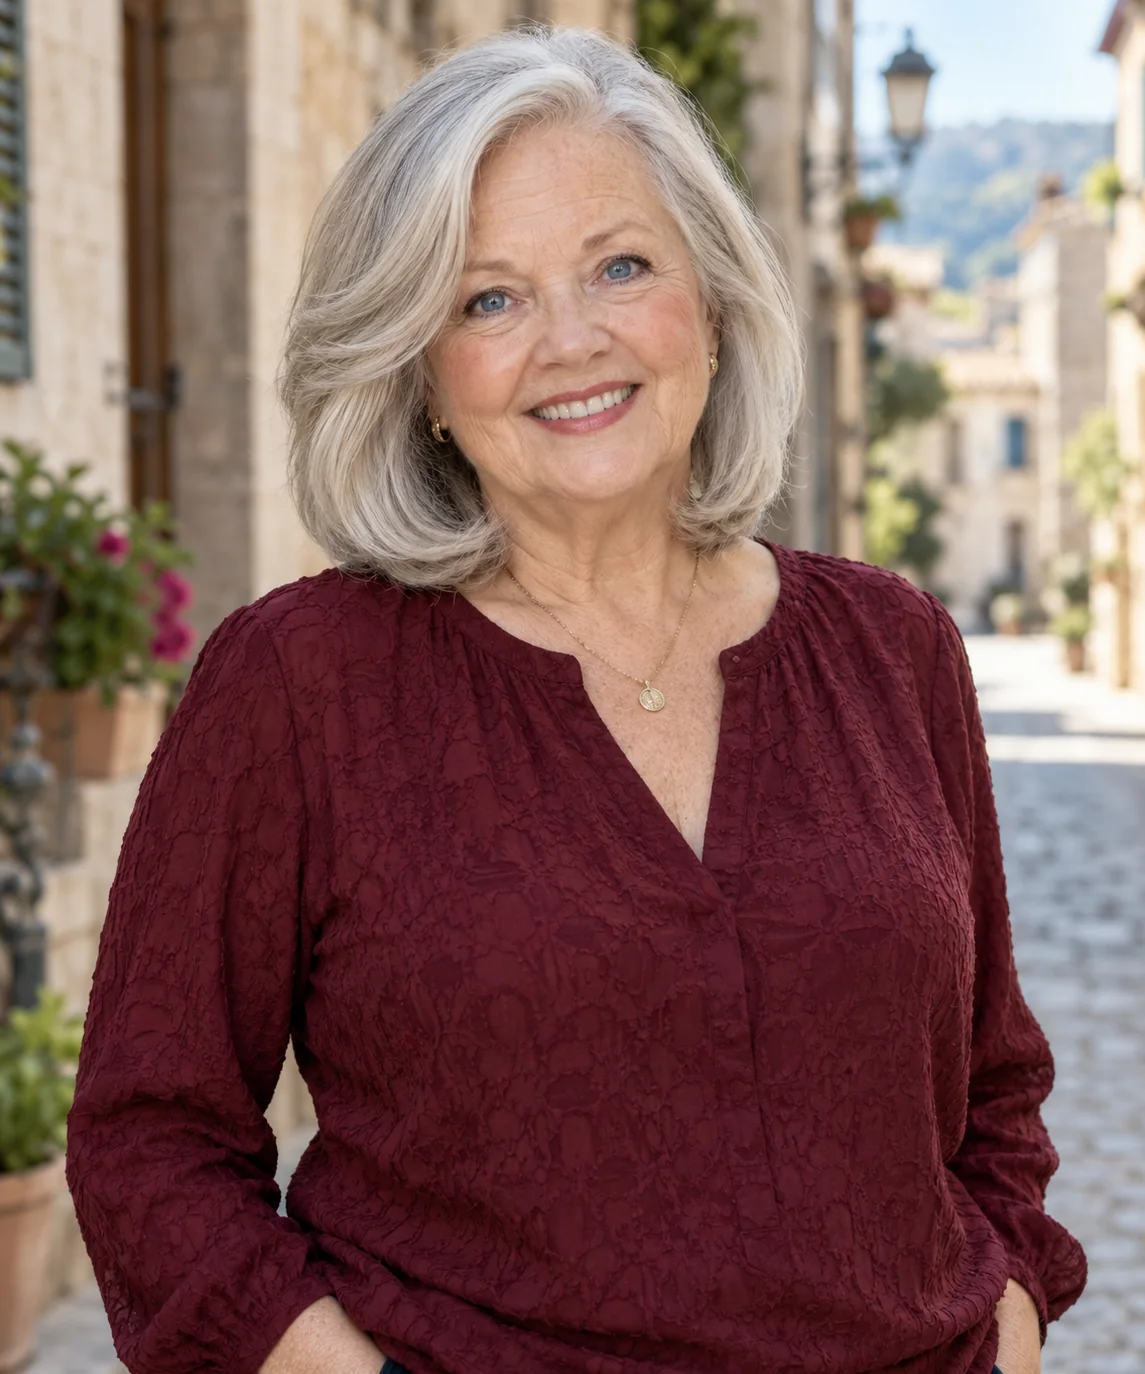
A slight side part shifts the rounded fullness toward one side, leaving the opposite face frame quieter and more open. The gentle asymmetry brings attention toward the eyes and can feel relaxed and individual if a perfectly balanced center part makes you feel too arranged. The heart impression becomes less symmetrical, which is part of this reference's appeal rather than something that needs correcting. Have your stylist assess the cut in the part you actually wear, asking for a fuller rounded sweep on one side with a connected taper below. Reset the roots in that direction while damp; repeatedly moving the part after drying can disturb the very curve you wanted to keep.
Ask your stylist for: Work with my slight side part, keeping a fuller rounded sweep on one side and a connected tapered outline below.
10. Loose S-Waves Through the Taper
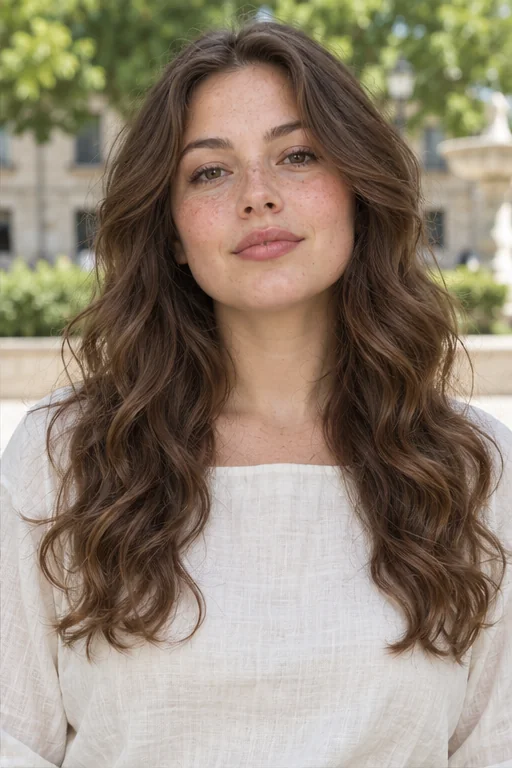
Loose S-waves soften the connected layers, so the rounded upper sides and narrowing ends read as a moving outline rather than a polished set of C-curves. The result can feel easygoing and expressive, especially when your own wave already supplies the movement and you would rather preserve it than smooth every section. Air-drying will not necessarily reproduce the photograph, and irregular waves may make the contour less even from day to day. Ask for the overall rounded-to-tapered shape to be checked in your dry natural wave, with enough length left for its bends. Use the setting method your hair responds to, then handle it lightly once dry instead of repeatedly combing out the pattern.
Ask your stylist for: Follow my loose natural S-wave while keeping rounded upper sides and a gently narrowing lower outline, checking the shape dry.
11. Broad Brushed Curls With a Narrower Finish
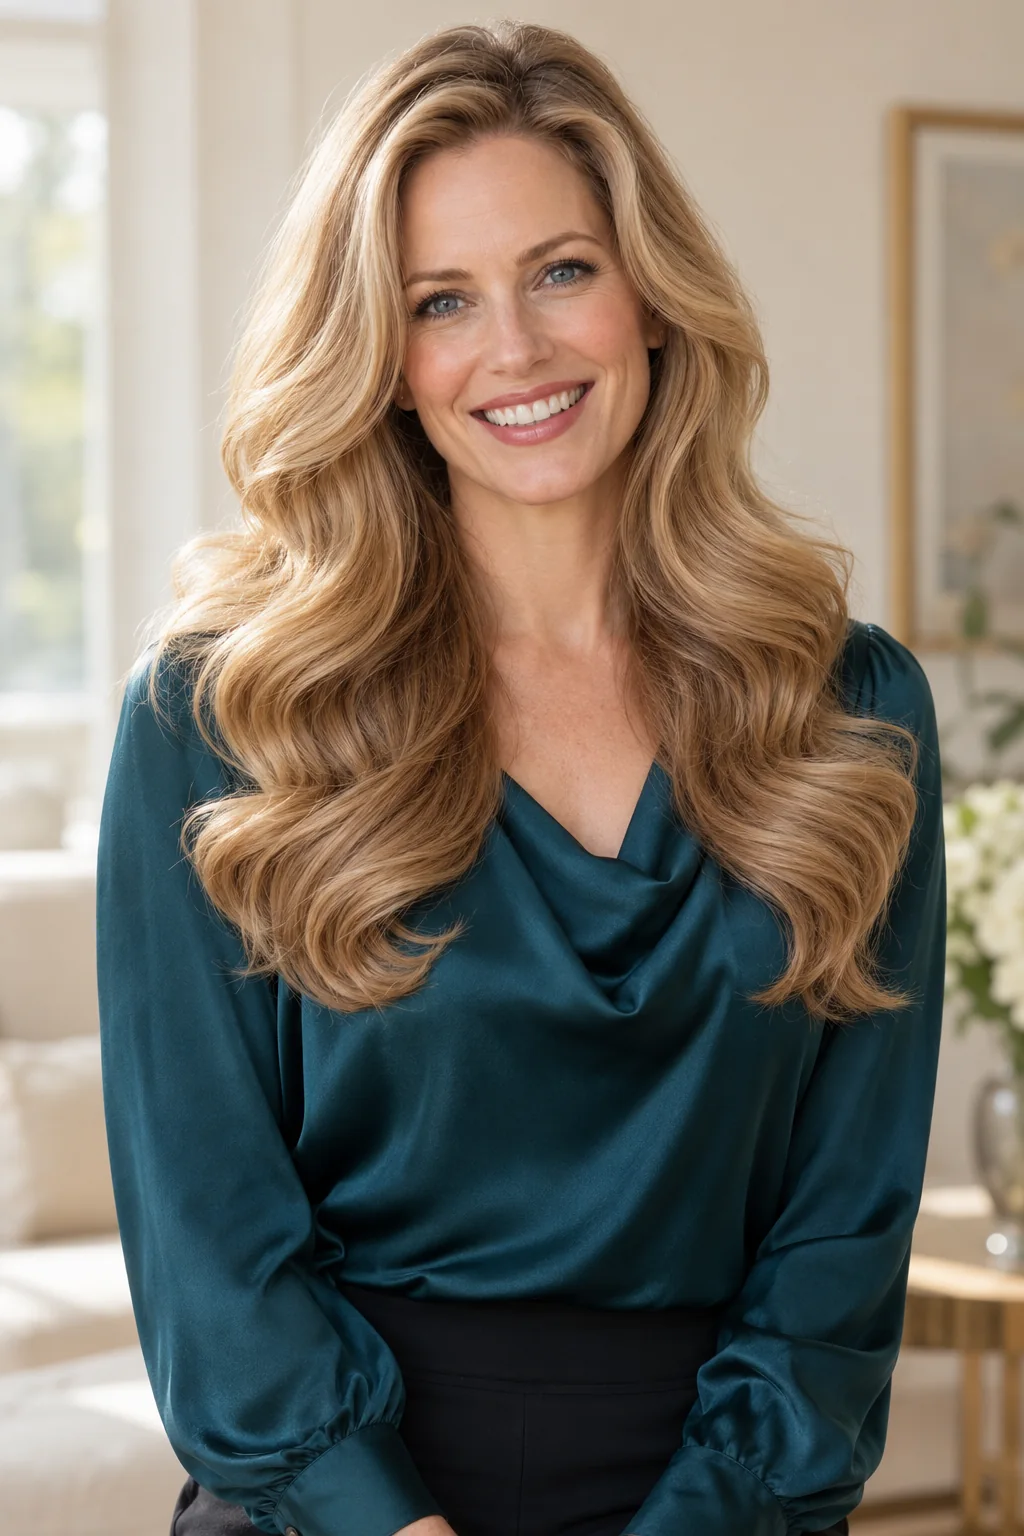
Broad brushed curls expand the upper sides, then settle into a narrower lower outline that keeps the soft heart impression visible. This is the dressier finish in the gallery, bringing a celebratory, glamorous mood to connected long layers when you want your hair to feel like part of the occasion. Much of the effect comes from styling, so the same cut can look considerably quieter on an ordinary wash day. Explain that you want layers capable of supporting broad curves with fullness above the lower edge, and ask for a demonstration suited to your tools. Let the set cool before brushing gently, checking that the ends remain connected rather than swelling into the same width as the sides.
Ask your stylist for: Connected long layers that support broad brushed curves, with the main fullness above a narrower lower outline rather than equal width throughout.
12. A Loose-Ringlet Interpretation of the Shape
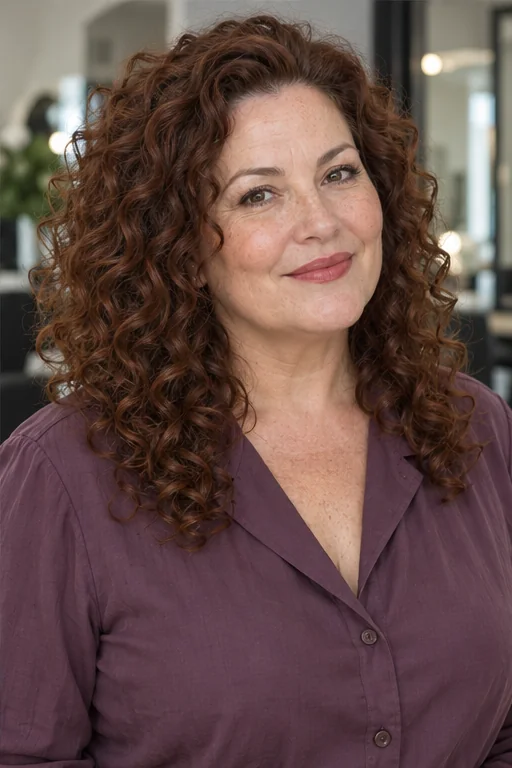
Loose ringlets build the rounded upper outline through their own spring, with the lower curls tapering gently toward the chest. This is an adaptation of the overall silhouette, not a promise that curly hair will form the same smooth C-shapes as a blowout, and that distinction makes the reference more useful. The open face frame and buoyant sides can feel joyful and comfortable when you want the cut to honor your texture rather than rely on straightening. Ask a curl-experienced stylist for a rounded-to-tapered outline, agreeing on the dry landing points and allowing for shrinkage. Check the result after your normal curl-setting routine, since stretching the front during the consultation can give a misleading idea of its everyday length.
Ask your stylist for: A curl-aware rounded upper outline tapering into longer ends, keeping connected loose ringlets and checking shrinkage completely dry.
Before You Book the Appointment
A successful salon visit begins with the overall shape, construction and upkeep—not only the finished length. Use this quick reality check before choosing your final reference photograph.
- Length: Most useful from the shoulders through longer lengths, with room below the shortest face-framing pieces.
- Texture and density: Discuss your natural movement and how much hair remains at the perimeter after layering.
- Daily routine: Expect to shape the front for the polished versions; choose the softer wave or curl references if those match your natural texture.
- Salon priority: Agree on the widest point, shortest layer, lower outline and how much can still reach your usual tie-back.
What to Ask for at the Salon
Bring a front view and a side view that show the same finished shape. Point out the widest part of the outline, where the shortest layer lands dry, how the curves connect and how solid the ends should remain. Explain whether you wear a center or side part, how often you tie your hair back and what your hair looks like without heat. Ask which parts of the photograph come from the cut and which come from styling. Your stylist can choose the cutting method after assessing your hair; the name love layers is not a reason to request razoring, slide cutting or thinning automatically.
Long Layers or Shorter Layers: What Changes?
Layer length describes where the shorter pieces land relative to the haircut, not simply whether your overall hair is long. A shorter upper layer can make the contour more visible but may escape a tie-back and ask for more daily shaping. Longer connected pieces usually give a gentler transition. Neither choice guarantees volume: density, strand behavior and styling all affect the result. Compare your preferred dry reference with the amount of hair that would remain along the lower edge before committing.
A Repeatable Way to Find the Curve
Start with your usual washing and detangling routine, then place the part where you intend to wear it. For a smooth finish, shape manageable sections with the tools you already use, guiding the front away from the face and allowing the lower lengths to curve into place. Follow your tool and heat-protectant instructions, keep hot surfaces away from skin and let sections cool before loosening them. Waves and ringlets need a texture-specific routine instead of the same brush technique. Ask for a demonstration you can repeat comfortably; the most elaborate finish is only useful if you enjoy making it.
Will Love Layers Work on Fine or Thick Hair?
Strand thickness and density are separate questions. Fine hair with plenty of strands can behave differently from thicker strands with a sparse perimeter, so a label alone cannot settle suitability. On delicate ends, a restrained front curve and solid baseline may be the better reference. With dense hair, discuss drying time and weight distribution before removing bulk, since too much removal can erase the connected outline. If your stylist thinks the contour would cost more density than you want to lose, use the reference for styling inspiration or choose a simpler cut.
How to Keep the Shape Comfortable as It Grows
Arrange your next appointment around how the shape behaves, rather than assuming every version needs an identical trim interval. Watch for a lower edge that looks uneven, front pieces that no longer settle where you like them or a routine that has become frustrating. Between visits, refresh the sections that need it instead of applying heat to the entire head repeatedly. During grow-out, longer layers can blend into a softer frame; explain if your goal is to regain a heavier baseline so the stylist does not keep shortening the upper pieces. Leave major reshaping to a professional rather than following a generic home-layering tutorial.
The Takeaway
Choose the contour you can picture wearing on an ordinary day: where the fullness sits, how much lower length you want and how much shaping feels enjoyable. Take those details to your stylist alongside the reference. A soft curve that works with your own hair is a more satisfying result than an elaborate finish you never want to recreate.
More Hair Inspiration
- Modern Rachel Haircuts for Thin Hair — Compare a more specific approach to protecting a thin perimeter.
- Face-Framing Layers at Different Lengths — Explore front placement when a complete rounded contour is not your goal.