You have all that lovely length, yet somehow the same ponytail keeps winning every morning. A different twist, braid or gathering point can make long hair feel exciting again without a haircut or an hour in front of the mirror.
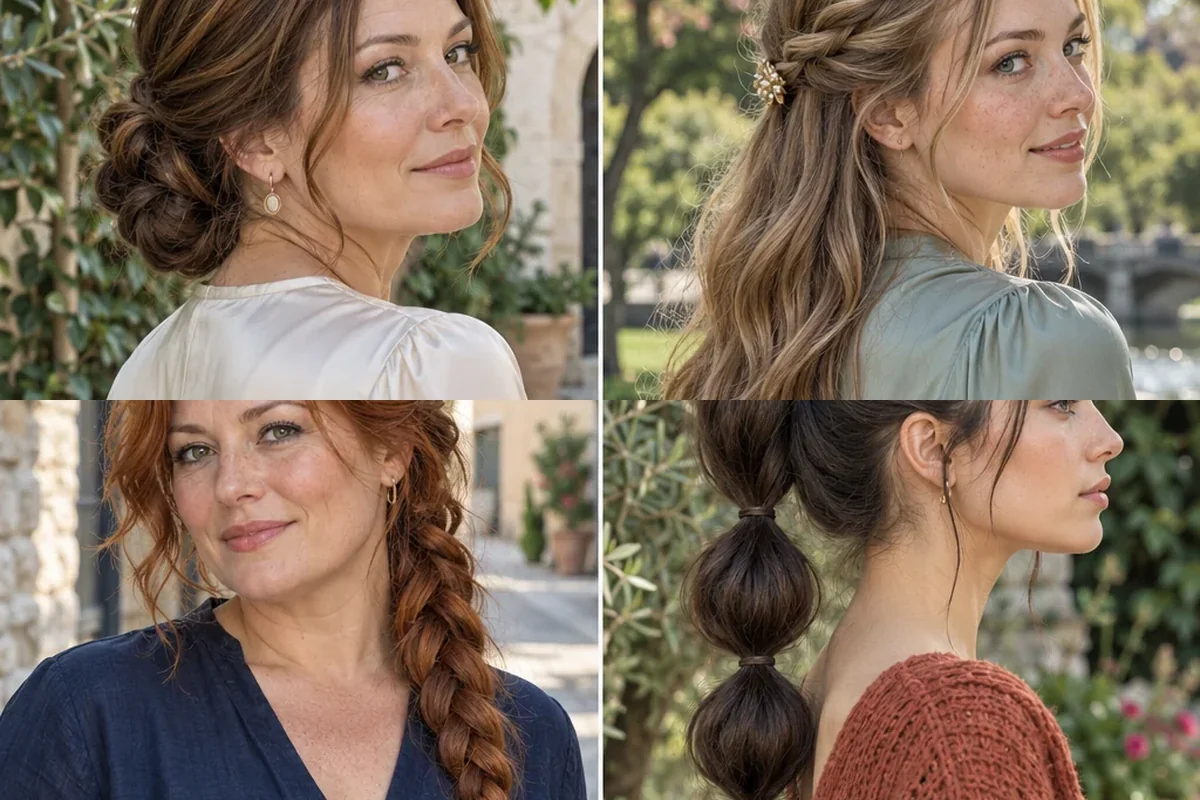
Here, long hairstyles means ways to arrange hair that falls below the shoulders, with many looks easiest on chest-length hair or longer. Their signature feature is how they use that length: coiling it into a bun, weaving it into a braid, gathering it into a ponytail or leaving part loose. These are temporary styles rather than long-layer haircuts. A half-up look leaves the lower section down, while an updo gathers the full length. Choose by texture, density, shorter layers and the amount of practice you want to invest.
Find the one that feels like you: Start with the first look and let the photographs lead. Each style explains how the shape affects your features, the mood it creates and the exact words to take to your stylist.
Quick Facts
- Start with dry, gently detangled hair.
- Choose clips and elastics for your density, not just your length.
- A comfortable style holds without pulling at the hairline.
- French, Dutch and fishtail braids usually need practice.
1. The Soft Low Chignon
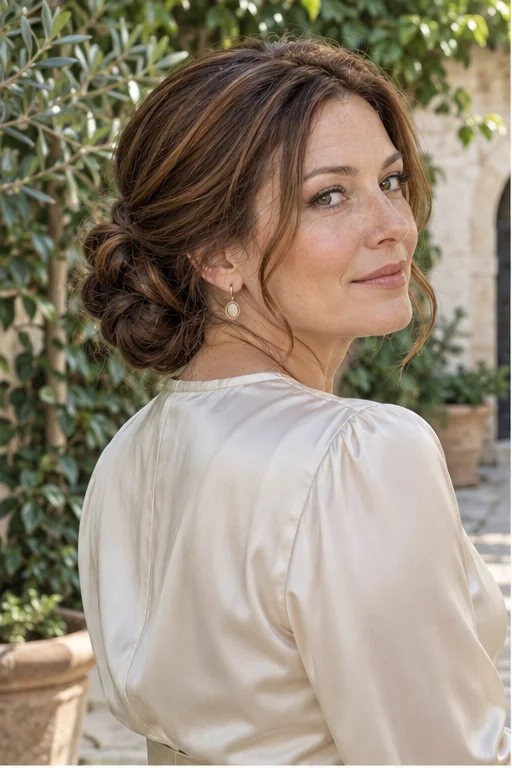
A low chignon gathers long hair into a softly rounded coil at the nape, leaving the crown quiet and the neckline beautifully clear. That low placement gives substantial length somewhere comfortable to sit, while a couple of loose cheek pieces soften an angular jaw and create a calm, composed feeling for work or dinner. Make a low ponytail, twist its length gently around the base and secure the coil with pins that catch both the bun and its foundation; very thick hair may need two smaller coils tucked together. Tell your stylist, ‘A soft nape chignon, minimal crown height and loose cheek framing,’ and keep the finish flexible rather than stiff.
Ask your stylist for: A soft nape chignon, minimal crown height and loose cheek framing.
2. Twisted Half-Up Hair With Loose Lengths
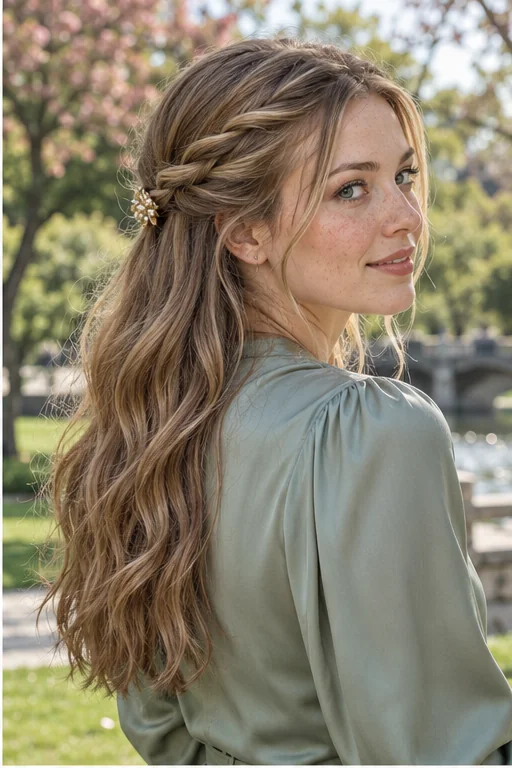
Two slim temple twists meeting at the back make long hair feel arranged while most of its movement stays loose. The exposed cheekbones and gentle side detail give this look a romantic, quietly confident mood, especially when you love wearing your hair down but dislike brushing it away from your eyes. Take matching sections above the ears, twist each away from the face and join them with a small barrette; use a little texture spray on slippery strands and avoid gathering so much that the lower half looks sparse. Request ‘Two soft temple twists, a low join and natural lengths,’ with shorter layers pinned discreetly into the twists.
Ask your stylist for: Two soft temple twists, a low join and natural lengths.
3. The Relaxed Side Braid
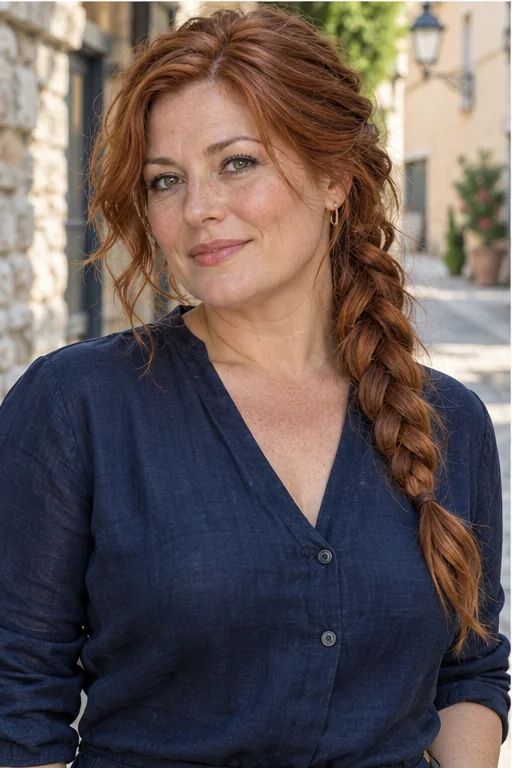
A relaxed side braid brings the full length over one shoulder in a broad, familiar three-strand plait, making long hair look soft rather than rigidly controlled. Its off-center line adds gentle asymmetry around a round face, and having the braid within reach can make a busy morning feel much less fiddly. Gather the hair below one ear, braid without pulling the scalp tight and loosen only the outer edges after securing the end; short layers may need a couple of hidden pins near the opposite ear. Ask for ‘A low side plait with a soft hairline and slightly expanded braid,’ and leave enough tension in the center to keep it together.
Ask your stylist for: A low side plait with a soft hairline and slightly expanded braid.
4. The Playful Bubble Ponytail
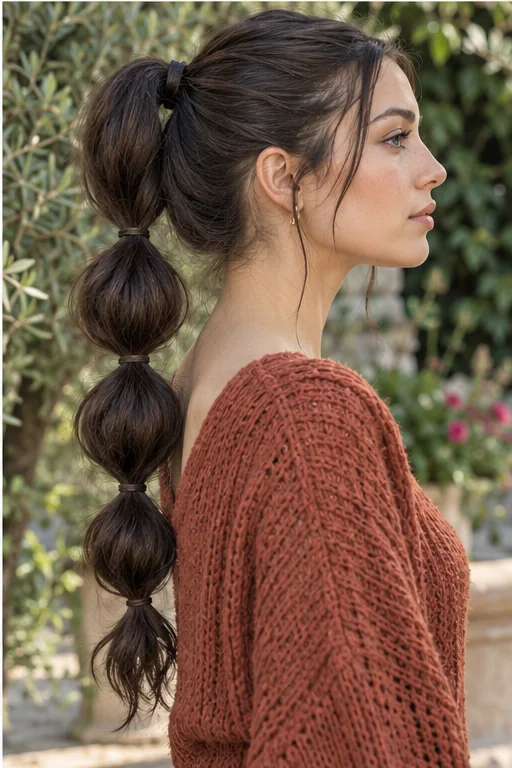
Rounded sections down a ponytail create the bubble effect, giving long hair a sculptural outline without requiring braid skills. The repeated curves make straight lengths look more substantial, and the playful shape can feel like a small lift on a casual day when your usual ponytail seems uninspired. Secure a mid-height ponytail, add covered elastics several inches apart and gently spread each section into a bubble, keeping the spacing consistent and the base comfortable. Fine hair works best with smaller bubbles, while dense hair needs stronger elastics; tell your stylist, ‘A mid-height bubble ponytail with even rounded sections,’ and remove each elastic carefully instead of dragging it down the length.
Ask your stylist for: A mid-height bubble ponytail with even rounded sections.
5. The Sleek Low Ponytail
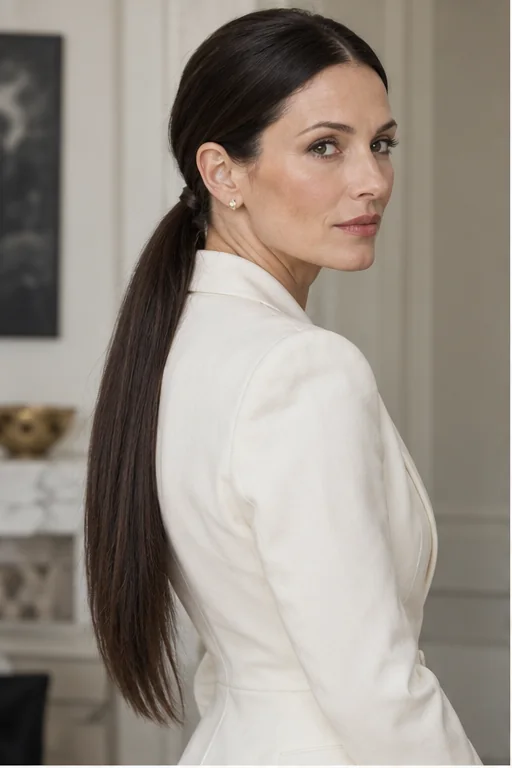
A precise center part and smooth nape ponytail let long hair create a clean, uninterrupted line down your back. With the face open and the bulk contained, this style feels assured and professional, making it useful for days when you want your outfit or earrings to have a little more breathing room. Brush the surface into a low elastic, then wrap a narrow piece of the tail around the tie and pin it underneath; a small amount of smoothing cream is usually enough to tame flyaways. Request ‘A center-parted low ponytail with a wrapped base and comfortable tension,’ and choose a softer side part if the central line feels too sharp.
Ask your stylist for: A center-parted low ponytail with a wrapped base and comfortable tension.
Pause and notice: Notice where the weight sits: low styles feel quiet and composed, while higher ponytails create lift. Choose the placement that stays comfortable through your real day.
6. The High Ponytail With a Wrapped Base
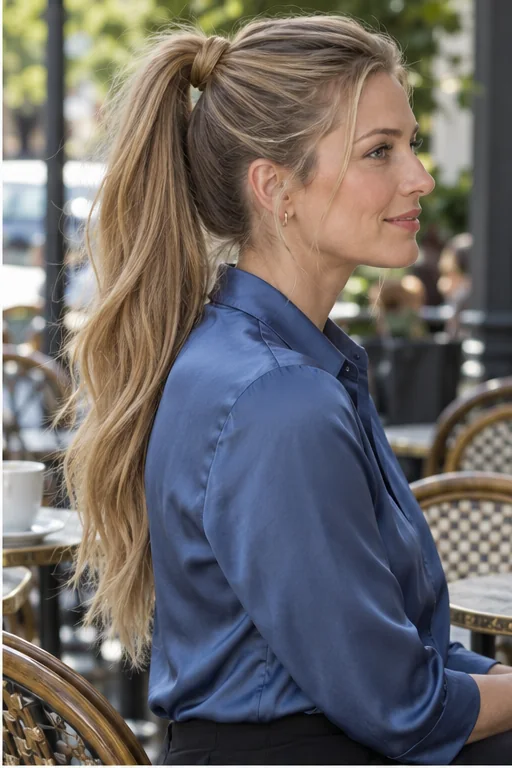
A high ponytail gathers the hair above the back of the head so the tail falls with a little swing and the neckline stays open. The lifted silhouette draws attention upward and can make you feel energetic and pulled together, although heavy lengths need a secure foundation rather than extra-tight brushing at the temples. Gather the hair in two stages if that helps, secure it with a covered elastic and wrap a slim piece around the base, pinning the end beneath the tie. Ask for ‘A high ponytail with a smooth but comfortable hairline and a concealed elastic,’ and lower the placement whenever the weight starts feeling distracting.
Ask your stylist for: A high ponytail with a smooth but comfortable hairline and a concealed elastic.
7. The French Braid That Keeps Everything Together
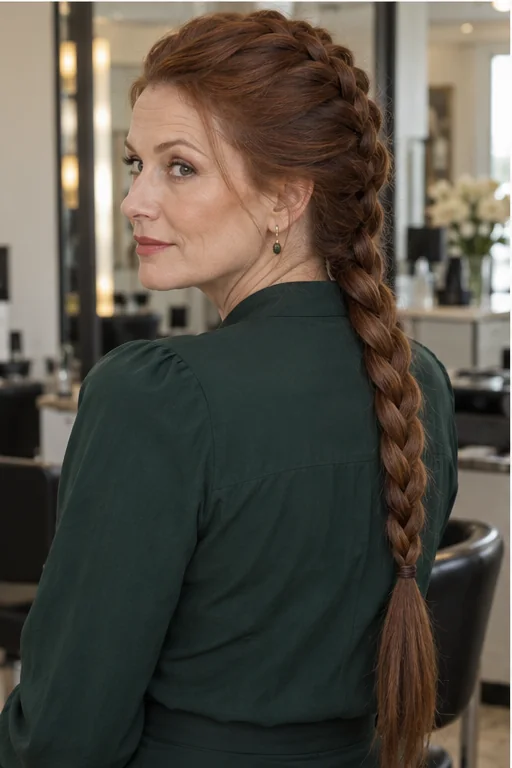
A French braid begins near the crown and incorporates side sections as it travels toward the nape, finishing in a regular plait through the remaining length. Because the strands cross over one another, the upper braid sits relatively close to the head, giving long hair a tidy, practical shape that can feel reassuringly secure on an active day. Divide a crown section into three, add a small amount of hair to each outer section as you cross it over the middle and continue until everything is included. Ask for ‘One centered French braid with comfortable tension,’ and expect extra practice or help if braiding behind your own head is unfamiliar.
Ask your stylist for: One centered French braid with comfortable tension.
8. Double Dutch Braids With Long Tails
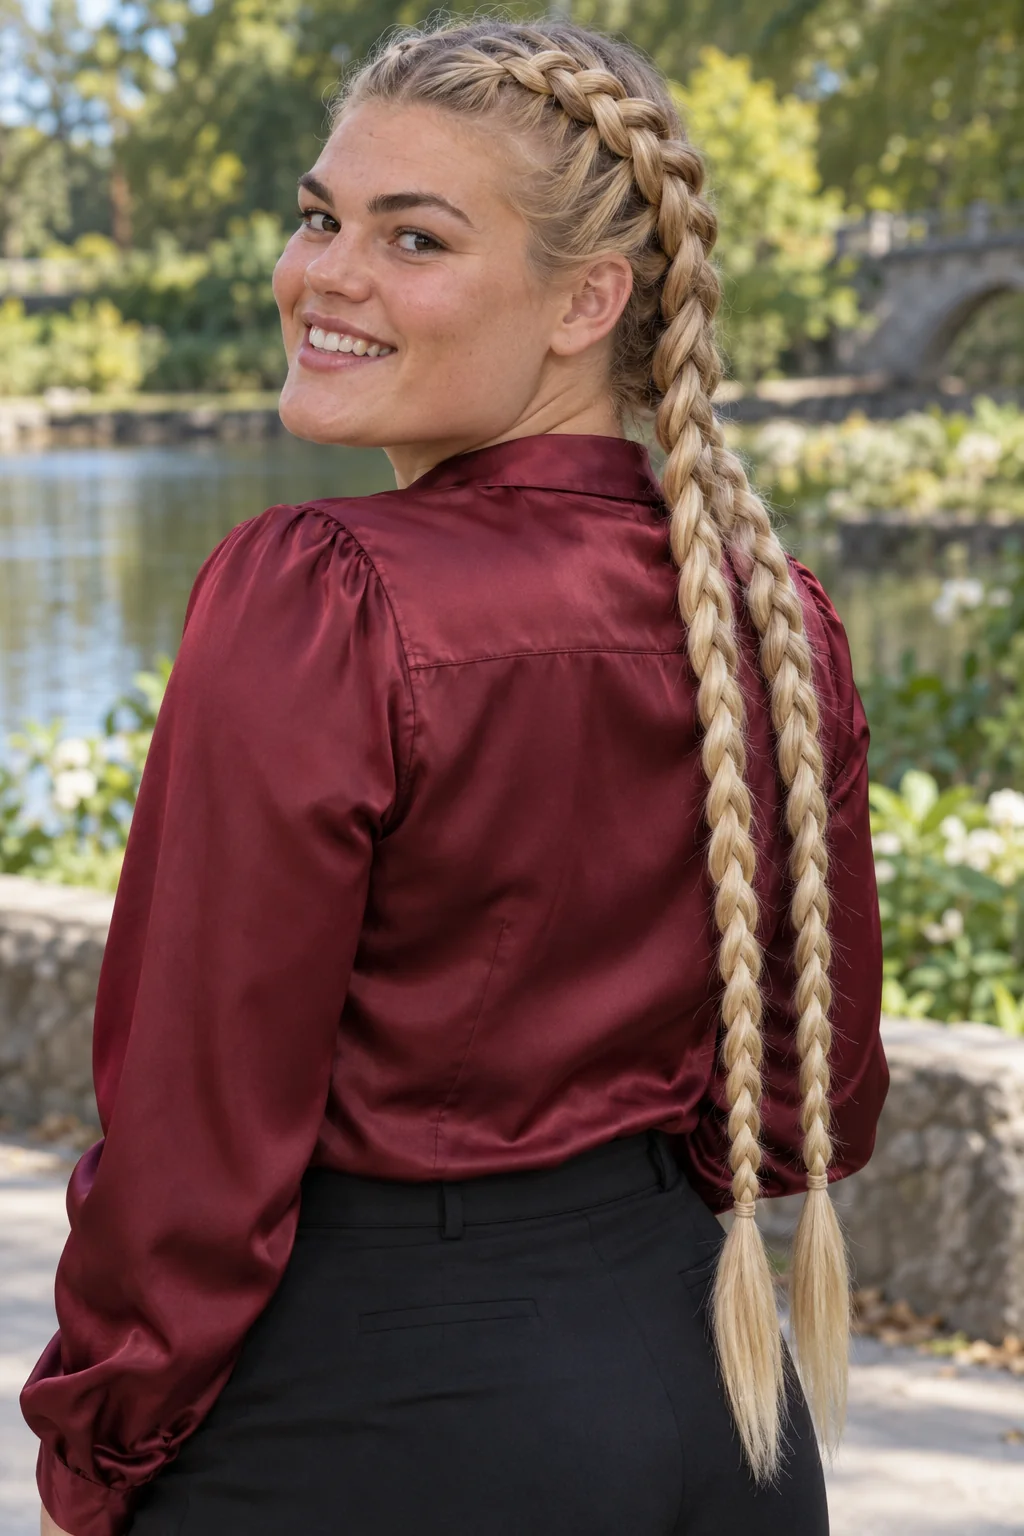
Two Dutch braids follow a center part, with the strands crossed underneath so each braid rises visibly above the hair instead of lying flat. That defined pair of ridges gives the style a sporty, purposeful feeling and keeps long lengths divided into manageable halves rather than one heavy gathering point. Braid each side from the hairline toward the nape, adding small sections underneath, then finish the tails as ordinary plaits; keep the first crossings loose enough that the forehead feels comfortable. Tell your stylist, ‘Two raised Dutch braids with a clean center part and full-length tails,’ and smooth escaping layers with a light cream rather than pulling harder.
Ask your stylist for: Two raised Dutch braids with a clean center part and full-length tails.
9. The Delicate Fishtail Side Braid
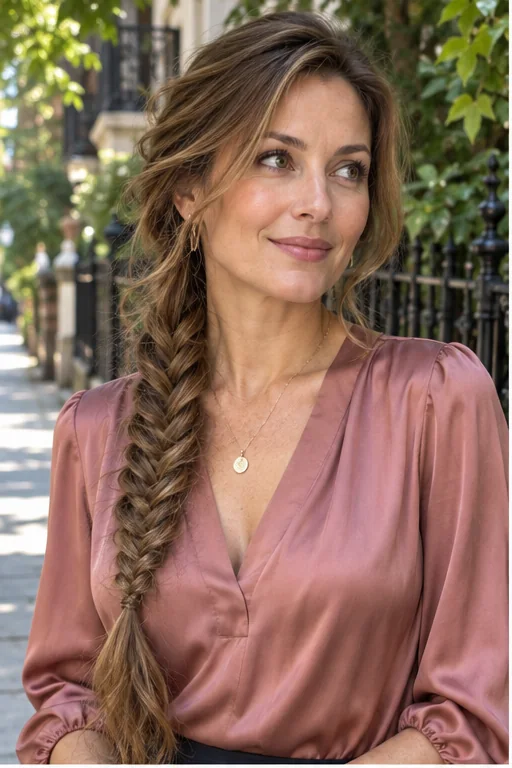
The fishtail's small, alternating strands create a delicate woven pattern that looks especially striking when a long braid rests over one shoulder. It feels more intricate and quietly special than a basic plait, giving a simple outfit a thoughtful finishing detail without needing a head full of accessories. Split the gathered hair into two halves, move a small outer strand from one half into the other and alternate all the way down; smaller strands make a finer pattern but also take longer. Request ‘A low side fishtail with a softly expanded edge,’ and secure slippery hair in a temporary low ponytail first if you need a steadier starting point.
Ask your stylist for: A low side fishtail with a softly expanded edge.
10. The Rope-Twist Ponytail
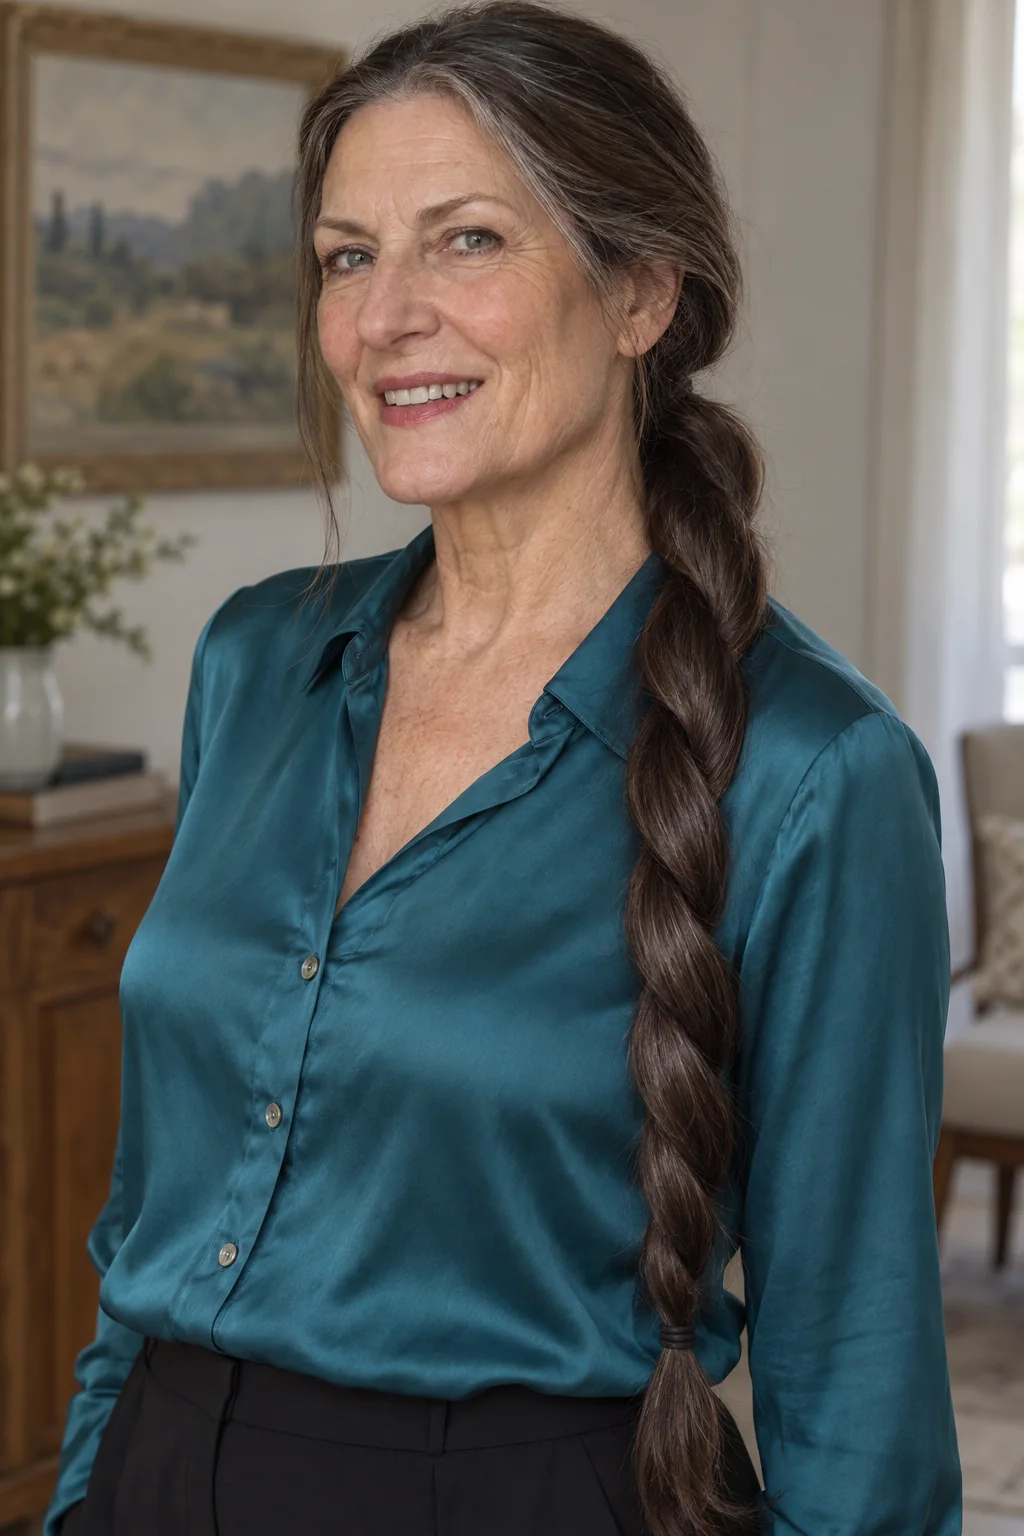
A rope-twist ponytail turns two sections into one clean spiral, making long hair look deliberate while keeping the technique simpler than a three-strand braid. The smooth, narrow shape suits straight or gently wavy lengths and gives you a quietly modern feeling when you want an alternative to another loose tail. Secure a low ponytail, divide it in two, twist both sections individually in the same direction and then wrap them around each other in the opposite direction before tying the end. Ask for ‘A low two-strand rope ponytail with a wrapped base,’ and use light hold through the ends because shorter layers can unwind before the rest.
Ask your stylist for: A low two-strand rope ponytail with a wrapped base.
Pause and notice: The braid pattern changes the mood more than extra accessories. A familiar three-strand plait feels relaxed, a fishtail adds detail, and a rope twist keeps the outline simple.
11. The Half-Up Topknot
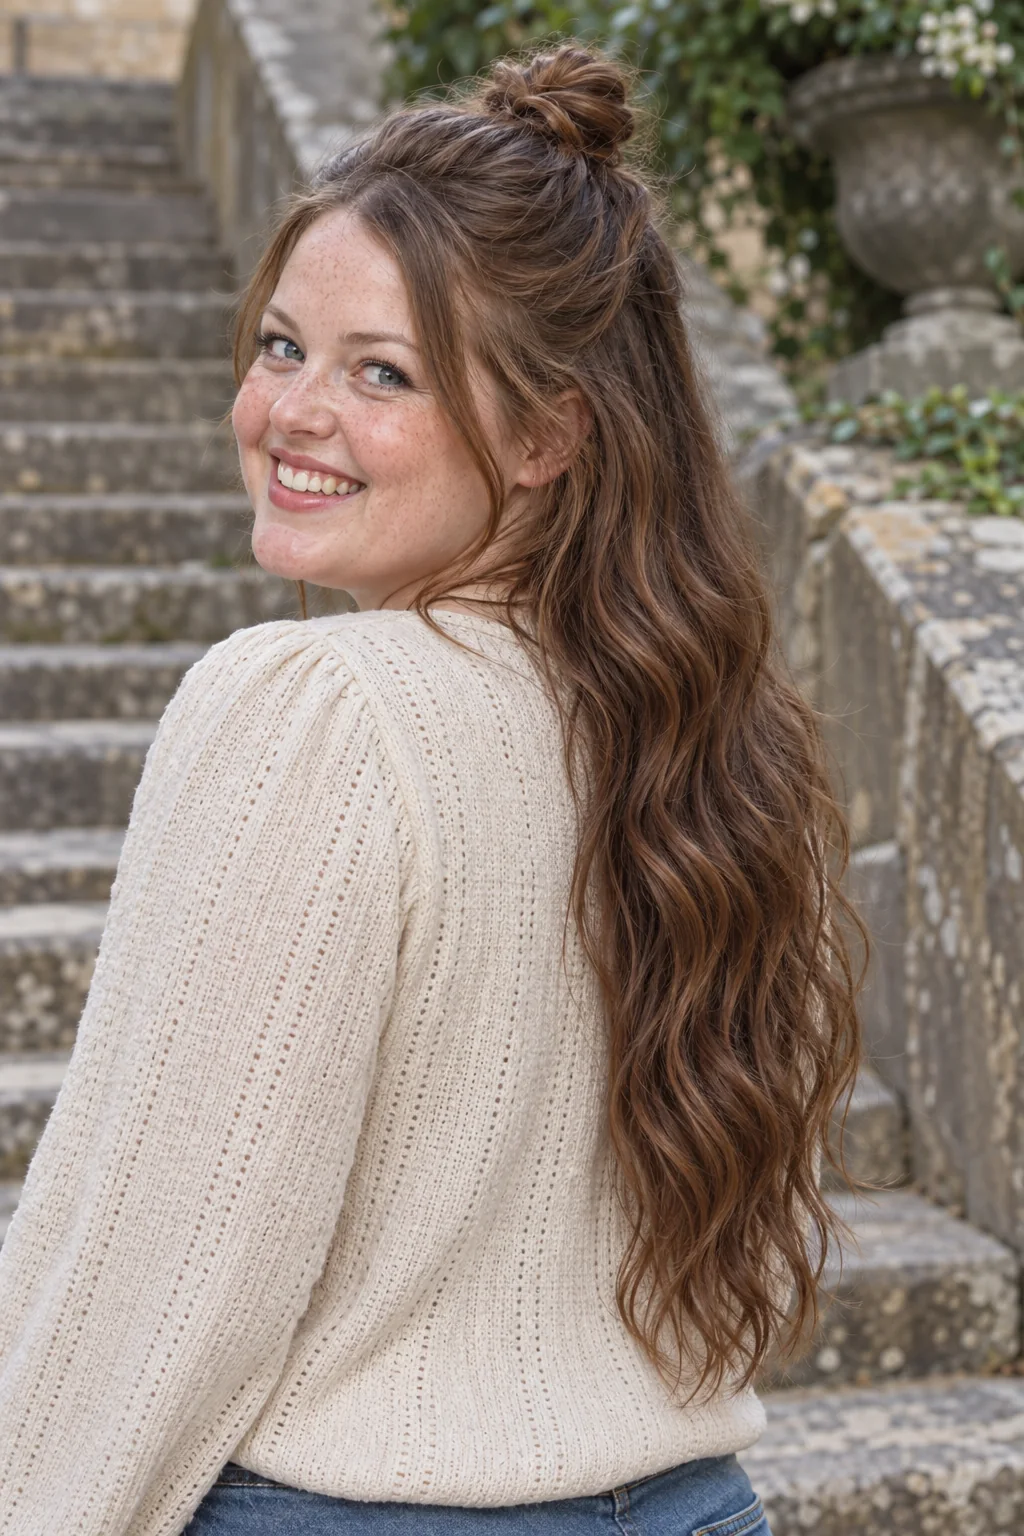
A small topknot at the crown pairs the convenience of an updo with the movement of long hair left loose underneath. The little lift above the face can balance a softer round outline, while the easy contrast between knot and waves feels relaxed and a touch playful for weekends or casual workdays. Gather only the upper section, twist it into a compact knot and secure it without pulling the hairline back hard; keeping more hair below the knot helps fine lengths retain fullness. Request ‘A small half-up crown knot with generous loose lengths,’ and tuck short ends neatly rather than repeatedly tightening the entire bun.
Ask your stylist for: A small half-up crown knot with generous loose lengths.
12. The Braided Half-Up Crown
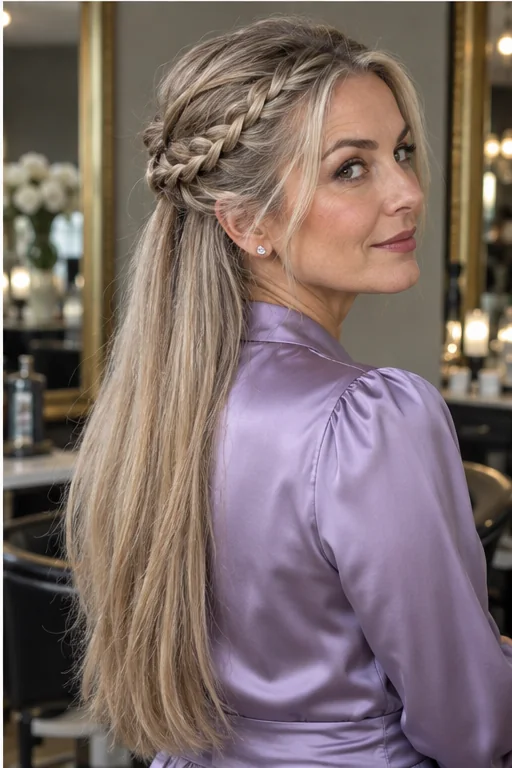
Two slim side plaits crossing or joining at the back create a half-up crown above long, loose lengths. The braid detail adds a soft, decorative line around the head, so the look feels romantic and finished without covering the neck or asking you to put every strand up. Make a small three-strand braid on each side above the ears, bring them behind the head and secure the meeting point with crossed pins or a discreet elastic; thicker hair can use wider sections without losing the loose base. Tell your stylist, ‘A braided half-up crown with no tall bouffant,’ and leave very short face-framing layers outside the braids.
Ask your stylist for: A braided half-up crown with no tall bouffant.
13. The Full-Length Braided Bun
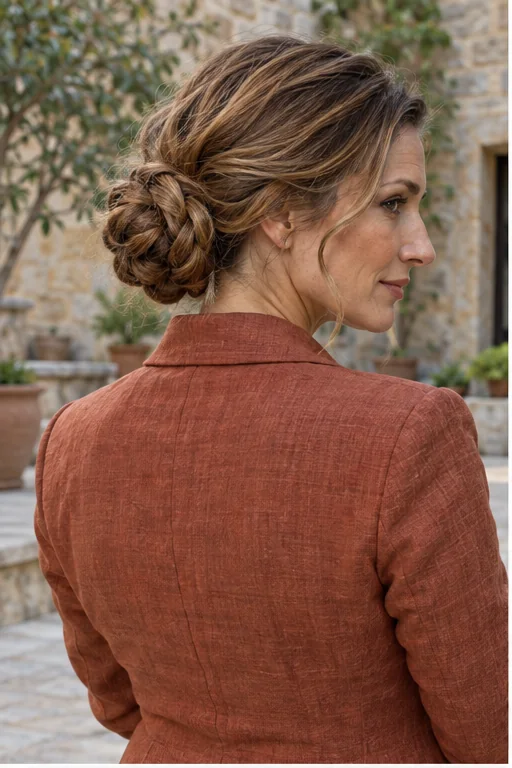
A braided bun coils a full-length plait around its base, letting the woven texture remain visible across the finished shape. It is a lovely way to make abundant length look intentional and compact, with a composed, slightly intricate mood that works for a presentation or an evening out. Start with a low ponytail, braid it, wrap the braid around the elastic and anchor the coil at several points; extra-thick hair may need a wider, flatter bun so the weight stays close to the head. Ask for ‘A low braided coil with the plait pattern showing,’ and tuck the end underneath before adding the final pin.
Ask your stylist for: A low braided coil with the plait pattern showing.
14. The Tall, Soft Topknot
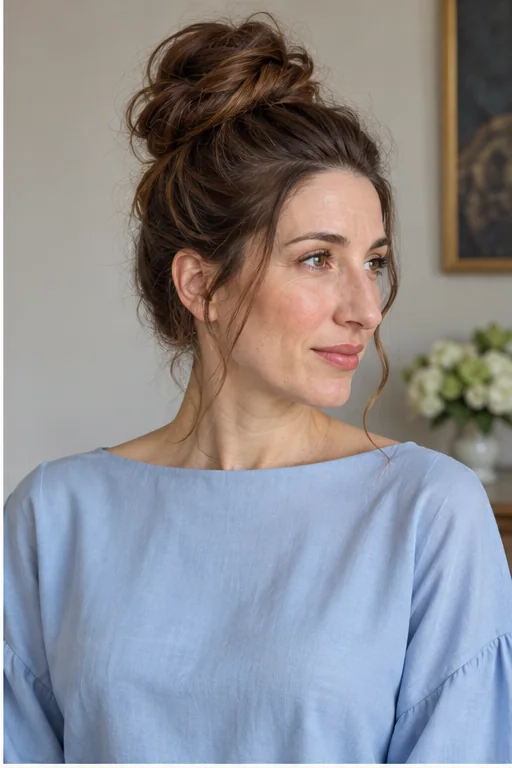
A soft topknot gathers the full length into a rounded bun high on the head, with a little air in the surface rather than a lacquered finish. Clearing the neck can feel wonderfully freeing, and the lifted shape gives a casual outfit an effortless, confident note when the bun is secure enough to forget about. Make a high ponytail, twist loosely, coil around the base and pin the weight into the foundation instead of relying on one tight elastic alone. Request ‘A full but soft high topknot with a comfortable hairline,’ and choose a lower bun if extra crown height exaggerates a long face or heavy hair pulls.
Ask your stylist for: A full but soft high topknot with a comfortable hairline.
15. The Claw-Clip Fold for Extra Length
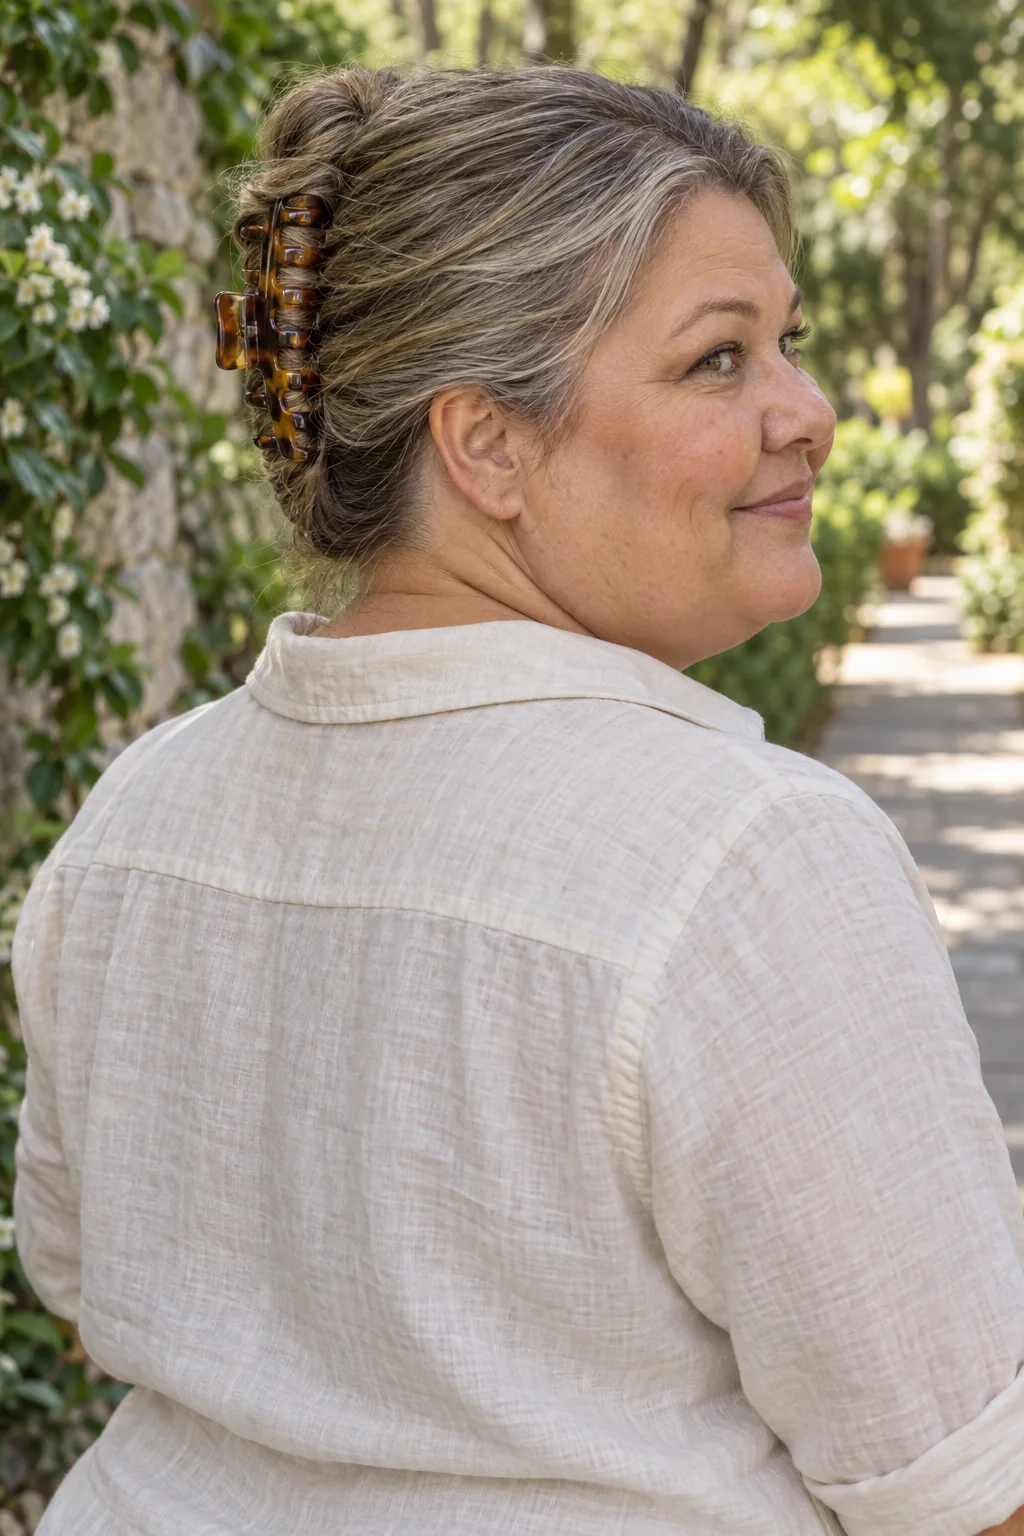
A folded claw-clip updo takes the long tail upward, then folds the remaining length back into the twist before a roomy clip grips it. That hidden fold makes the shape more compact than simply letting all the ends spill over the top, creating an easy, quietly chic feeling while keeping hair out of your collar. Twist the gathered length gently, fold the excess and place the clip so its teeth catch the twist and some underlying hair; if it cannot close comfortably, use a larger clip or divide the hair. Ask for ‘A contained claw-clip fold with tucked ends,’ and avoid forcing a small clip around a heavy bundle.
Ask your stylist for: A contained claw-clip fold with tucked ends.
Pause and notice: If wearing all your hair up feels too exposed, return to a half-up look. You can keep the length you love visible while freeing your face and shoulders.
16. The Topsy-Tail Low Ponytail
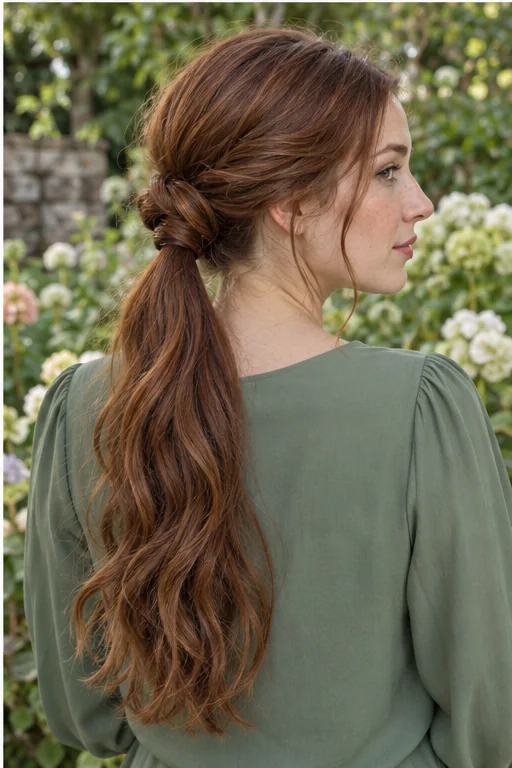
One inward turn above a low ponytail creates the topsy-tail detail: two soft twists meeting around a loose, flowing tail. It adds interest close to the nape without changing the whole silhouette, giving you a neat, understated feeling when you want a work-friendly style with just a little more personality. Tie a low ponytail, slide the elastic down slightly, make a gap above it and pass the tail through once before gently settling the twists. Tell your stylist, ‘A single inverted low ponytail with a soft base,’ and avoid repeated flipping, which can tangle fine hair or make shorter layers poke out unpredictably.
Ask your stylist for: A single inverted low ponytail with a soft base.
17. The Full Pull-Through Braid
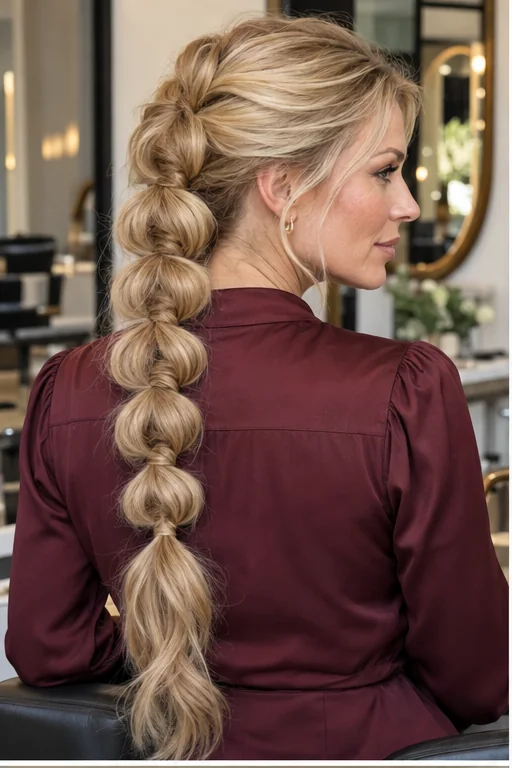
A pull-through braid uses linked ponytail sections to build a broad, braid-like shape, with rounded edges that make long hair look impressively full. The structured volume can feel playful and a little dressy, particularly if regular braiding frustrates you, although this elastic-based method still takes patience and several carefully placed ties. Create successive ponytails down the back, split an upper tail around the next one and secure the split sections below it, repeating the pattern before loosening the edges. Request ‘A single pull-through braid with even, rounded sections,’ and keep fine hair's expansion modest so you hide the elastics without exposing gaps.
Ask your stylist for: A single pull-through braid with even, rounded sections.
18. The Wrapped Scarf Ponytail
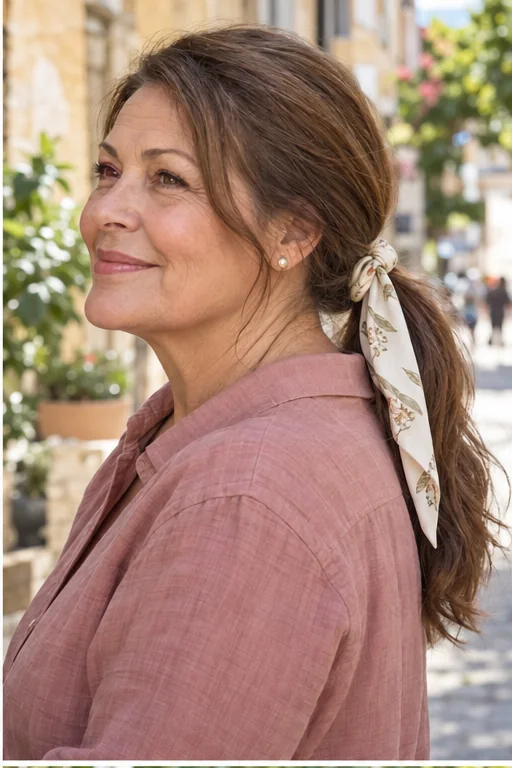
A small scarf tied around the base of a low ponytail adds a soft fabric detail while the long tail remains the main event. The movement of the scarf makes an ordinary gathering feel considered and cheerful, a useful little confidence boost when you have only a few minutes but want your style to match your outfit. Secure the hair with a covered elastic first, then knot a lightweight scarf over it so the fabric decorates rather than carries the hair's weight. Ask for ‘A soft low ponytail with a small scarf over the elastic,’ and keep the scarf tails short enough that they do not overwhelm fine lengths.
Ask your stylist for: A soft low ponytail with a small scarf over the elastic.
19. The Side-Swept Pinned Style
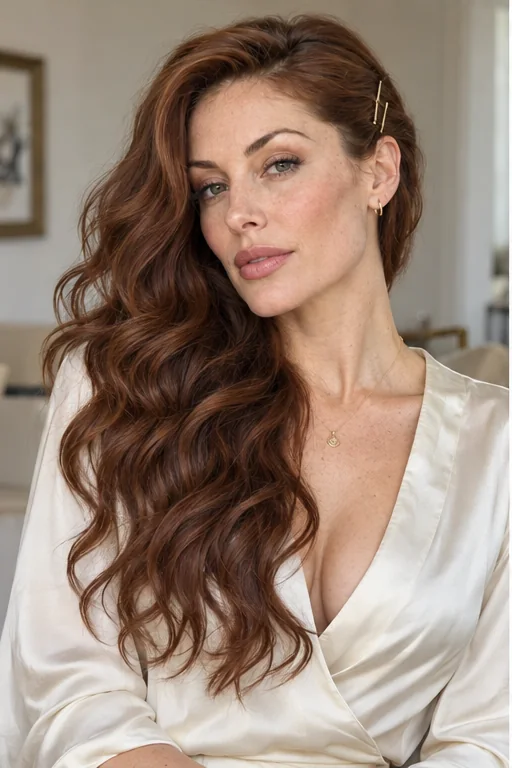
A side-swept pinned style moves loose long hair over one shoulder while a small, tidy section behind the opposite ear holds the direction. The asymmetry shows off one side of the face and opens the neckline, creating a softly glamorous feeling for dinner without committing to a full updo or elaborate curl set. Make a comfortable side part, guide the lengths across and secure the opposite temple section with two crossed pins tucked behind the ear; keep existing waves rather than restyling every strand. Request ‘A side-swept loose finish with one discreet pinned side,’ and expect very slippery straight hair to need light texture for grip.
Ask your stylist for: A side-swept loose finish with one discreet pinned side.
20. The Curly Half-Up Puff
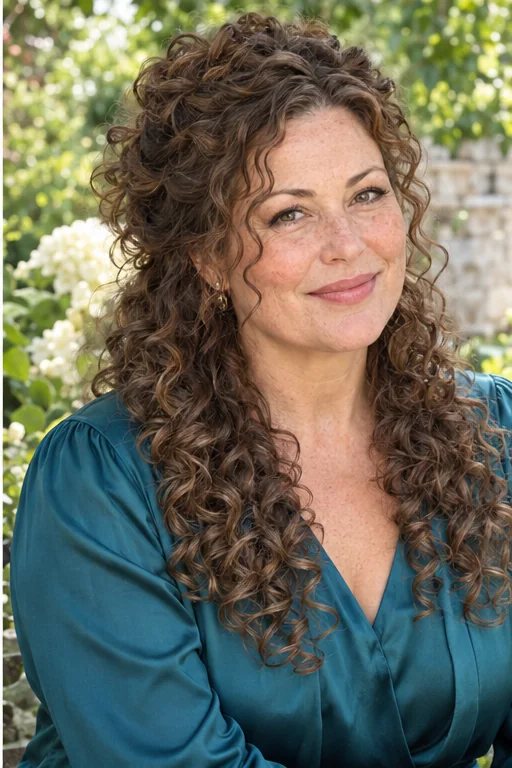
A curly half-up puff gathers the upper curls loosely while the lower section keeps its natural shape and length. The rounded crown volume feels joyful and expressive, bringing attention to the eyes while letting you enjoy your curls without constantly moving them out of your face. Separate the upper section with your fingers, secure it with a soft tie and lift a few curls gently at the base rather than brushing away their pattern; use a touch of leave-in on individual flyaways if needed. Tell your stylist, ‘A loose half-up curly puff with the lower curls untouched,’ and remember that curl shrinkage changes how much length appears below the gathering.
Ask your stylist for: A loose half-up curly puff with the lower curls untouched.
Before You Book the Appointment
A successful salon visit begins with the overall shape, construction and upkeep—not only the finished length. Use this quick reality check before choosing your final reference photograph.
- Fine hair: Smaller sections and light products help styles stay secure.
- Thick hair: Distribute bun weight across several anchor points.
- Natural curls: Preserve the pattern and smooth only where needed.
- Short layers: Plan for escaping pieces and discreet pins.
Choose by Length, Density and Layers
Chest-length hair usually gives buns and braids more material to work with, but density determines the size of the finished shape. Fine strands often need light grip and smaller sections; thick hair benefits from distributing weight across several anchor points. Short layers can escape a plait even when the overall hair is long, so plan for discreet pins or a softer outline. Keep natural curls recognizable instead of assuming every gathered style requires a smooth blowout.
A Small Styling Kit Makes a Big Difference
Keep covered elastics, pins, a clip that closes comfortably, a gentle brush and one lightweight holding product together. Detangle from the ends upward before gathering dry hair. Place pins through the foundation beneath a bun rather than only through its outer coil. If a style tugs or feels heavy, loosen or reposition it; a secure result should not depend on pulling hard at the temples.
What to Say at a Styling Appointment
Bring a photo showing the gathering point and full length, and say whether you want a smooth, textured or naturally curly finish. Mention your density, shorter layers, how long you need the style to last and whether you will recreate it yourself. Ask the stylist to demonstrate the anchor points and let you try the hardest movement once. A practice appointment can reveal which parts need extra support for an event.
Can These Styles Work With Bangs or Frizz?
Leave bangs outside the gathered section and style them separately, or pin a longer fringe softly into the sides. Flyaways do not automatically spoil a relaxed braid or bun. Smooth only the surface that needs it with a small amount of cream, then check the shape in daylight. Avoid piling on heavy product to imitate a polished photo; the right balance depends on your strand thickness and preferred finish.
Keep the Length Looking Good as It Grows
These arrangements do not need a haircut to work, but worn ends and tangles make styling less pleasant. Agree on an end-trim plan based on condition and length goals; avoid adding short layers purely to copy a gathered style if they will escape everyday braids. Release ties gently, vary the gathering point and detangle patiently. Pick one simple style and one practice-day style, so your long hair gains variety without becoming another demanding job.