Short hair can feel wonderfully freeing until you want to do something different with it. A small twist, a new part or a well-placed clip can change the whole feeling of your cut, even when a full ponytail is out of reach.
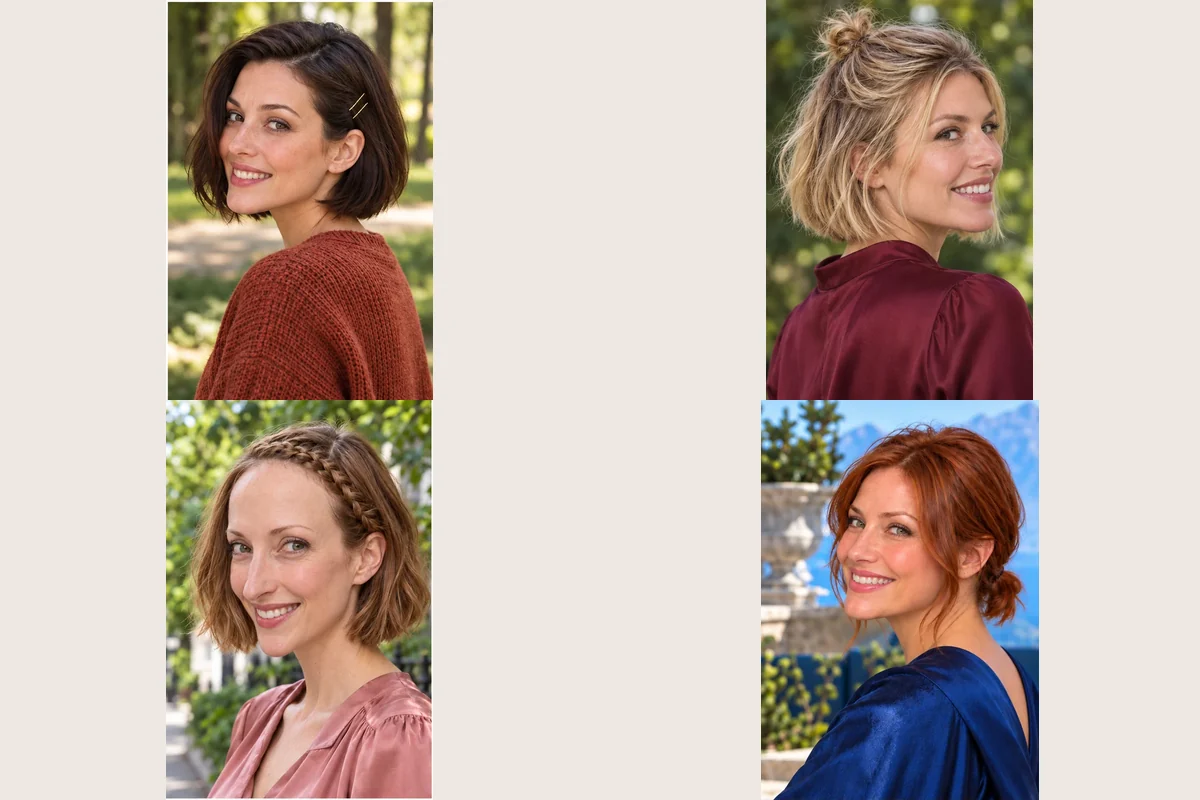
Here, hairstyles for short hair means temporary ways to arrange or finish an existing pixie or bob, rather than choosing a new haircut. The defining feature is working with limited length: securing smaller sections, leaving the lower hair loose or changing its direction and texture. Most gathered looks need a chin-to-neck-length bob; pixies suit surface styling, small pins and headbands. A half-up style leaves the lower section down, while a full updo must catch the nape too. Check each look's length requirement against your shortest layers, not just the longest piece.
Find the one that feels like you: Start with the first look and let the photographs lead. Each style explains how the shape affects your features, the mood it creates and the exact words to take to your stylist.
Quick Facts
- Judge length at the nape as well as around the face.
- Short layers often need separate pins rather than a tighter elastic.
- Small clips usually hold short sections more comfortably than oversized ones.
- Braiding behind your head may take practice or a second pair of hands.
1. The Deep Side Part With a Neat Ear Tuck
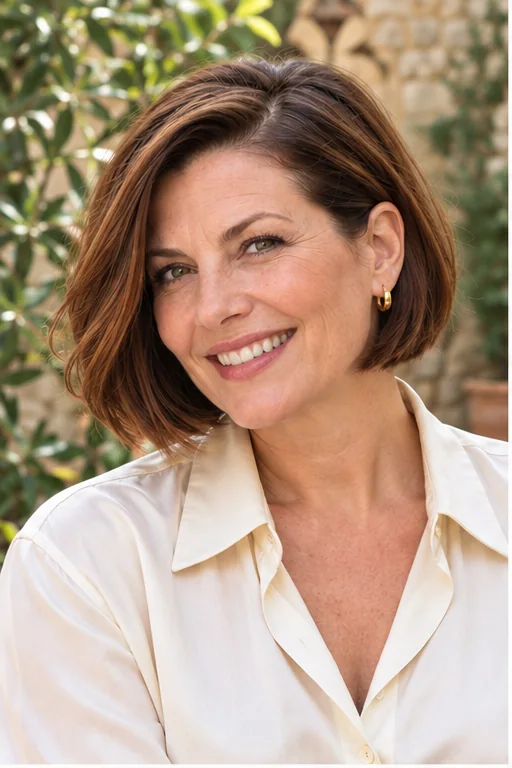
A deep side part shifts a chin-length bob into a sweeping shape, with one side tucked neatly behind the ear and the other left softly full. That open cheek gives earrings breathing room and makes a familiar cut feel quietly assured, especially on workdays when you want polish without gathering every strand. Make the part while the roots are damp, dry the fuller side in its new direction and tuck the smaller side only when it is dry; a tiny hidden pin helps slippery hair stay put. Ask for ‘A deep side part, one clean ear tuck and soft opposite-side volume,’ and avoid flattening the fuller side with too much serum.
Ask your stylist for: A deep side part, one clean ear tuck and soft volume on the opposite side.
2. The Swept-Back Pixie With Touchable Texture
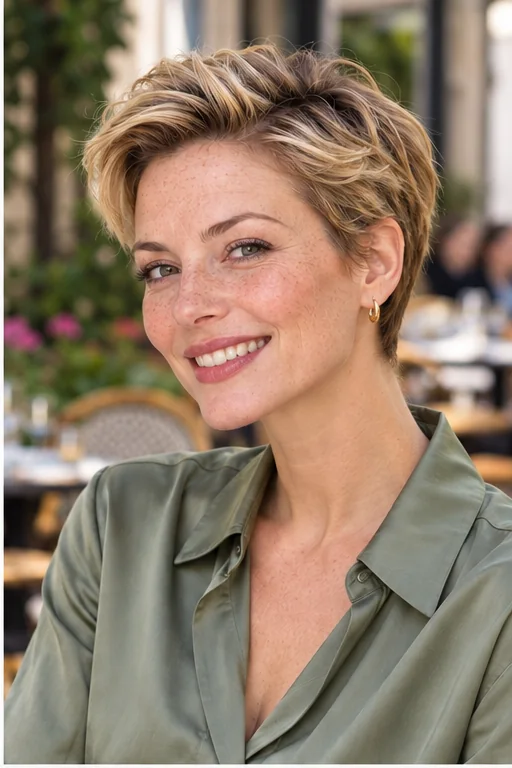
Sweeping the longer top of a pixie backward opens the forehead while leaving the short sides close and tidy. The upward direction draws attention to the eyes and can feel refreshingly confident for a meeting or evening out, without asking you to grow enough length for a ponytail. Work a little light styling cream through damp top sections, direct them back with your fingers and let a few pieces separate naturally; a top that is extremely short may need a gentler upward finish instead. Tell your stylist, ‘A softly swept-back finish with separated top pieces,’ and choose flexible hold so you can reshape it instead of building a stiff shell.
Ask your stylist for: A softly swept-back finish with separated top pieces and no hard wet-look shell.
3. The Slim Headband on a Cropped Cut

A slim fabric headband gives a cropped pixie a deliberate frame, holding the front back while the crown keeps its natural texture. The small band adds a playful, finished detail and clears your eyes, making it useful when the fringe is growing but still too short to join a clip. Choose a band that sits comfortably behind the hairline, smooth only the front pieces beneath it and lift the crown lightly with your fingers rather than pressing the whole cut flat. Request ‘A narrow headband with soft crown texture,’ and test the pressure before wearing it all day because a pretty accessory should not leave your temples aching.
Ask your stylist for: A narrow headband behind the hairline with soft crown texture and comfortable pressure.
4. The Side-Pinned Bob With a Little Spark
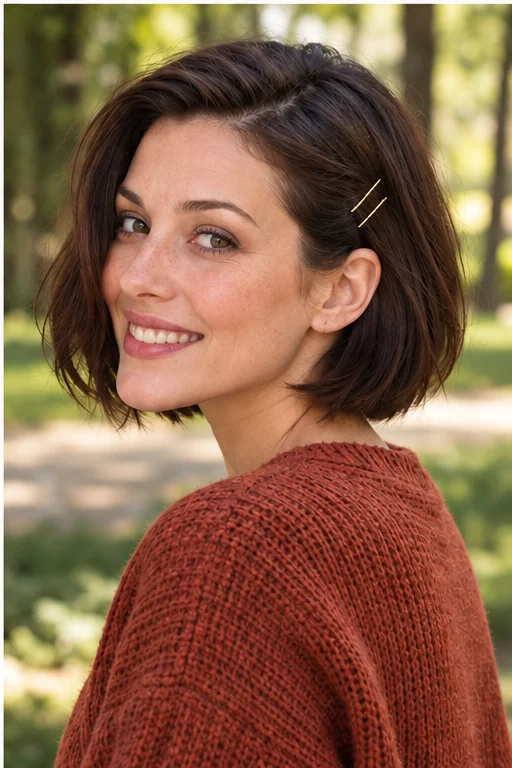
Two small parallel pins above one ear turn a practical side sweep into a crisp little detail on a chin-length bob. The exposed temple gives the face a clear outline, and the restrained decoration can make you feel put together on a day when shorter layers keep falling forward. Sweep a narrow section back, place the first pin through it into the underlying hair and add the second beside it; very slippery strands benefit from a trace of dry texture before pinning. Ask for ‘Two neat parallel side pins with the rest of the bob loose,’ and use smooth-ended pins that slide out gently rather than snagging the ends.
Ask your stylist for: Two neat parallel side pins above one ear, with the rest of the bob loose.
5. Two Temple Twists That Meet Behind the Head
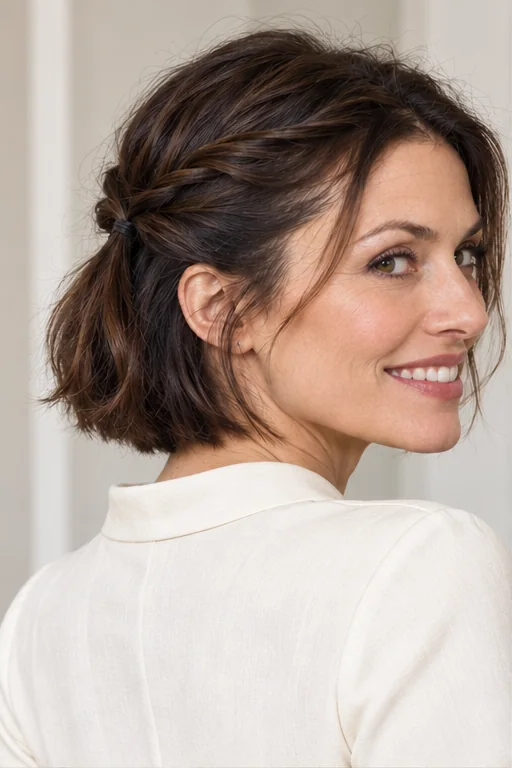
Two narrow temple twists meeting behind the head give a chin-to-neck-length bob a soft half-up outline without swallowing its loose lower layers. The gentle side lines open the cheeks and create a romantic, relaxed feeling, especially when you enjoy wearing hair down but want it away from your eyes. Twist each side backward, join the sections with a small covered elastic and pin any short ends into the twists; if the sections cannot meet comfortably, secure them separately above the ears instead. Tell your stylist, ‘Two soft temple twists with a low join and generous loose hair,’ and keep the twists small so fine bobs still look full underneath.
Ask your stylist for: Two soft temple twists joined low behind the head, with the lower bob loose.
Pause and notice: If the sides reach but the nape does not, half-up styles are your useful middle ground. A few loose lower pieces are part of the plan, not a reason to tighten everything.
6. The Small Claw-Clip Half-Up Gather
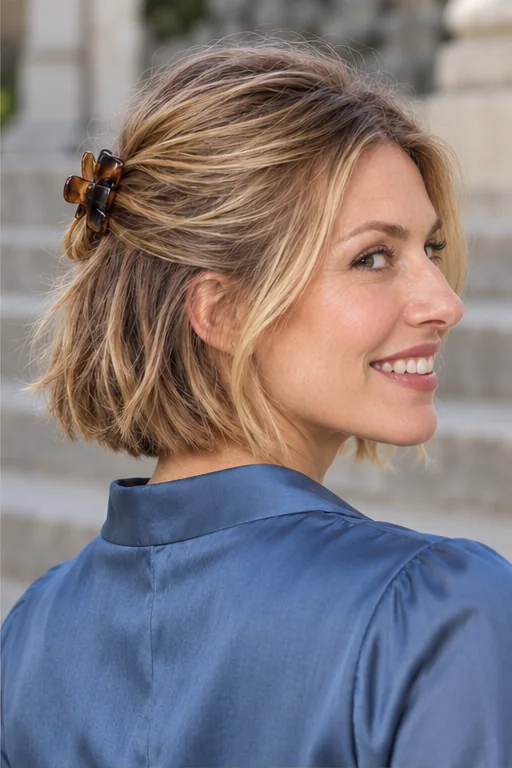
A small claw clip holding the upper section of a bob creates a compact half-up shape while the nape remains loose. It feels casual and capable, clearing the face for desk work or errands without the frustration of trying to fold short hair into a large vertical twist. Gather the temple and crown sections, give them a small turn and close an appropriately sized clip over the meeting point; keep the teeth away from the scalp and choose a lighter clip if fine hair slips under its weight. Request ‘A small half-up claw-clip gather with the lower bob loose,’ and reposition it whenever the clip starts pressing against your head.
Ask your stylist for: A small half-up claw-clip gather, with a loose lower bob and no large vertical twist.
7. The Little Half-Up Ponytail
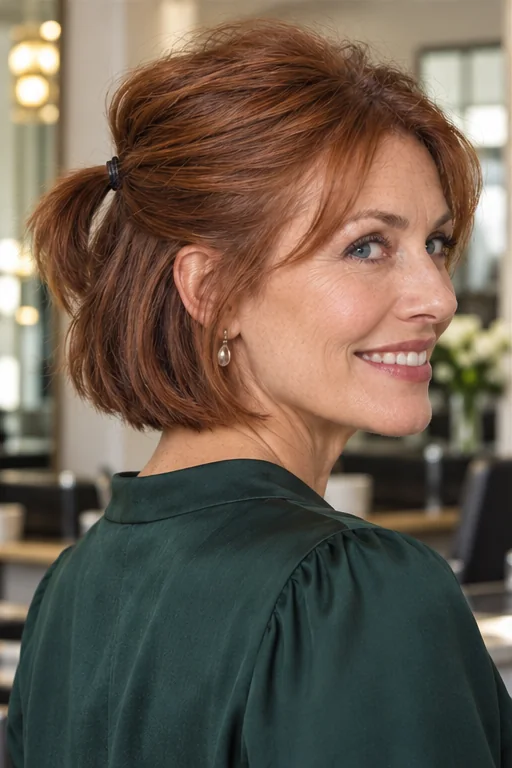
A little half-up ponytail gathers only the top and sides of a chin-length bob, leaving a short, lively tail above the loose nape. That contrast makes the cut feel playful and useful, giving you clearer sightlines during a busy morning even when the lower hair cannot reach an elastic. Take a modest section from above each ear, gather it at the back and secure it with a small covered tie, allowing short face pieces to stay soft rather than stretching them. Ask for ‘A small half-up ponytail with a comfortable hairline,’ and loosen the base a touch if the gathering starts pulling at the temples.
Ask your stylist for: A small half-up ponytail at the back with no tight hairline or tall puff.
8. The Half-Up Knot With Loose Bob Ends
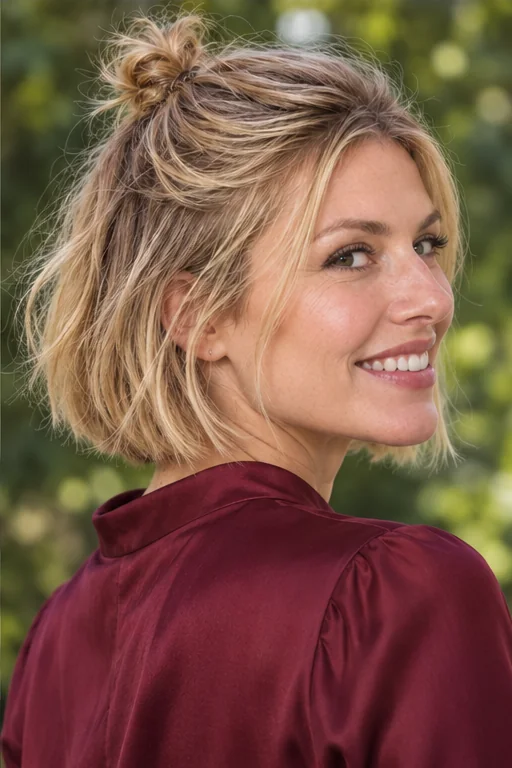
A compact knot at the crown gives a neck-length bob a little height while most of the cut swings freely underneath. That upward detail can balance a soft round outline and make an ordinary weekend outfit feel more spirited, provided the upper section has enough length to bend into a knot. Gather only the top third, loop it through a small elastic and tuck the ends around the base with one or two pins; do not keep tightening the entire knot to catch a stubborn short piece. Request ‘A compact half-up crown knot with generous loose lengths,’ and choose the ponytail version instead if your layers barely reach the tie.
Ask your stylist for: A compact half-up crown knot, with most of the bob left loose beneath it.
9. A Dutch Braid Along the Front Hairline
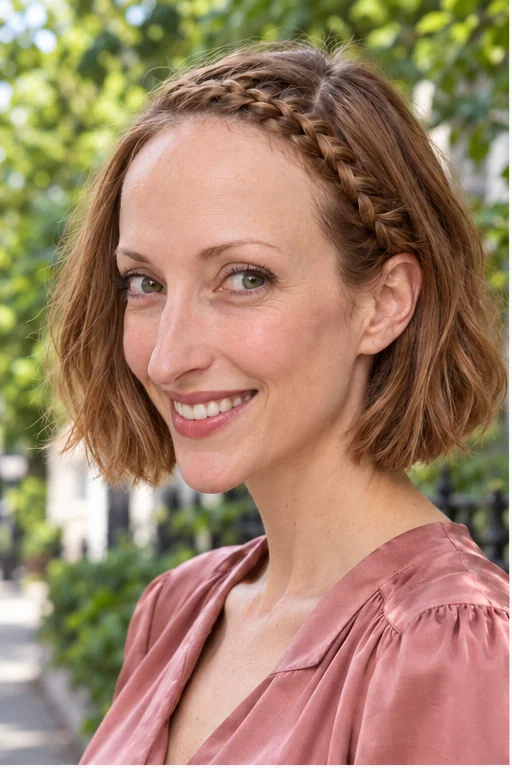
A narrow Dutch braid following the front hairline makes a raised ribbon of woven hair above a loose bob. It gives a growing fringe somewhere attractive to go and can feel quietly clever when you want a face-clearing style with more character than another pin. Start near the part, cross the side strands underneath the center and add small hairline sections as you work toward the ear, then hide the end beneath the loose hair; fringe that is too short to overlap needs pins instead. Ask for ‘A narrow raised hairline braid ending behind one ear,’ and expect practice because even a small braid needs steady sectioning.
Ask your stylist for: A narrow raised Dutch braid along the front hairline, ending behind one ear.
10. The Flat Side French Braid
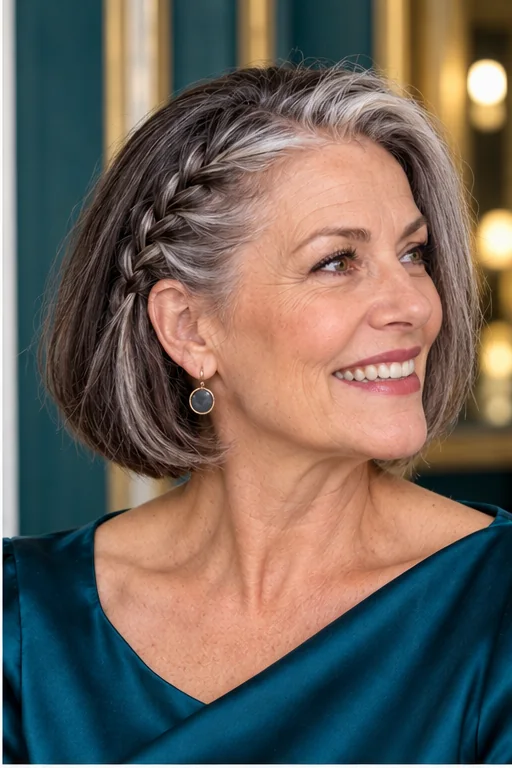
A French braid on one side of a chin-to-neck-length bob sits closer to the head than a raised Dutch braid, leaving the opposite side softly loose. The asymmetry exposes one cheekbone and gives the finish a composed, slightly modern mood, useful when you want short hair to feel intentionally arranged for dinner. Braid a temple section by crossing strands over the center and adding small side sections, then secure the short end behind the ear with a hidden pin; keep the braid narrow enough that its strands can overlap. Tell your stylist, ‘One flat temple-to-ear French braid,’ and avoid pulling tighter to compensate for layers that keep slipping out.
Ask your stylist for: One flat French braid from temple to behind the ear, with the opposite side loose.
Pause and notice: Braids need enough overlapping length to stay woven. Practice on a side section you can see before attempting two braids behind your head.
11. Twin Dutch Braids With Short Nape Tails
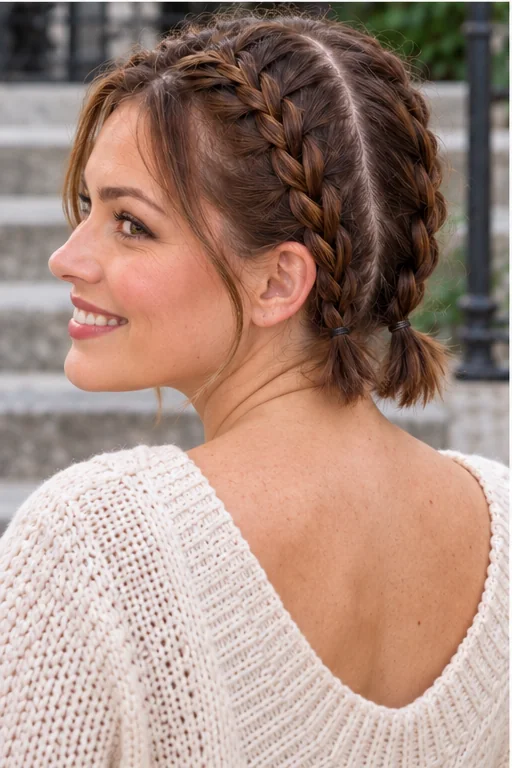
Two raised Dutch braids divide a neck-length bob down the center, finishing in short ponytail ends at the nape rather than long plaits. The paired lines feel sporty and purposeful, keeping the sides controlled for an active day while distributing the gathering across two smaller sections. Braid each side with strands crossing underneath, add hair as you travel back and tie off once the remaining length is too short to weave; this needs longer bob layers, and a chin-length cut may only manage half-up braids. Request ‘Two Dutch braids with short nape ponytail ends,’ and leave the hairline comfortable even if that means a few pieces stay outside.
Ask your stylist for: Two Dutch braids to the nape, finished with short ponytail ends and comfortable tension.
12. The Braided Half-Up Band
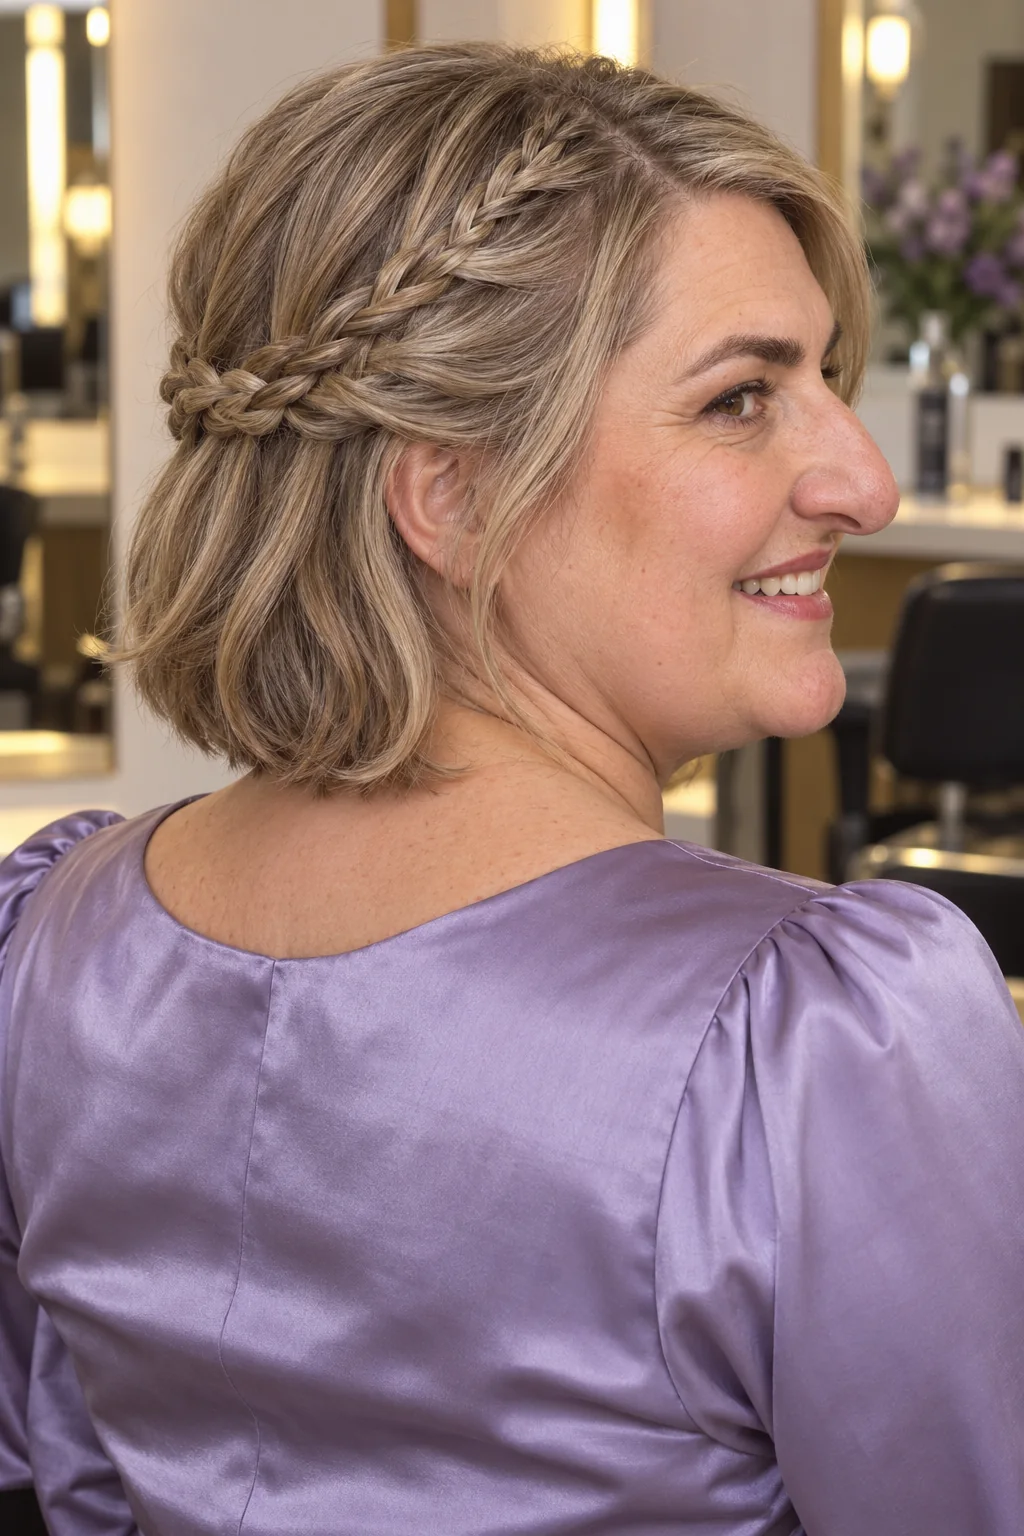
Two slim three-strand side plaits joining across the back make a decorative half-up band on a neck-length bob. The woven line gives a simple loose cut a thoughtful, gently romantic feeling while keeping the nape free, so it suits days when you want detail without a full updo. Braid a small section above each ear, bring the ends backward and join them with a discreet elastic or crossed pins, checking that the plaits meet without stretching. Ask for ‘Two slim side plaits with a low rear join,’ and leave shorter cheek pieces out if including them makes the braid fuzzy or pulls the front too flat.
Ask your stylist for: Two slim side plaits joined low across the back, with the lower bob loose.
13. A Short Low Ponytail With Soft Face Pieces
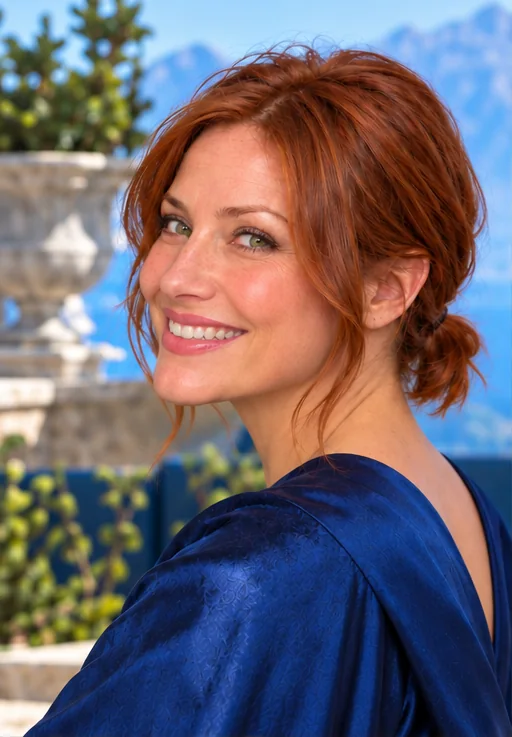
A short ponytail sitting low at the nape gives a neck-length bob a clean gathering point, with a couple of cheek pieces left loose to soften the outline. It feels calm and practical for work, especially when you want hair off the neck without pretending your cut can create a long swinging tail. Gather the hair where the nape reaches most comfortably, secure a small covered elastic and pin escaping lower layers upward into the base; very short nape hair means a half-up style is the better option. Request ‘A low short ponytail with soft cheek pieces,’ and resist moving it higher if that makes the lower sections strain.
Ask your stylist for: A low short ponytail with soft cheek pieces and discreet pins for escaping nape layers.
14. The Looped Nape Ponytail
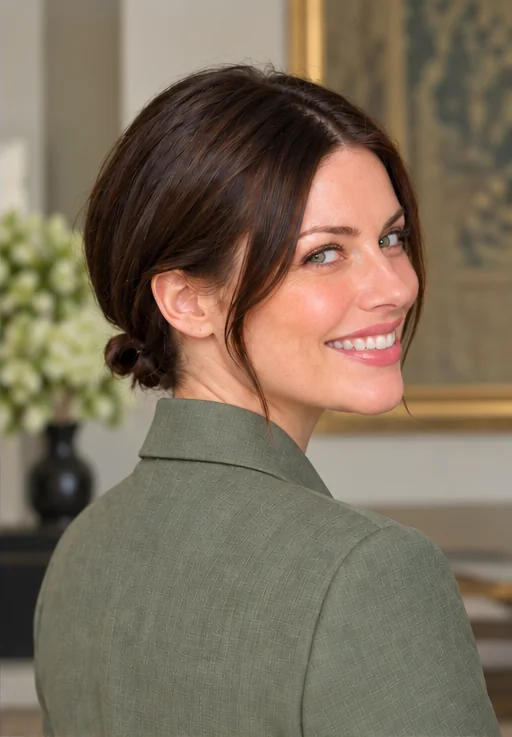
Folding a short low ponytail into a loop creates a compact nape shape without trying to wrap the tail around itself. The little loop makes a neck-length bob look contained and quietly polished, a reassuring choice when a conventional bun feels like more length than you have. Gather a low ponytail, leave its final pass through the elastic halfway finished and tuck the short tips under the base, adding pins only where they can catch an anchor beneath. Tell your stylist, ‘A small looped nape ponytail with neat tucked tips,’ and accept a modest loop rather than pulling it wide enough to expose the elastic or loosen the hold.
Ask your stylist for: A small looped nape ponytail with the tips tucked neatly under its base.
15. Three Little Buns Across the Nape
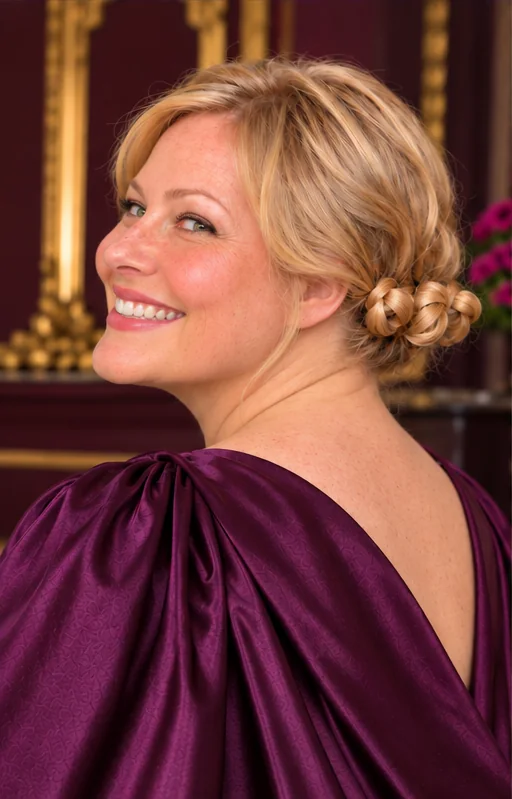
Three small buns placed side by side across the nape turn a neck-length bob into an updo through several manageable gathering points. Dividing the hair means each section travels less distance, and the repeated little coils feel playful yet organized when one central bun would leave too many pieces outside. Make three low ponytails, twist or loop each short tail into a small bun and pin it into its own foundation, leaving fragile hairline pieces loose rather than forcing them across. Ask for ‘Three compact nape buns with evenly spread support,’ and use this only when the shortest lower layers can reach their nearby elastics comfortably.
Ask your stylist for: Three compact low buns across the nape, with the support spread evenly and no tight hairline.
Pause and notice: A secure style should feel comfortable. If a bun pulls, spread its support across more pins or choose a smaller half-up gathering instead.
16. The Soft Twisted Nape Tuck
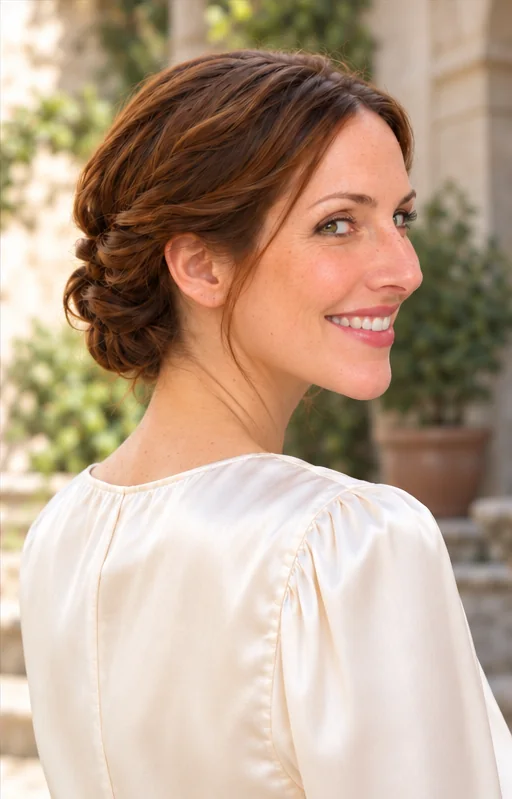
Small sections twisted and pinned into one another create a soft nape tuck on a neck-length bob, hiding the ends without a large bun. The rounded low shape feels composed and a little special, clearing the neckline for dinner or a presentation while allowing shorter layers to have their own anchors. Start with small lower sections, twist each gently upward and pin its end into the neighboring section, then bring the sides back in the same way; help from a stylist may be useful when you cannot see the rear. Request ‘A soft nape tuck made from small pinned twists,’ and keep the crown relaxed rather than adding height to disguise insecure ends.
Ask your stylist for: A low soft nape tuck built from small pinned twists, without a tall crown or added hair.
17. The Defined S-Wave Bob
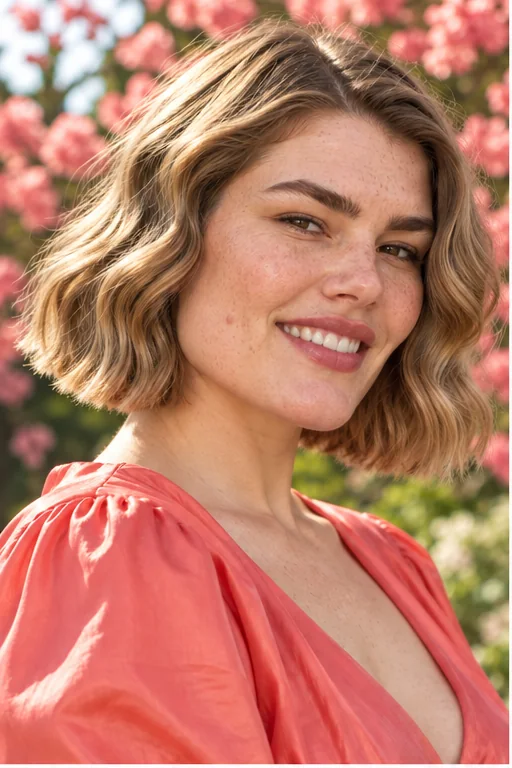
Loose S-shaped bends through a chin-length bob add movement while keeping the ends comparatively relaxed, giving the cut a wider, softer surface texture. The waves can make straight hair look less rigid and help you feel casually dressed up without changing the haircut or gathering the nape. On dry hair with heat protectant, guide a suitable iron through small alternating bends rather than winding every section into a ringlet, then separate the finish with your fingers; naturally wavy hair may need only a few surface adjustments. Ask for ‘Loose S-bends with soft ends,’ and keep heat moderate for your hair's condition instead of repeatedly passing over the same section.
Ask your stylist for: Loose S-shaped bends through the bob, with soft ends and no tight ringlets.
18. The Outward-Flipped Bob Ends

A small outward flick around the ends gives a jaw-to-neck-length bob a lively edge while the roots remain smooth and controlled. That little change of direction opens the line around the jaw and can make the cut feel cheerful and fresh for a casual lunch or a day out. Dry the hair smooth, bend only the final inch outward with a brush or suitable iron and let the tips cool before touching them; ends that stop high above the jaw may suit simple piecey texture better. Tell your stylist, ‘Smooth roots and a small even outward flick,’ and use light hold so the ends can move instead of forming a stiff shelf.
Ask your stylist for: Smooth bob roots with a small even outward flick at the ends.
19. Natural Curls With One Side Pinned Open
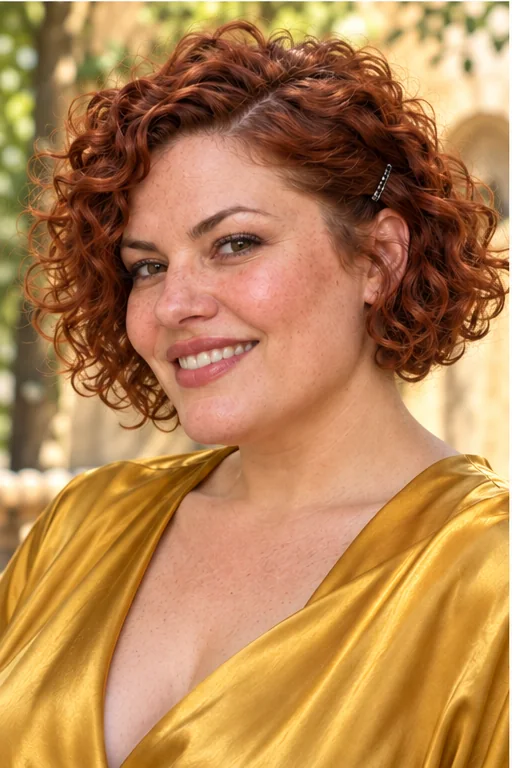
One pinned temple section beside a short curly bob leaves the curl groups defined while opening a clear line around the cheek. The contrast between an exposed side and generous curls feels lively and assured, useful when you want your natural texture visible but need a little less hair near your eyes. Apply a light curl product to damp hair, let the pattern set before handling it and pin a small dry side section into the underlying hair without brushing the curls apart. Request ‘Defined natural curls and one softly pinned temple,’ and judge the minimum length after the hair dries because spring can make a wet section look deceptively easy to secure.
Ask your stylist for: Defined natural curls with one small temple section pinned back and no brushed-out surface.
20. The Piecey Pixie With a Soft Side Sweep
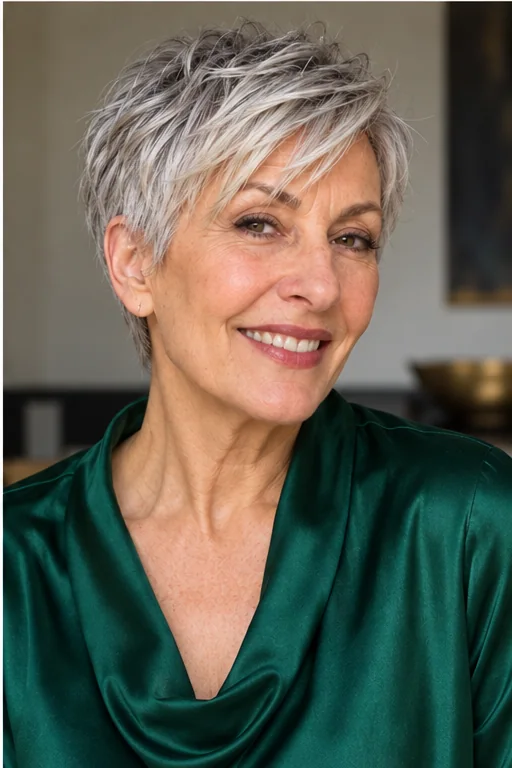
A soft diagonal fringe and lightly separated top pieces make a pixie feel textured without lifting every strand off the forehead. The slanted line can soften a broad forehead and bring attention toward the eyes, giving the cut a relaxed, quietly stylish mood on days when you want a finish that takes very little gathering. Dry the fringe in its preferred direction, rub a trace of flexible cream between your fingertips and touch only the ends of a few top pieces, leaving the roots airy. Ask for ‘A soft diagonal sweep with separated top pieces,’ and add product gradually because short fine hair can look heavy long before it feels heavily coated.
Ask your stylist for: A soft diagonal fringe sweep with separated top pieces and light, flexible hold.
Before You Book the Appointment
A successful salon visit begins with the overall shape, construction and upkeep—not only the finished length. Use this quick reality check before choosing your final reference photograph.
- Pixies: Try swept texture, a headband or small side pins; full buns usually need more length.
- Chin-length bobs: Temple braids and half-up gathers often work before a full ponytail does.
- Neck-length bobs: Low ponytails and compact nape arrangements may work if layers reach.
- Fine hair: Use light texture and small anchors to preserve visible fullness.
- Thick hair: Divide gathered hair into smaller supported sections instead of pulling harder.
Choose by the shortest section, not the longest strand
A pixie with a long front still has a short nape. Start with surface styling, a slim headband or small pins. Chin-length bobs often manage temple details and half-up gathers before they can hold full updos. Neck-length bobs offer more options, but layers may still escape. Test a small gather without pulling: if it reaches only when stretched, choose a lower anchor or leave that section loose.
Match the hold to your texture and density
Fine hair usually needs a small lightweight clip and a little grip, not a heavy coating of cream. Thick hair benefits from several smaller anchor points and clips whose teeth close without pressure. With natural curls, preserve the dry curl groups and account for shrinkage before choosing an elastic position. Straight slippery hair may hold better with light texture, while fragile hair needs smooth accessories and gentle removal.
What to ask for when booking a styling appointment
Say you want an arrangement on your existing cut, then name the anchor position, the sections left loose and the finish you prefer. Bring a photograph showing the back as well as the front. Ask whether your shortest layers can support the style without extensions, and request comfortable tension. If you want to repeat the look yourself, ask the stylist to show the section sizes, pin direction and order of steps before the final spray.
Keep the style comfortable and undo it gently
Secure pins into a foundation rather than repeatedly tightening an elastic. Reposition any clip that presses when you sit or lean back, and release a style that pulls at the hairline. At the end of the day, remove pins one at a time and unwind covered ties carefully; do not drag them down the ends. Use hot tools on dry hair with suitable heat protection and avoid repeating passes just to catch every tiny strand.
Can short hair really hold a bun?
Sometimes, but the shortest layers decide. A neck-length bob may hold a tiny loop or several little nape buns; a chin-length bob often works better half-up. A conventional wrapped bun needs more tail length than a folded loop. A pixie rarely supplies enough length for either, so choose pins, a headband or a change of texture instead. The goal is a comfortable shape that stays together, not a larger bun at any cost.
Make growing layers part of the plan
As the sides grow, temple twists and half-up ponytails often become possible before a full nape gather does. Keep shorter pieces separate with small pins rather than pulling them into every style. If you are growing the whole cut, explain that at trim appointments so the stylist can tidy the outline while protecting the length you need. Choose your next look by what your hair can hold today, then enjoy the extra options as it grows.