A few thoughtfully placed pieces around your face can make familiar hair feel lighter, fresher and much more expressive.
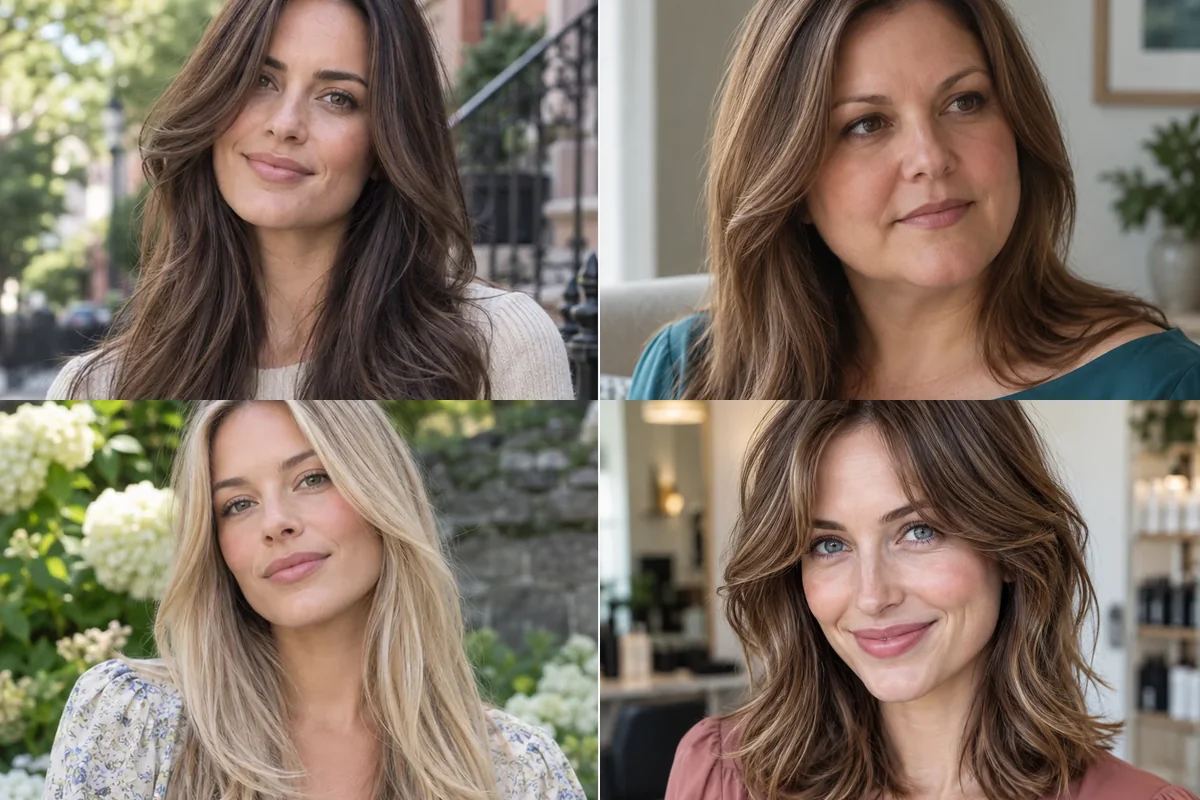
Face-framing layers are shorter, angled pieces cut around the front perimeter. They begin near a chosen feature—usually the cheekbone, jaw, chin or collarbone—then lengthen into the surrounding haircut. Unlike full-head layers, they reshape the front without necessarily removing weight through the back. They are usually longer and more connected than bangs, while a butterfly cut uses more dramatic layers throughout. The right placement depends on texture, density, parting, shrinkage and whether every piece needs to reach a ponytail.
Find the one that feels like you: Start with the first look and let the photographs lead. Each style explains how the shape affects your features, the mood it creates and the exact words to take to your stylist.
1. Cheekbone-Skimming Long Layers
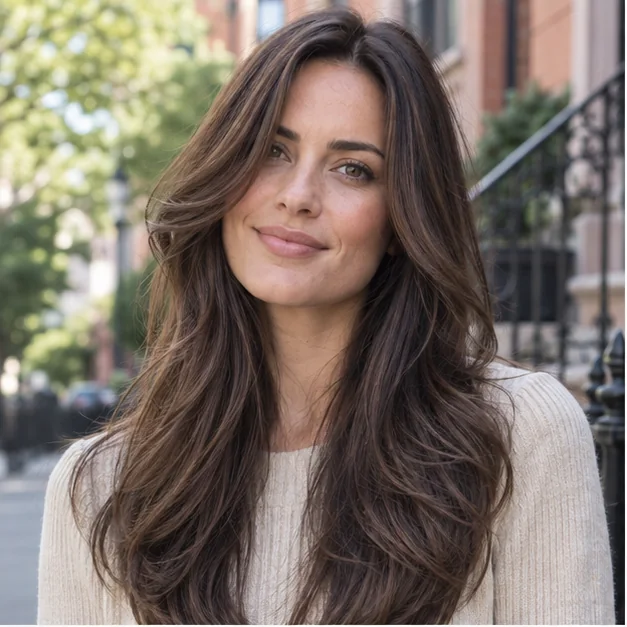
The shortest pieces meet the cheekbones, sweep past the jaw and melt into long lengths. This high starting point draws attention toward the eyes and creates lift beside fuller cheeks, giving long hair a bright, confident energy without sacrificing its substantial baseline. It suits straight or wavy medium-density hair, though the front may escape a high ponytail. Ask for cheekbone framing with forward overdirection and a seamless connection below the shoulders; blow-dry it away from the face with a medium round brush.
Ask your stylist for: Cheekbone framing with forward overdirection, blended below the shoulders.
2. Soft Chin-Length Face Frame
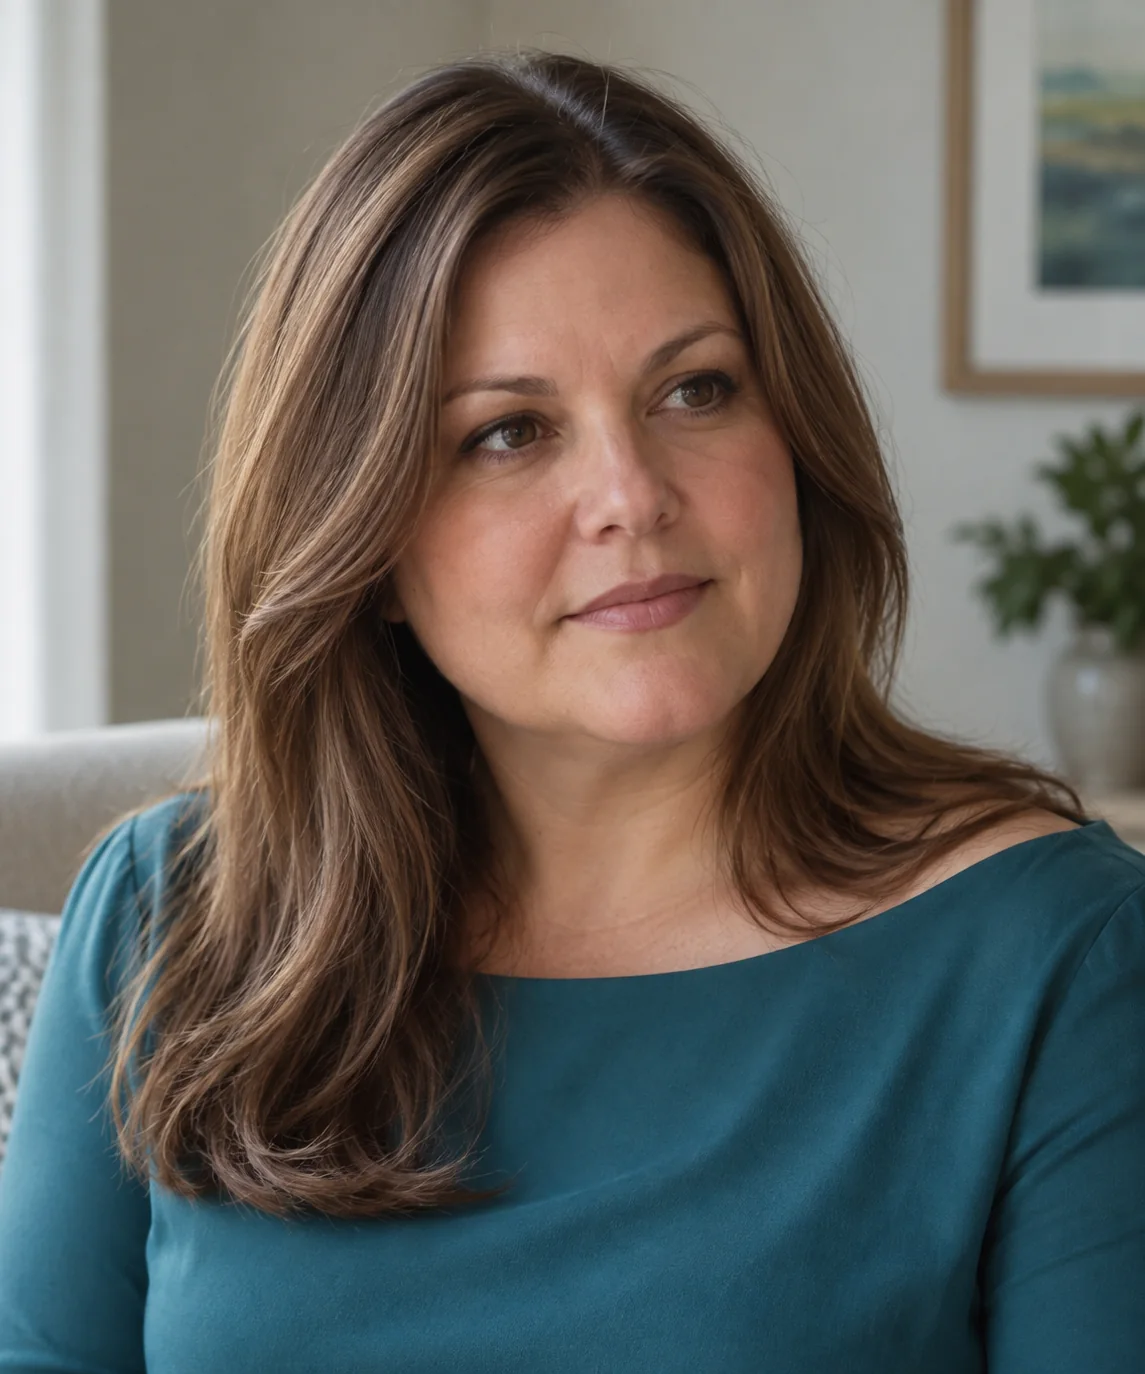
Chin-length pieces curve around the lower face before disappearing into medium-to-long hair. The placement softens a strong jaw, adds shape without exposing much forehead and feels polished in an understated way. Because the shortest layer still tucks behind the ears, it is an easy first step for someone protective of their routine or nervous about bangs. Ask for a chin-length frame with no shelf at the temples and long blended ends; smooth it or add one loose bend at the jaw.
Ask your stylist for: A chin-length frame with seamless temple blending and softly tapered ends.
3. Collarbone Layers for Fine Hair
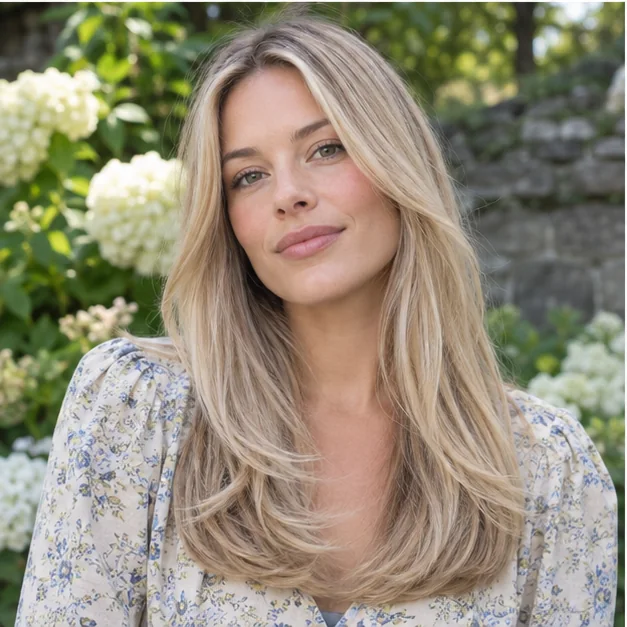
The frame begins at the collarbone and blends into a dense, nearly blunt perimeter, so fine hair gains movement without losing fullness. The low angle opens the neckline and makes the front feel intentional while preserving a calm, substantial silhouette that can boost confidence on low-styling days. It grows out quietly and reaches most ponytails. Ask for collarbone framing, minimal elevation and no thinning through the baseline; use lightweight root spray and curve only the front ends with a large brush.
Ask your stylist for: Collarbone framing with minimal elevation, a dense perimeter and no thinning.
4. Shoulder-Length Layers With Curtain Bangs

Curtain bangs open around the eyes, lengthen over the cheekbones and join buoyant shoulder-length layers. The connected curve balances a broad forehead and makes the cut feel romantic instead of looking like separate bangs attached to a lob. This version rewards a quick morning blow-dry, although the fringe needs trims sooner than the rest. Ask for brow-to-cheekbone curtain bangs connected through the temples into shoulder-grazing layers with a full perimeter; dry forward first, then sweep apart while cooling.
Ask your stylist for: Brow-to-cheekbone curtain bangs connected into shoulder-grazing layers.
5. Side-Parted Jawline Layers

A deep side part sends one section diagonally across the forehead while jaw-length layers sweep back on both sides. That asymmetry can soften a square jaw and bring elegant movement to straight or wavy hair, creating a poised, self-assured mood that works in professional settings. A natural cowlick should guide the part rather than be fought. Ask for jawline framing mapped to your everyday side part, with the heavier side softly graduated; dry against the final direction first, then sweep over.
Ask your stylist for: Jawline framing customized to the natural side part with soft graduation.
6. Center-Parted 90s Face Frame
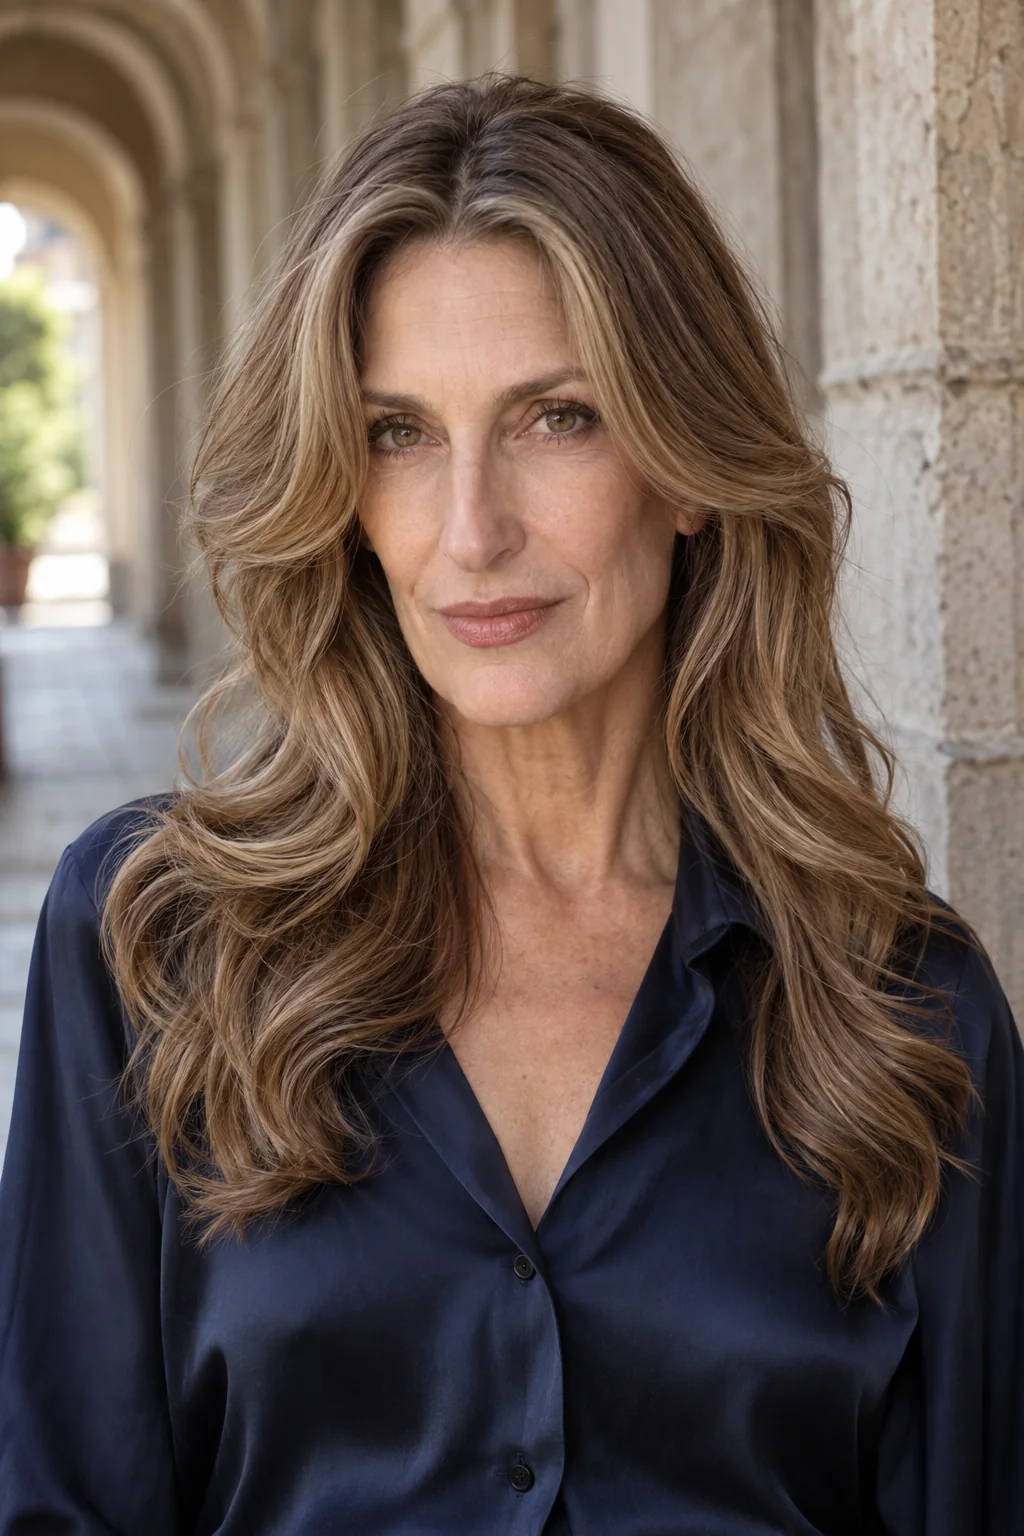
Rounded front layers begin near the cheekbones, roll away from a center part and cascade into plush lengths. The lifted wings make the cheek area look sculpted and give the haircut upbeat supermodel confidence, especially on straight-to-wavy hair with enough density to hold a bend. Its signature bounce needs heat or rollers, but the cut remains wearable when relaxed. Ask for symmetrical 90s framing with rounded overdirection and protected end weight; set the front on large rollers and cool fully before brushing.
Ask your stylist for: Symmetrical cheekbone-starting 90s framing with rounded overdirection.
7. Air-Dried Wavy Face Frame
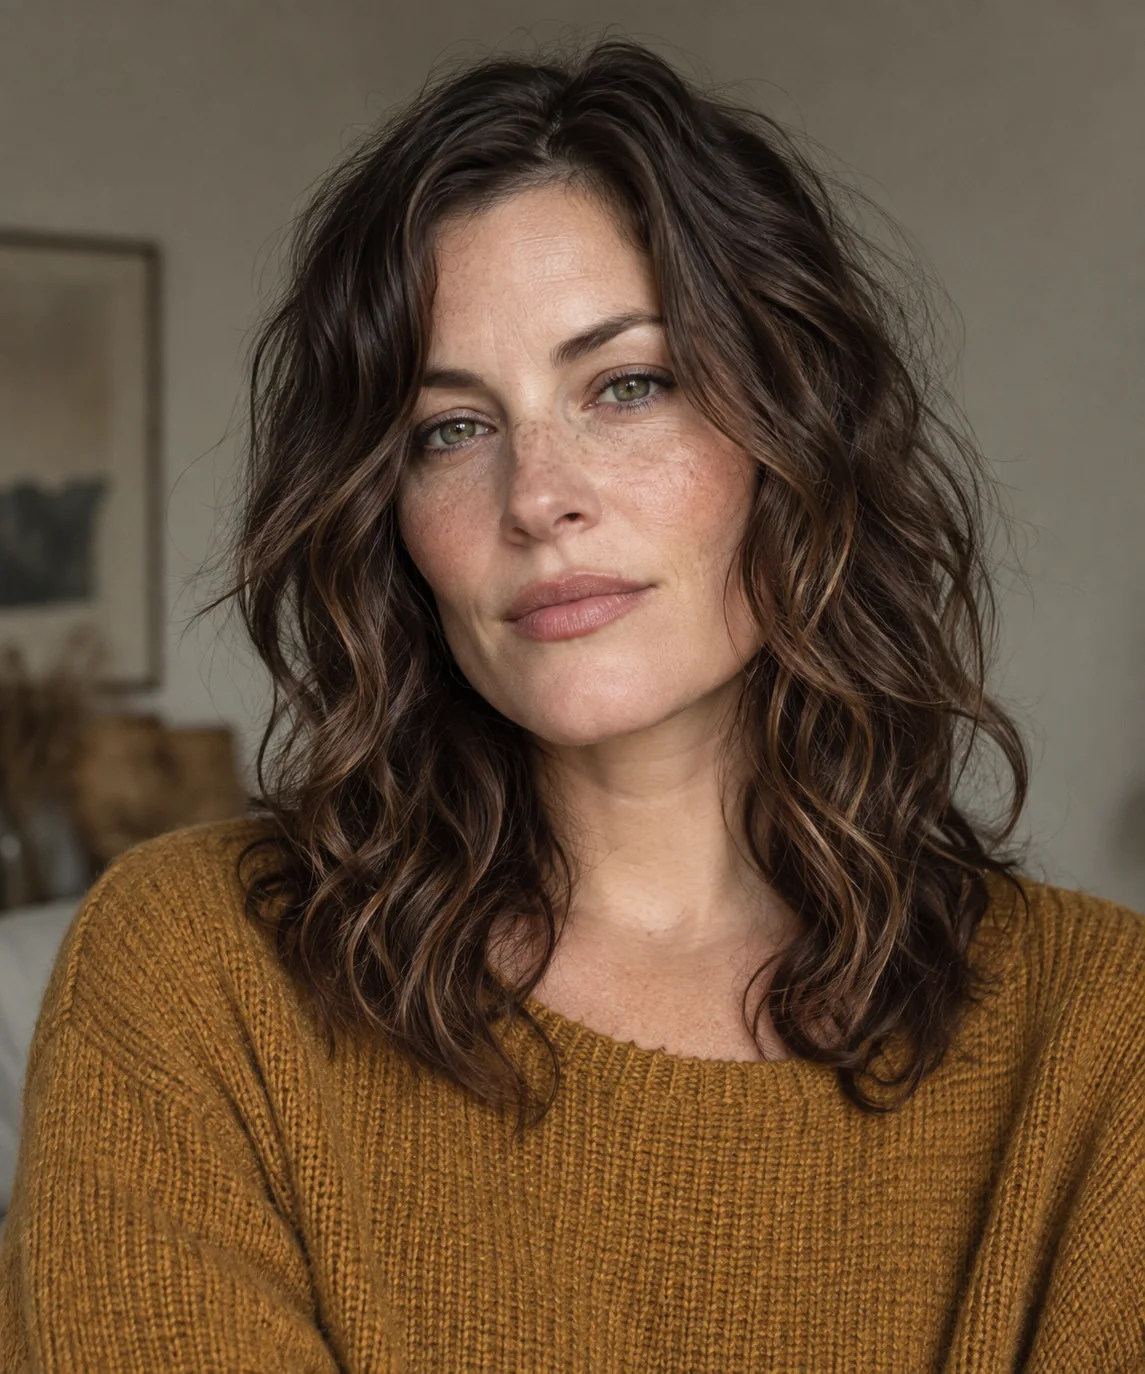
These layers start where the natural wave makes its strongest bend, allowing each section to form an easy S around the face. The shape releases heaviness, softens angular features and creates relaxed confidence without requiring a blowout. Because wet hair hides spring and irregular wave patterns, the shortest piece should be checked dry. Ask for wave-aware framing between cheekbone and chin, dry-refined without a razor on frizz-prone ends; scrunch foam into wet hair, set the part and leave it untouched while drying.
Ask your stylist for: Wave-aware cheekbone-to-chin framing, refined dry to preserve clumps.
8. Curl-by-Curl Face Frame
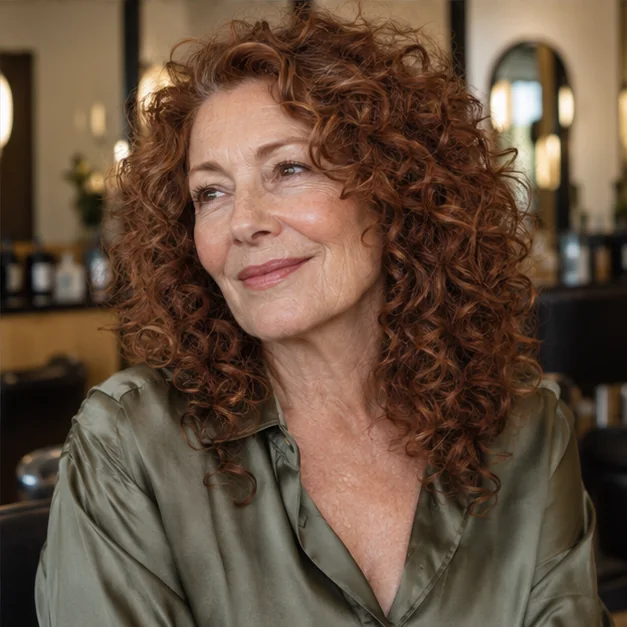
Individual curls are shaped dry so the front opens around the eyes without producing an accidental short shelf. The tailored frame gives ringlets lift, prevents a heavy triangular outline and feels joyful while respecting the curl pattern actually worn. Shrinkage varies by section, making a stretched wet cut risky. Ask for dry curl-by-curl framing with the shortest finished curl agreed in advance and no blanket thinning; apply leave-in and gel in sections, then diffuse gently without disturbing the front.
Ask your stylist for: Dry curl-by-curl framing with the finished length agreed in advance.
9. Sleek Straight Face Frame
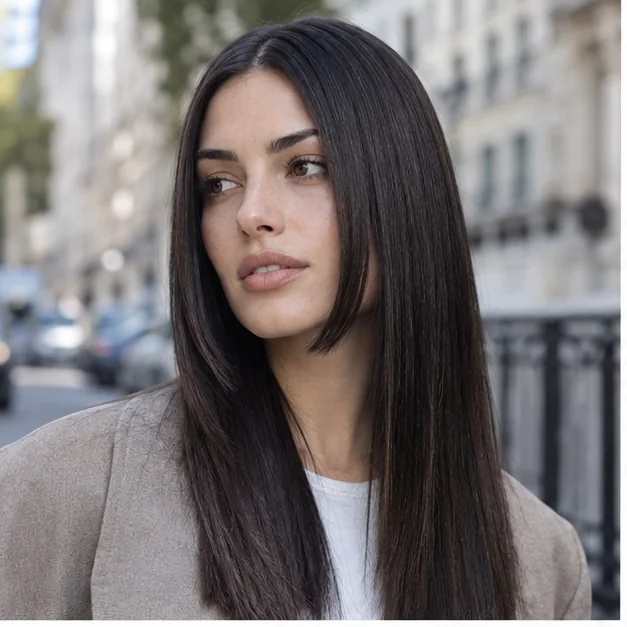
Precise diagonal sections begin at the chin and blend almost invisibly into sleek straight lengths. The clean lines refine the jaw and neckline, adding modern movement while preserving a smooth, expensive-looking surface. Straight hair reveals every uneven connection, so careful sectioning and a dry precision check matter more than heavy texturizing. Ask for chin-length framing with low elevation, point cutting only at the ends and no visible step into the perimeter; direct the dryer downward and finish with light serum.
Ask your stylist for: Chin-length low-elevation framing with point-cut ends and a dry check.
10. Short Bob With Subtle Framing

A chin-skimming bob keeps its graphic perimeter while a few shorter pieces soften the front corners near the cheekbones. The detail makes the bob feel less severe, brightens the eyes and creates a quietly chic update without turning it into a bixie. Too much graduation would weaken the signature line, so restraint is essential. Ask for a strong chin-length perimeter with minimal cheekbone framing confined to the front hairline and no stacked back; tuck one side or bevel the ends with a small brush.
Ask your stylist for: A strong chin-length bob with minimal cheekbone framing at the hairline.
11. Layered Lob With Cheekbone Pieces

A collarbone lob gains energy from cheekbone pieces that fan into light side layers. The combination adds height around the face while leaving enough baseline weight to look full, creating a fresh, capable style that moves easily from air-dried to polished. Fine hair needs fewer side layers; thick hair can support a broader frame. Ask for a collarbone lob, cheekbone framing and connected side layers with a protected back perimeter; style the front away and leave the ends softly undone.
Ask your stylist for: A collarbone lob with cheekbone framing and a protected back perimeter.
12. Weight-Releasing Frame for Thick Hair
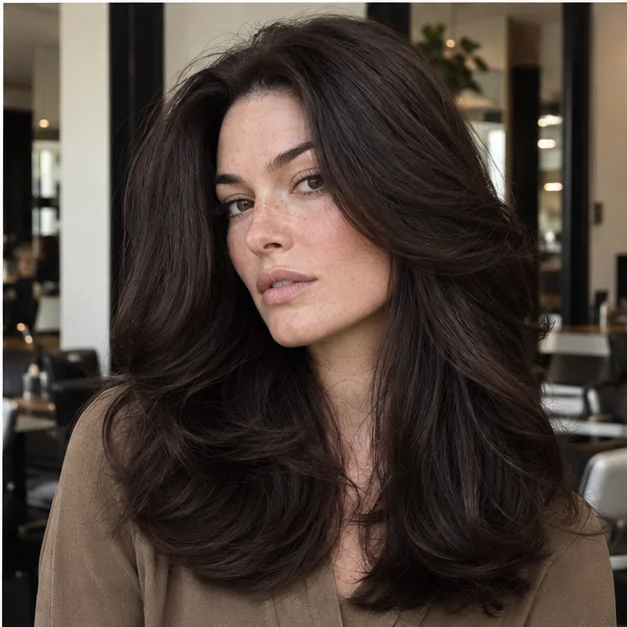
Broad layers begin around the jaw and use selective internal weight removal so thick hair curves instead of pushing outward. The frame reveals more of the face, reduces front drying time and gives dense hair a calmer silhouette that can feel freeing. Surface thinning may create frizz, so debulking belongs underneath. Ask for jaw-to-collarbone framing with hidden internal graduation, a long surface veil and no thinning near the hairline; dry the roots completely before smoothing the ends.
Ask your stylist for: Jaw-to-collarbone framing with hidden graduation and an intact surface veil.
13. Wispy Frame for Fine Hair
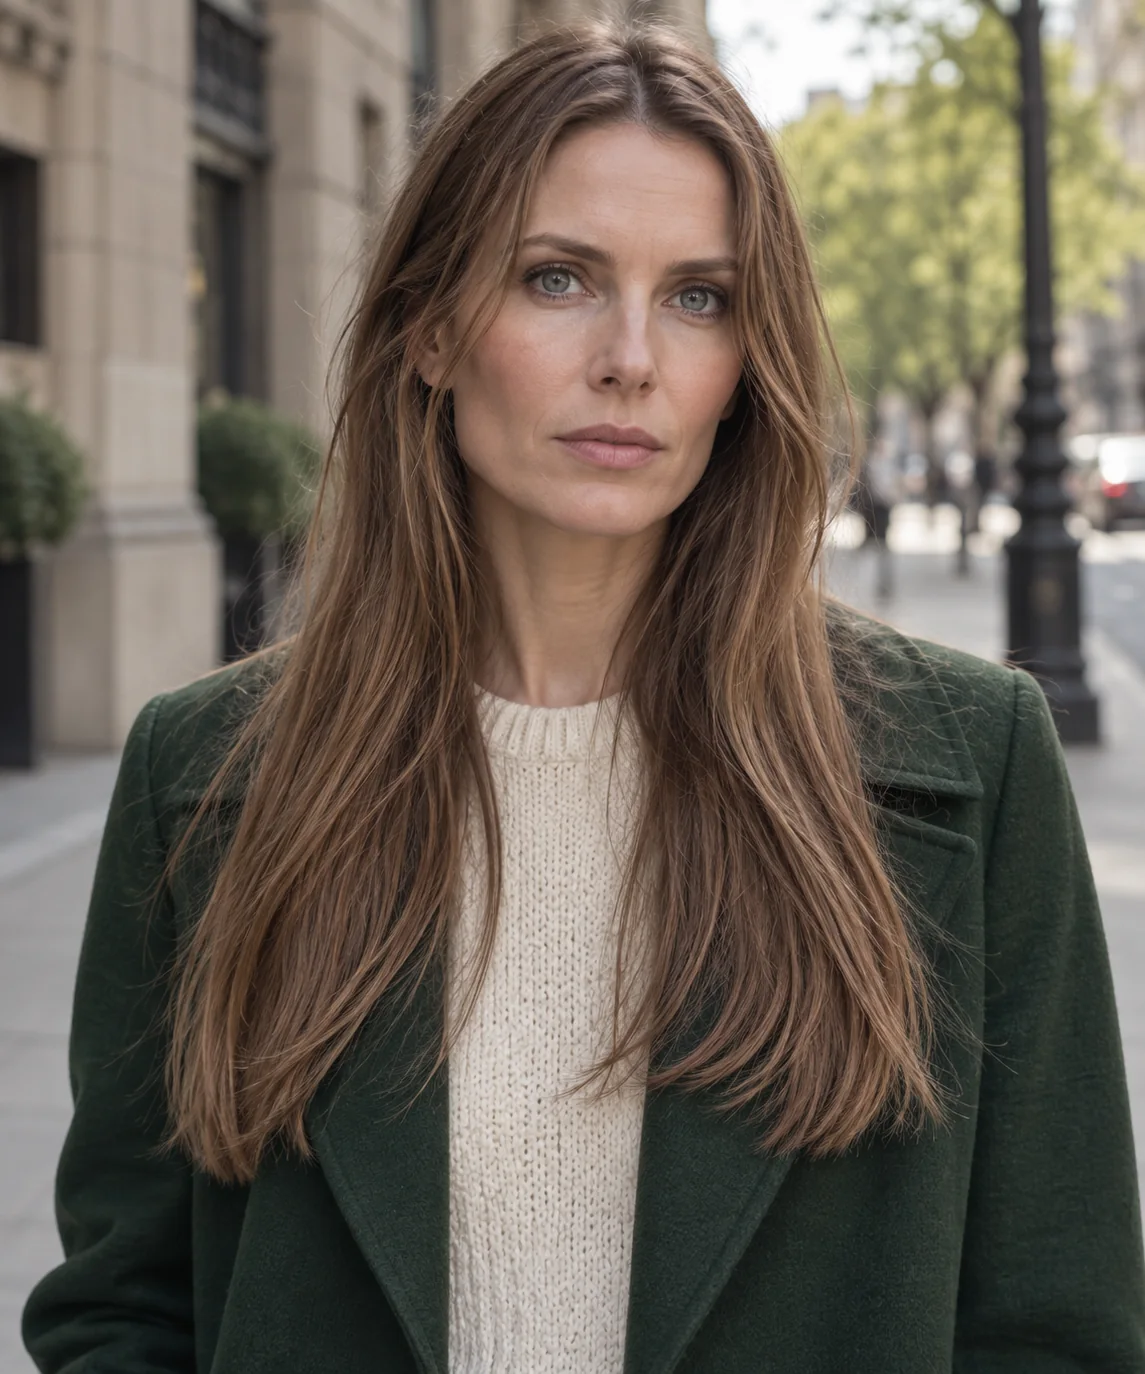
A narrow, low-density section is feathered from the cheekbones downward while most hair stays one length. The light frame adds expression without making fine ends transparent, producing a soft, approachable finish that still looks substantial from the back. Over-sectioning is the main risk, so less hair is an advantage. Ask for a very narrow cheekbone frame, softly point-cut with a dense untouched perimeter and no thinning shears; use a tiny amount of mousse and bend the pieces once.
Ask your stylist for: A narrow cheekbone frame with a dense perimeter and no thinning shears.
14. Face-Framing Layers With Full Bangs
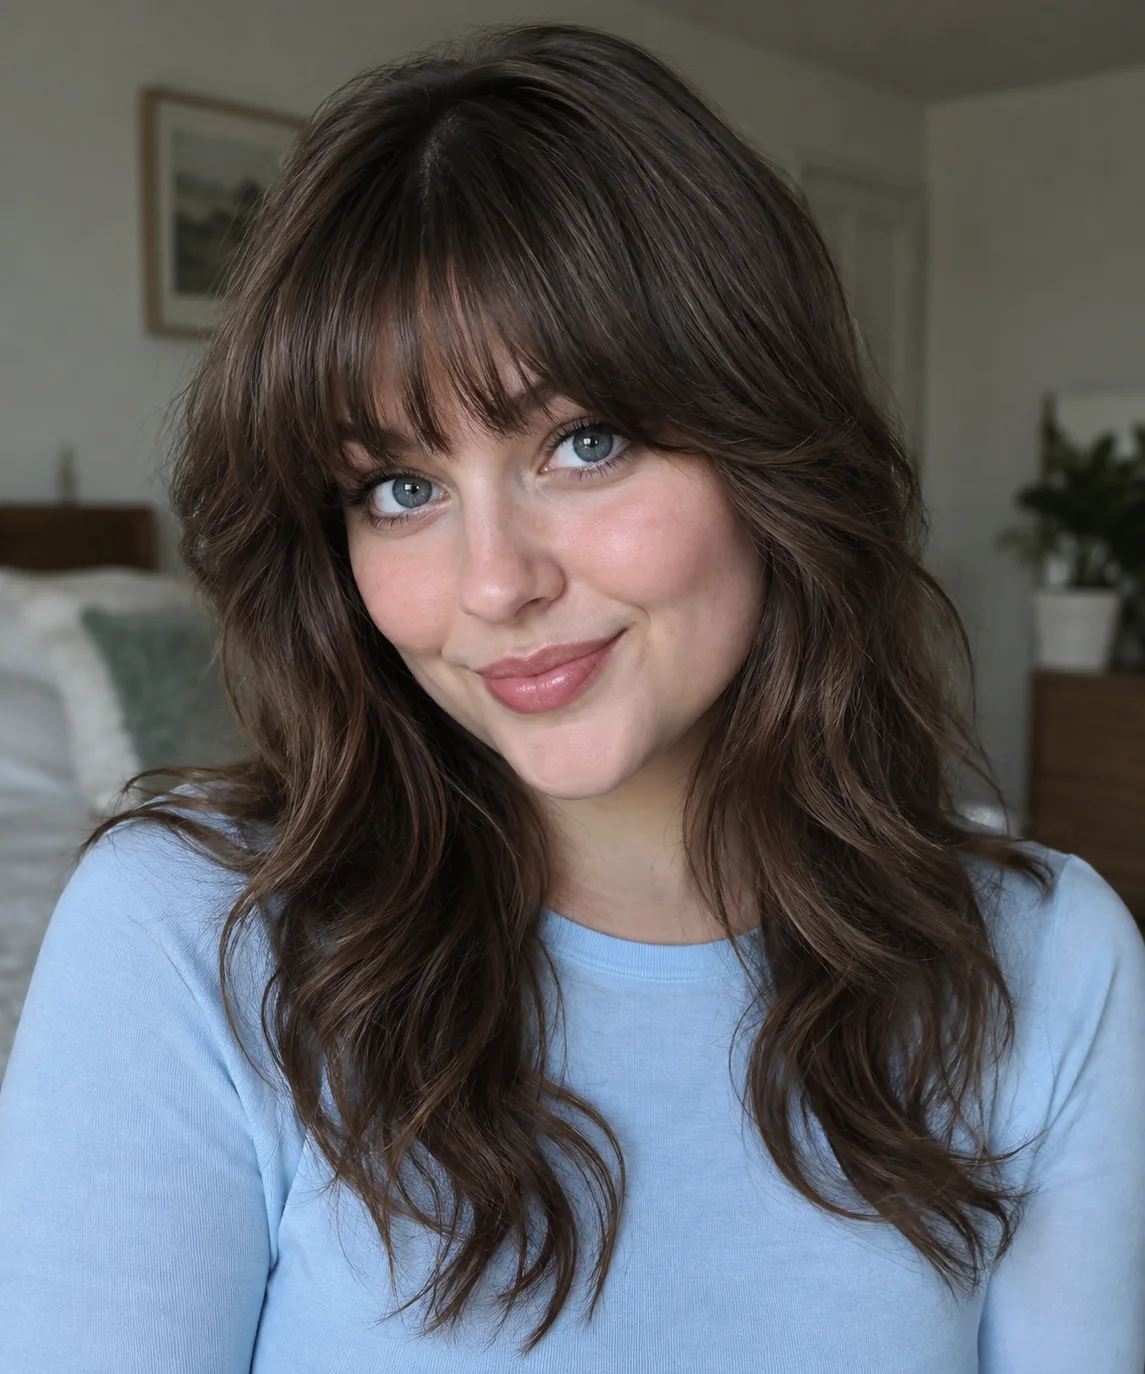
A full brow-skimming fringe extends into temple pieces that lengthen past the cheekbones and connect with the haircut. This continuous curve emphasizes the eyes, softens a long face and feels sophisticated rather than creating a blunt fringe box. The bang requires regular trims and immediate styling after washing, but the side pieces make grow-out kinder. Ask for a softly rounded full fringe with cheekbone temple blending and no hard corner; dry it flat from side to side before curving the outer pieces away.
Ask your stylist for: A rounded brow fringe with cheekbone temple blending and no hard corner.
15. Bottleneck Bangs Into Long Layers
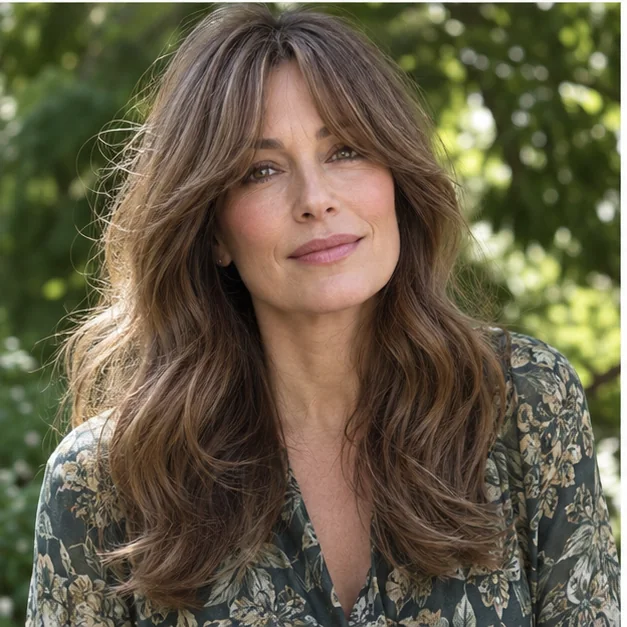
Bottleneck bangs sit shorter through the center, open around the eyes and stretch into cheekbone and jaw layers. The narrow center highlights the gaze while longer sides soften the forehead, creating a playful, fashion-aware frame that grows out more easily than blunt bangs. It needs a quick daily reset, especially after sleep. Ask for a light bottleneck fringe above the brows at center, cheekbone-length at the sides and seamlessly connected to long framing; dry it immediately with a small round brush.
Ask your stylist for: A light bottleneck fringe with cheekbone sides blended into long framing.
16. One-Length Hair With a Low Frame
The back remains completely one length while two low angled sections begin below the chin and melt into the perimeter. This gives someone who loves a blunt cut movement and neckline softness without changing the dense, dependable shape they rely on. It feels refined, ties back easily and grows out almost invisibly. Ask for an untouched one-length baseline with framing only below the chin, cut at low elevation and connected at the ends; air-dry straight or add one inward bend for definition.
Ask your stylist for: An untouched one-length baseline with low framing beginning below the chin.
17. Shaggy Face-Framing Layers

Broken cheekbone and jaw layers merge into tousled side texture while the crown stays softer than a true shag. The irregular pieces encourage waves, disguise uneven texture and create a relaxed creative mood without committing to a heavily layered back. Medium-to-thick hair supports the separation best; fine hair needs restraint. Ask for choppy but connected framing, deep point cutting through the sides and no severe crown disconnection; scrunch with mousse, diffuse briefly and separate a few dry ends with paste.
Ask your stylist for: Choppy connected cheekbone-to-jaw framing with no crown disconnection.
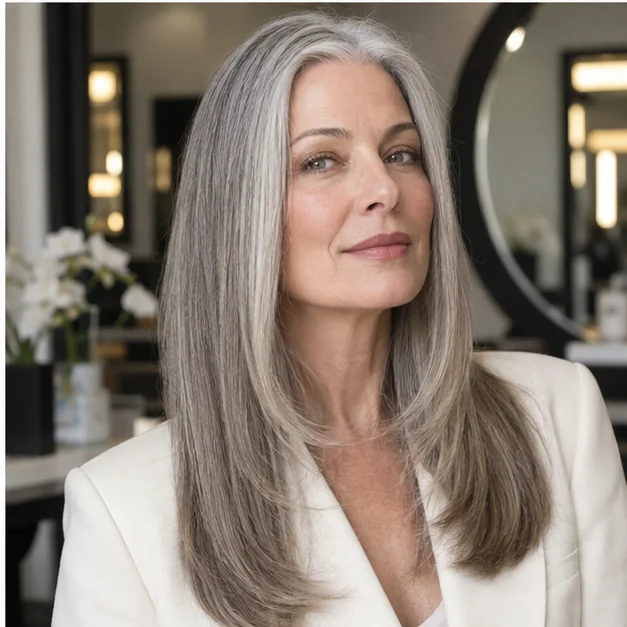
18. Silver Hair With Soft Framing

Soft layers begin at the cheekbones and move into a polished silver bob or medium cut, retaining enough weight for luminous gray strands to look healthy. The bright frame draws light toward the eyes and gives silver hair a fresh, assured presence rather than forcing it into severity. Coarser grays need moisture; finer white hair needs restrained layering. Ask for cheekbone-to-chin framing tailored to density, polished ends and no aggressive razor work; use hydrating cream and occasional violet care without dulling shine.
Ask your stylist for: Cheekbone-to-chin framing tailored to silver-hair density with polished ends.
19. Low-Maintenance Tuckable Layers
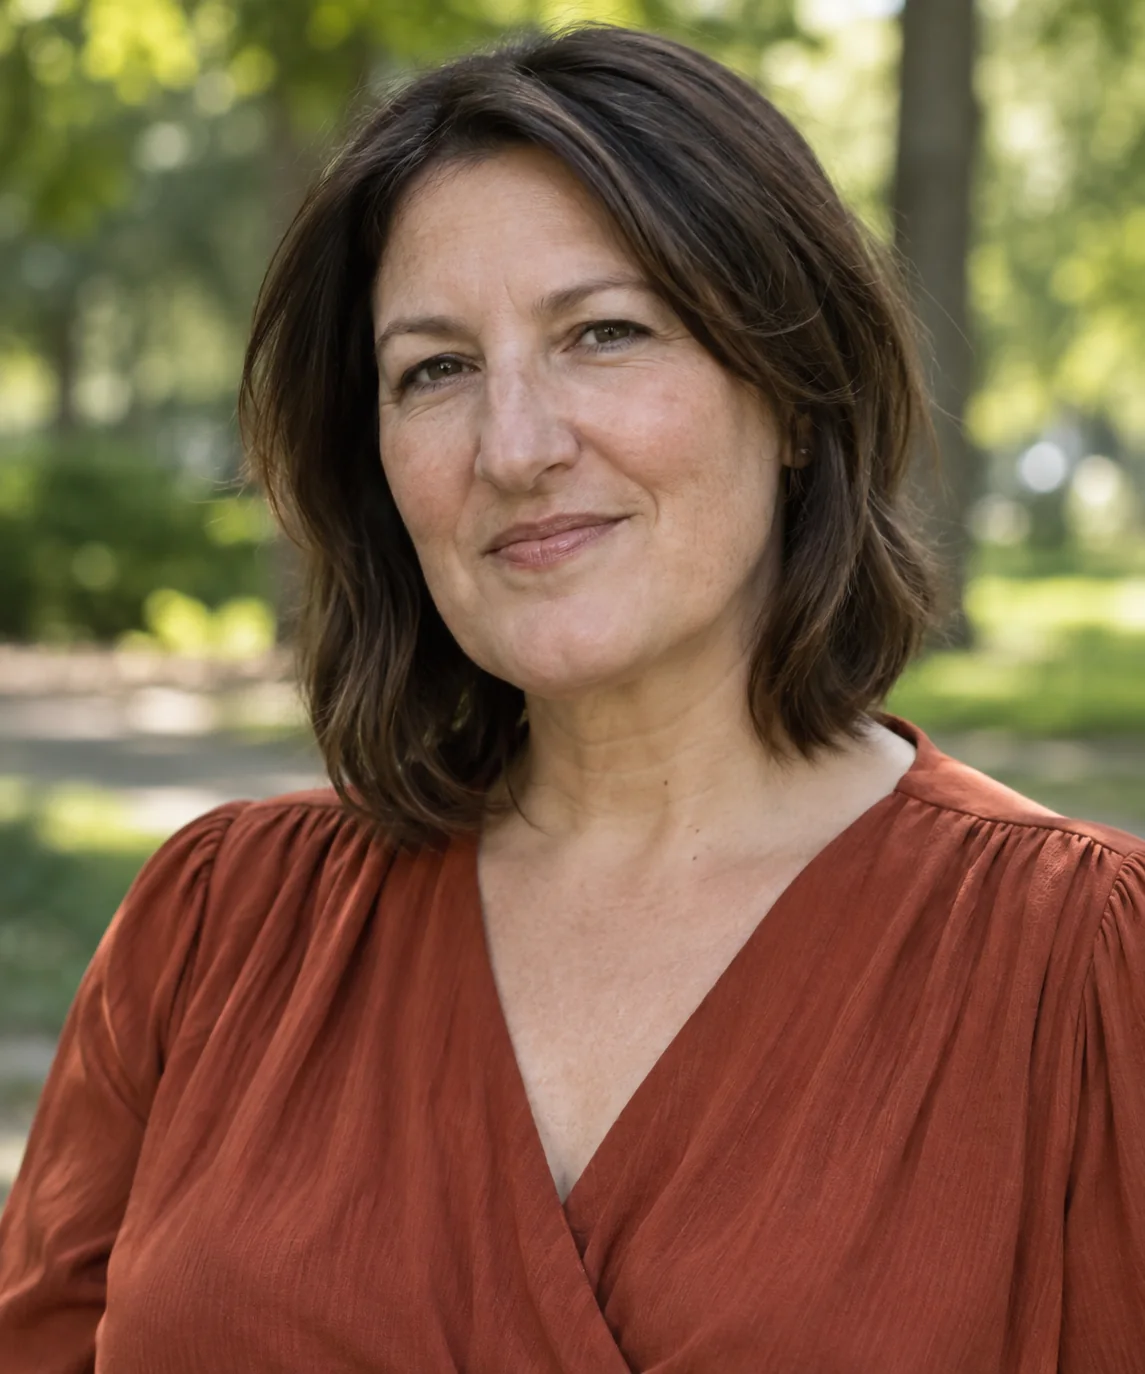
The shortest layer lands below the jaw, long enough to tuck behind the ear and join a ponytail with minimal clips. That practical placement adds visible shape but keeps workouts, busy mornings and windy commutes uncomplicated, creating a composed style that never feels demanding. It grows out smoothly and can stretch trims when the ends remain healthy. Ask for below-jaw framing tested for ear tuck and ponytail reach, with seamless blending and no short temple pieces; smooth once or let it air-dry.
Ask your stylist for: Below-jaw framing tested for ear tuck and ponytail reach.
20. Curved Frame With Rounded Ends
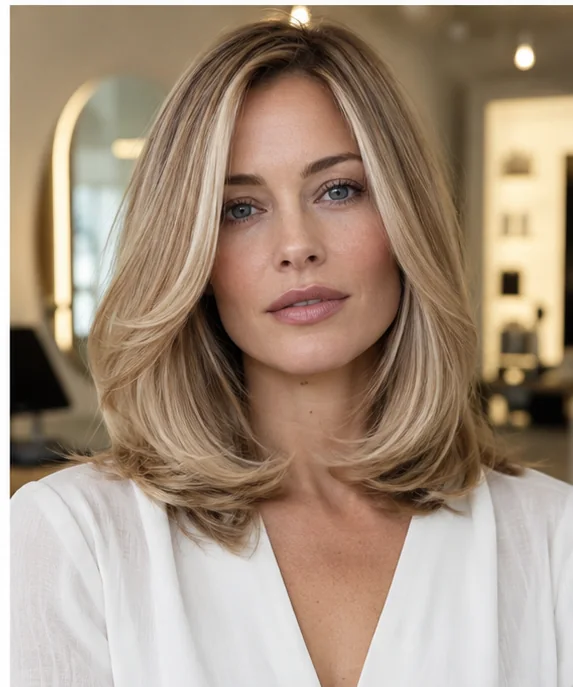
Broad front layers sweep from the jaw to collarbone and finish in glossy rounded ends that turn away from the face. The curve makes medium or long hair look plush, balances a narrow chin and creates an approachable polished mood from office hours to dinner. The cut works without heat, although its sculpted finish needs a brush or large roller. Ask for broad connected framing with a rounded perimeter and enough end weight to hold a bevel; roll warm sections away and release only when cool.
Ask your stylist for: Broad jaw-to-collarbone framing with enough end weight for a bevel.
Before You Book the Appointment
A successful salon visit begins with the overall shape, construction and upkeep—not only the finished length. Use this quick reality check before choosing your final reference photograph.
- Best for: Adding movement or feature-framing without necessarily changing overall length
- Styling effort: Two to fifteen minutes
- Typical maintenance: Eight to twelve weeks
- Main benefit: A customized front shape that changes the whole haircut
Choose the Shortest Point
Cheekbone layers create strong lift and eye emphasis. Jaw and chin placement soften the lower face while remaining easier to tuck. Collarbone framing preserves density and ponytail reach. Assess natural bends, cowlicks and shrinkage first because the same measured length behaves differently on straight hair and curls.
What to Ask for at the Salon
Bring front and side references, then point to the exact feature where the shortest finished piece should land. Explain your part, texture, air-drying habits and whether every layer must reach a ponytail. Ask how the frame will connect to the perimeter and request a dry check after styling.
Styling, Maintenance and Grow-Out
Most frames need reshaping every eight to twelve weeks; cheekbone pieces and bangs may need attention sooner. Direct a dryer or roller away from the face for lift, or style curls wet and leave them undisturbed. Connected chin or collarbone layers grow out quietly, while short choppy pieces show their age sooner.
Face Frames Versus Bangs and Full Layers
Face-framing layers concentrate angled movement at the front perimeter. Bangs cover the forehead and usually begin from a deeper section. Full layers redistribute weight around the crown, sides and back, while a butterfly cut pairs dramatic short wings with extensive layering through long hair.