You love the way your locs look down, right up until they’re caught under a bag strap or tucked into the back of your coat. Once they reach your chest or waist, a different tie position or a single fold can change how the whole style feels.
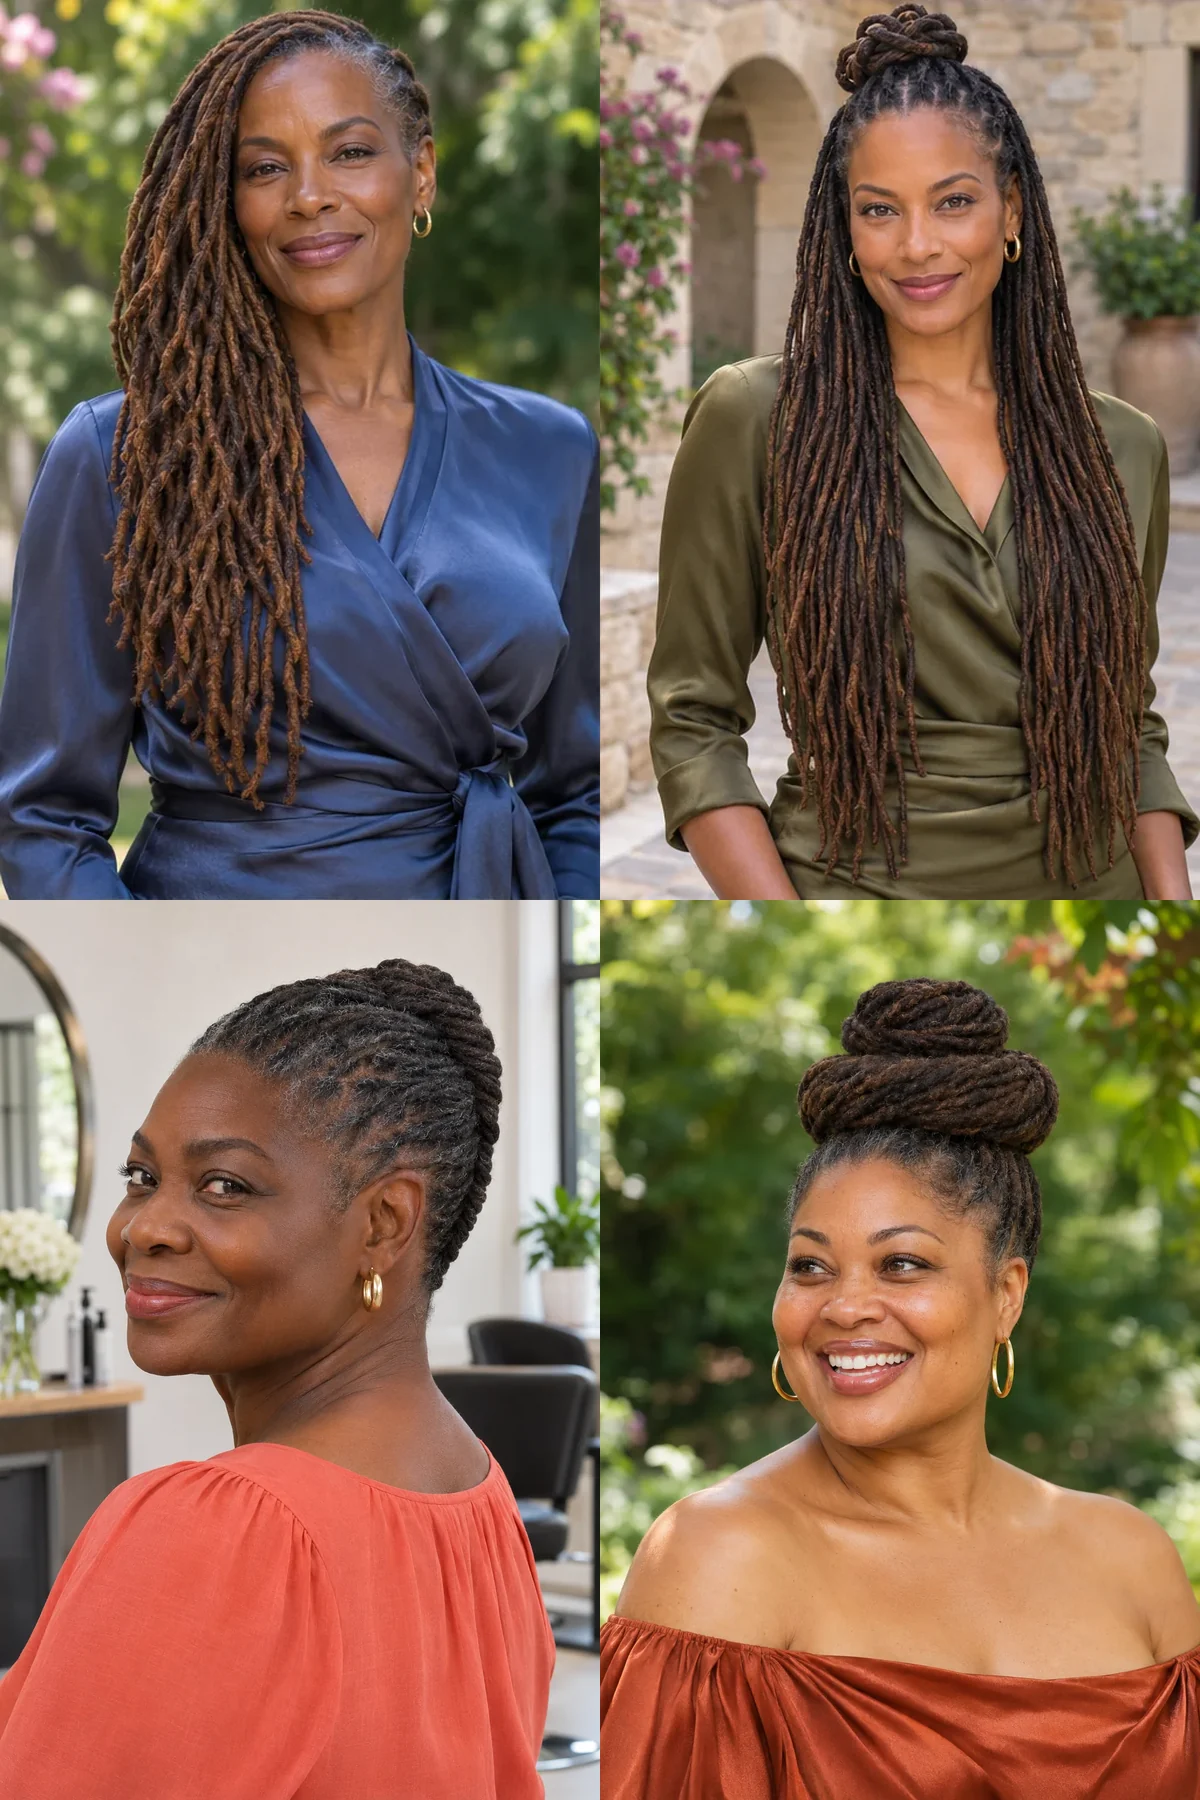
Long loc styles are ways of arranging existing locs that fall below the shoulders when loose. The extra length can drape, braid back on itself or fold into a roll, but it also adds weight wherever you secure it. These ideas use natural locs already in place. Faux locs use added hair to create a loc-like shape, and short locs generally need different ways of securing the ends.
Find the one that feels like you: Start with the first look and let the photographs lead. Each style explains how the shape affects your features, the mood it creates and the exact words to take to your stylist.
Quick Facts
- Start by choosing where you want the ends to land, especially around a coat collar or shoulder strap.
- Leave a little give at the roots and check the style while turning your head.
- Show your loctician a view of the anchor as well as the front.
1. The One-Shoulder Drape
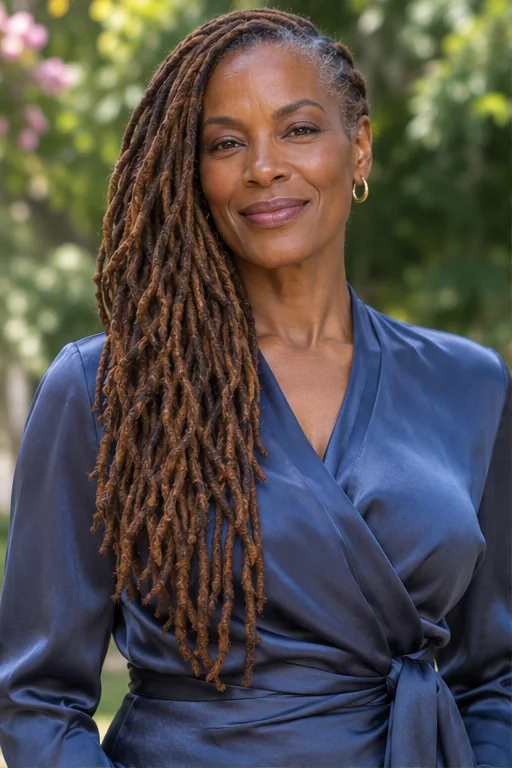
A deep part sends chest-length locs over one shoulder in a loose curtain, leaving the opposite temple and neckline open. That contrast frames one cheek and shows off a single earring, which can make a plain T-shirt feel like a deliberate outfit. The drape works best if your locs already fall comfortably to one side or you want a style you can undo before bed. On a windy day, slide a smooth pin under a small section near the exposed ear and leave the rest free. At the salon, ask to follow your natural part and secure only that small temple section.
Ask your stylist for: Keep my locs loose, sweep them across from my natural side part, and pin back only the small section above my opposite ear.
2. A Loose Spiral Set
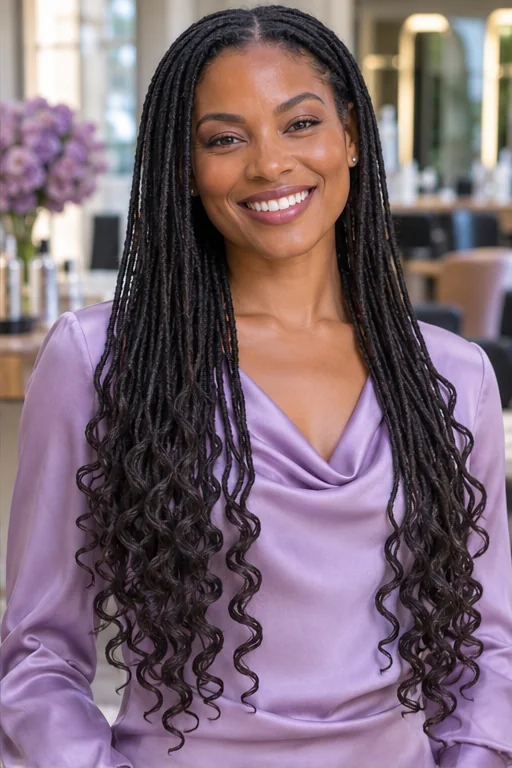
Long locs take on a different shape when the lower lengths fall in open spirals. The soft curves give fine locs more presence over the shoulders, and the bounce can feel just dressy enough for dinner with the same clothes you wore to work. Allow enough time for the locs to dry all the way through before removing the rods, especially if you have dense hair or grouped several locs together. To keep the top calm and the ends loose, ask your loctician to start the rods below the roots and use a larger diameter through the bottom half.
Ask your stylist for: Start the rods below the roots and set my locs in small groups for large, loose spirals.
3. Big Two-Strand Twists Worn Down
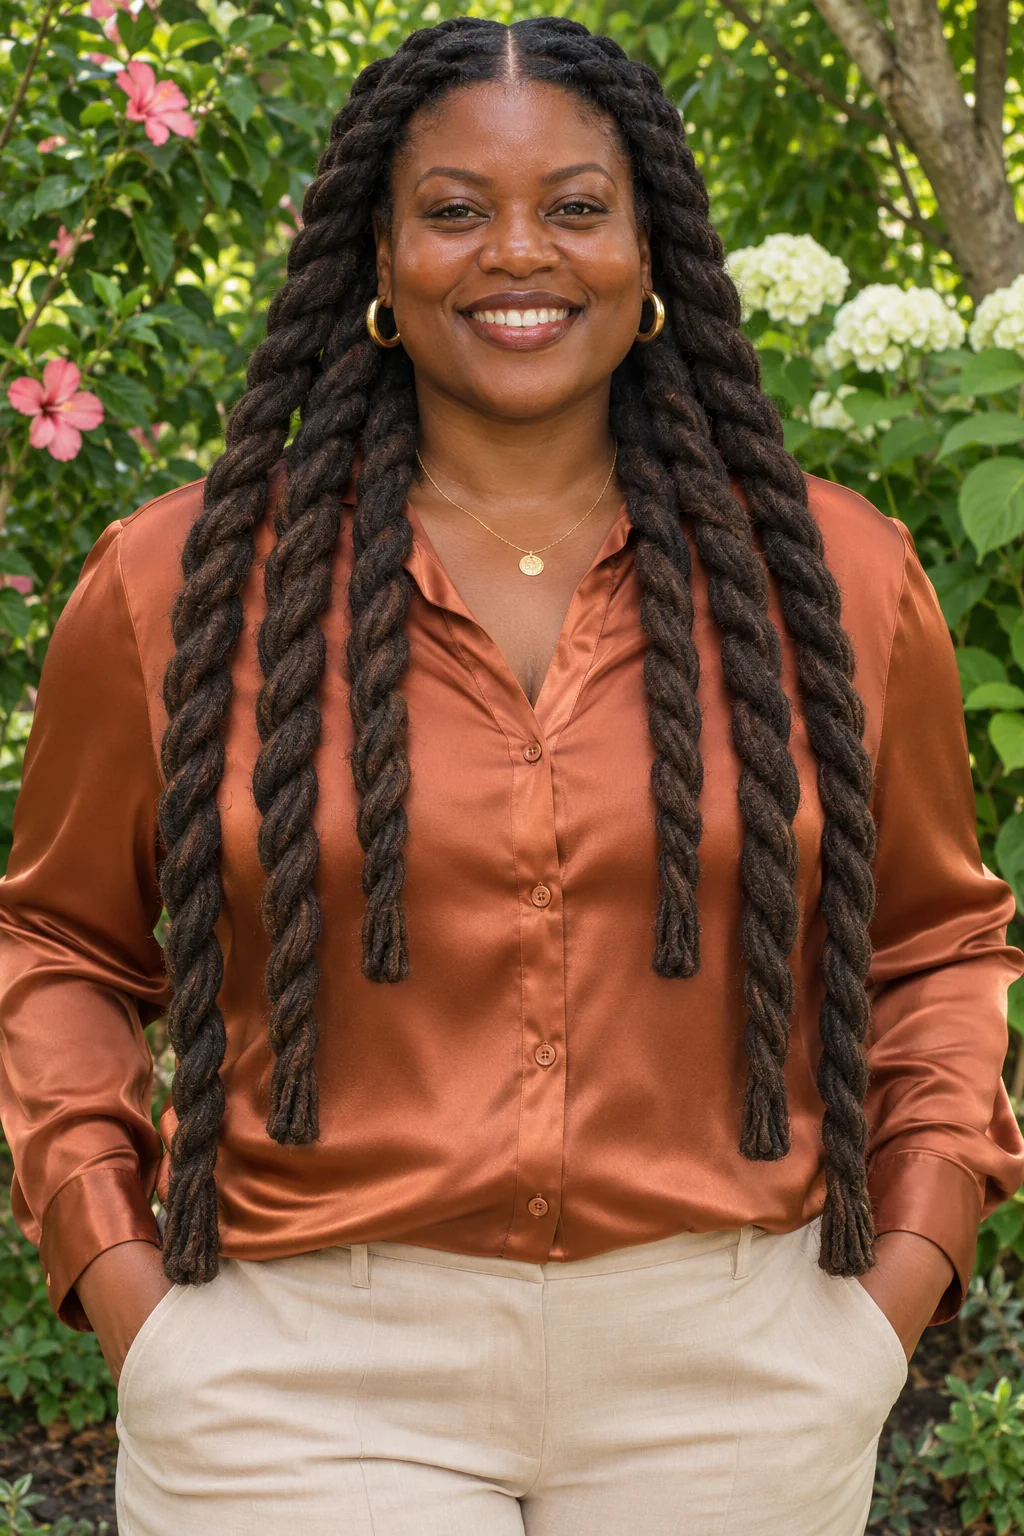
A few oversized two-strand twists turn dozens of long locs into broad ropes you can lay over the shoulders. The larger sections give the whole style a sculptural look, and having fewer loose lengths to move aside can feel surprisingly freeing on a busy day. This is especially handy when you like your hair down but spend the day leaning over a desk or working with your hands. Start each twist loosely near the scalp and use a covered band only if an end unravels. Ask for a few big twists with relaxed bases and keep the individual locs visible within each rope.
Ask your stylist for: Make a few large two-strand twists from my existing locs and leave the base of each group relaxed.
Pause and notice: If you like wearing your locs down, try putting on your usual coat before choosing a style. You may only need to move the front section or group the ends to get the freedom you want.
4. A Half-Up Knot With the Length Left Loose
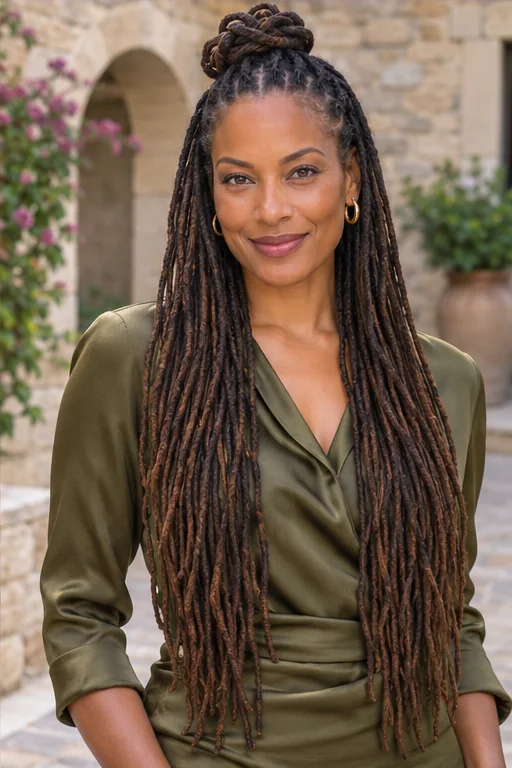
The small knot at the crown is the only part of this look that needs to hold. The locs below it keep their full length, so you get the lift of a bun around your face and the feeling of wearing your hair down from the shoulders back. It’s a good choice for a day when you want to keep hair out of your eyes without carrying the weight of an all-up style. Try it with a shallow top section first, then loosen any temple locs that feel pulled. Ask for a small crown knot with the entire lower section left loose.
Ask your stylist for: Gather a shallow top section into a loose crown knot and leave my temples and the lower locs free.
5. The Half-Up Loc Halo
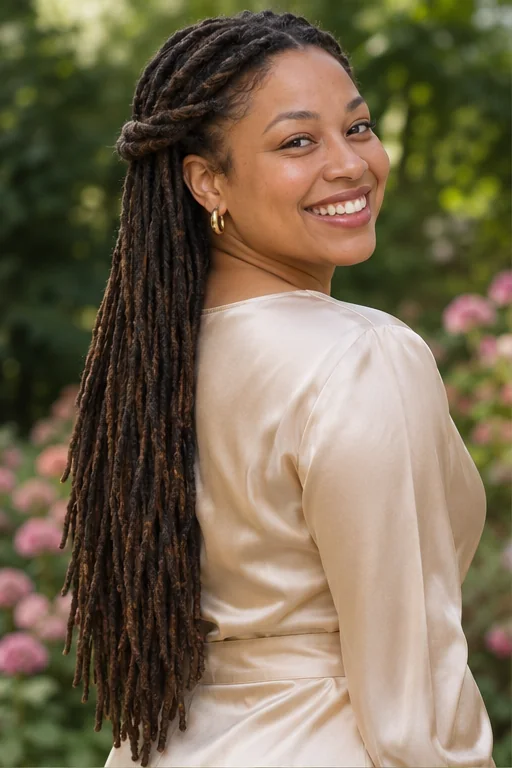
Follow the twist from above one ear and you’ll see it curve around the head to meet its partner at the back. The narrow halo clears the ears and leaves the longer locs falling down your back, a soft, romantic shape that feels at home at a garden party. It’s easier to keep the band slim if your locs are small or medium, since two large bundles can feel bulky behind the ears. Use two shallow sections and cross-pin the join where the pins can hide. At the salon, ask for a low-profile halo with a loose lower section and room for your glasses if you wear them.
Ask your stylist for: Twist two small sections above my ears into a narrow halo, hide the join in back, and leave the lower locs loose.
6. A Low Ponytail With a Wrapped Base
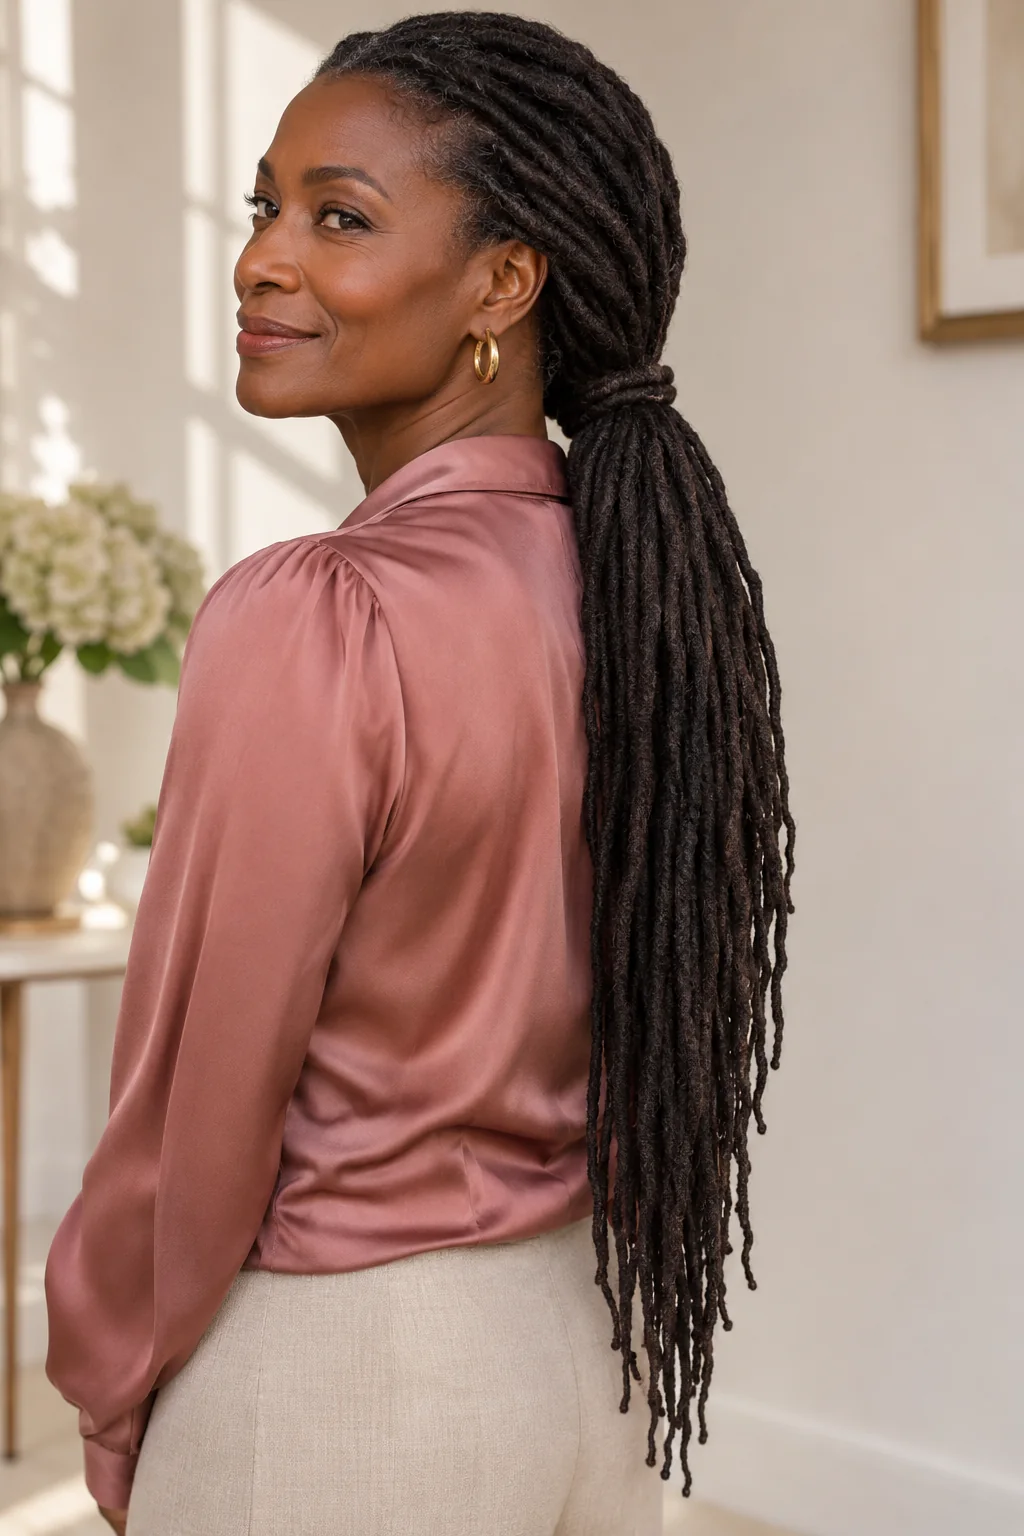
A single loc wrapped around a low ponytail makes the tie disappear, leaving the long ends to fall in one clean line. With the weight sitting low and the top left easy, the shape feels quietly polished for work or a dinner where you want your earrings to show. A wide, soft tie gives the bundle more room than a thin elastic, especially if your locs are thick. Leave enough give at the nape to turn your head comfortably. Ask your loctician for a low anchor and one wrap around it, with the individual lengths free below.
Ask your stylist for: Set the ponytail at my nape with a wide soft tie and wrap just one loc around the base.
7. A Long Ponytail Braided Into One Plait
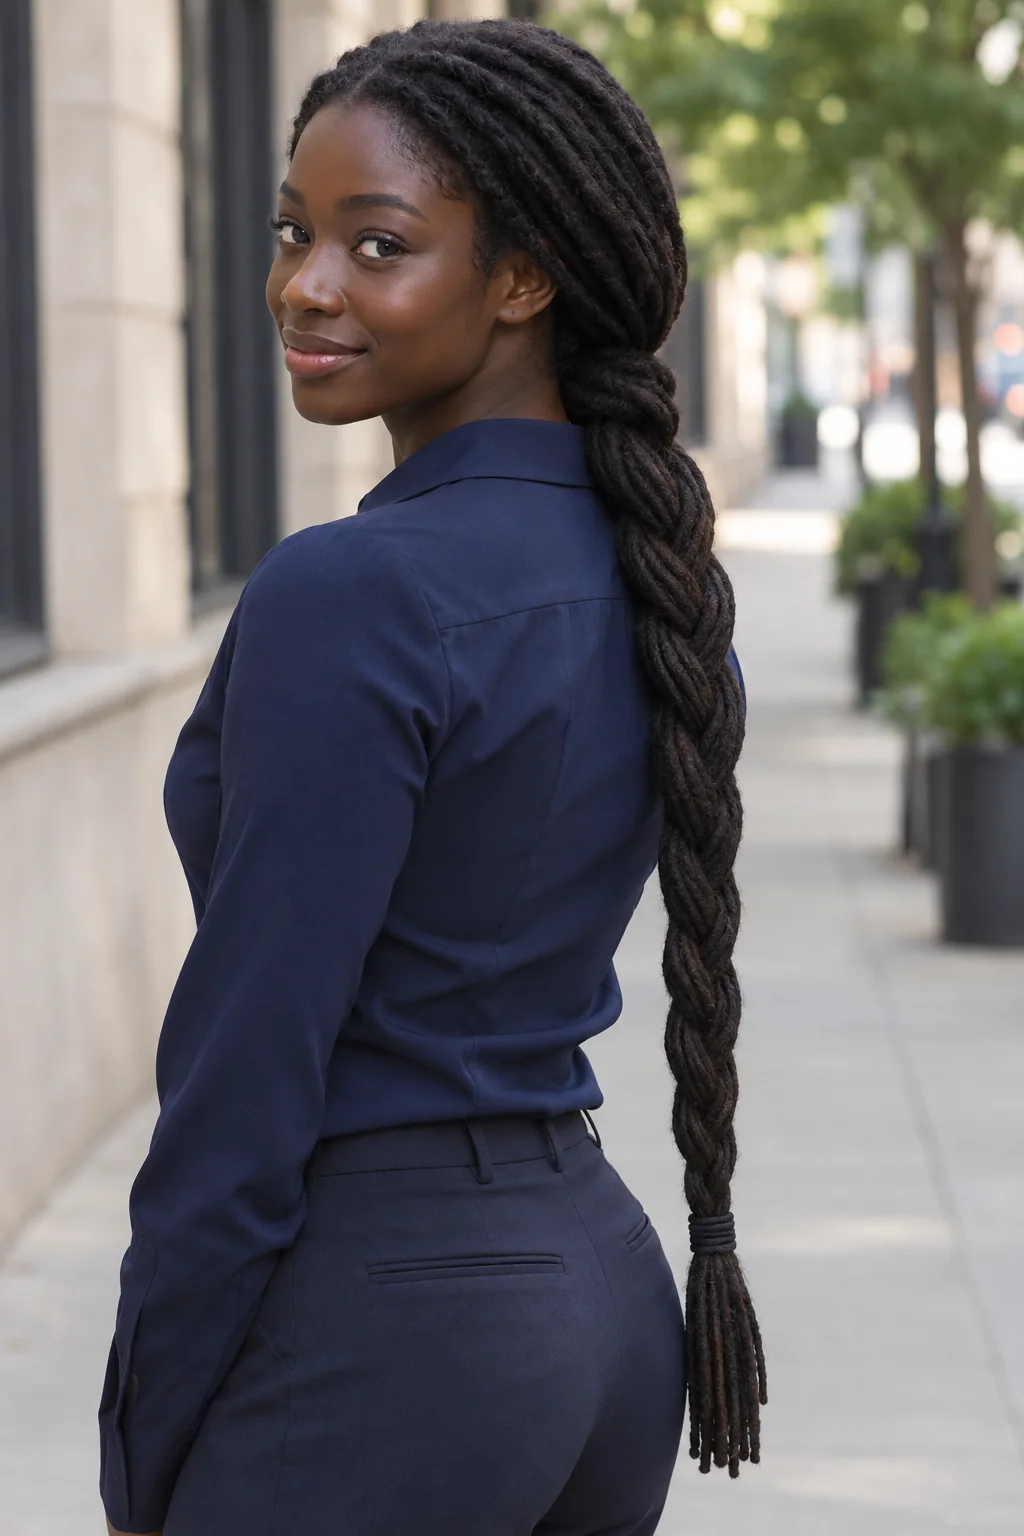
When the free length of a low ponytail goes into one broad plait, the locs move together instead of scattering over your arms and back. That makes it an easy shape to live with on errands or on a commute, and the substantial braid can make a simple jacket feel a little more pulled together. Choose a loose three-strand weave if the full length gets heavy, then check that the braid can bend when you sit back. Ask for the ponytail tie near the nape and for the plait to start below it, with a soft band around the ends.
Ask your stylist for: Start a low ponytail with a soft tie and braid the free length into one loose three-strand plait.
8. A Folded Ponytail That Clears Your Collar
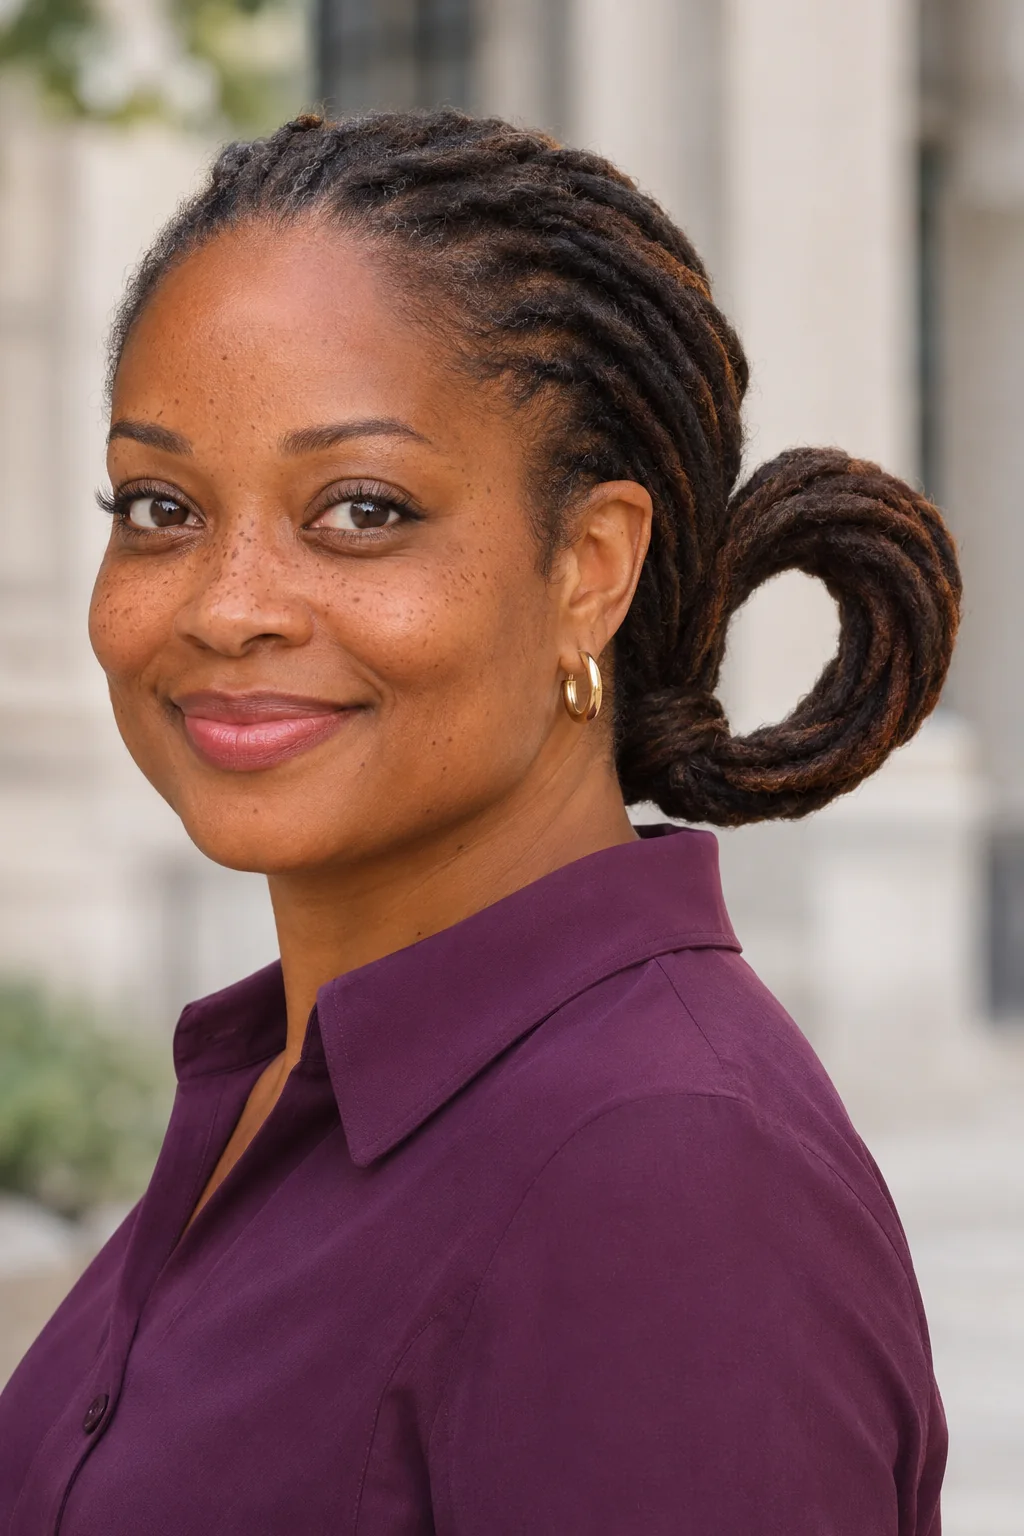
A folded ponytail lifts the ends in one broad loop, so the length stays away from your collar without winding into a tight bun. The long, soft shape at the back looks tidy enough for a workday and feels practical when you’re going in and out of a coat. It works best if your locs bend comfortably where you want the fold, and especially thick bundles may need two soft ties to hold the base. Test the loop against your usual collar before you leave the mirror. Ask for one fold with the tips tucked beside the base.
Ask your stylist for: Fold my ponytail upward once, keep the loop broad, and secure the tips at the base above my collar.
Pause and notice: Try the sitting test. A style that feels light when you stand can press into a chair or a headrest once you sit, so check the anchor where you’ll actually wear it.
9. Two Low Coils at the Nape
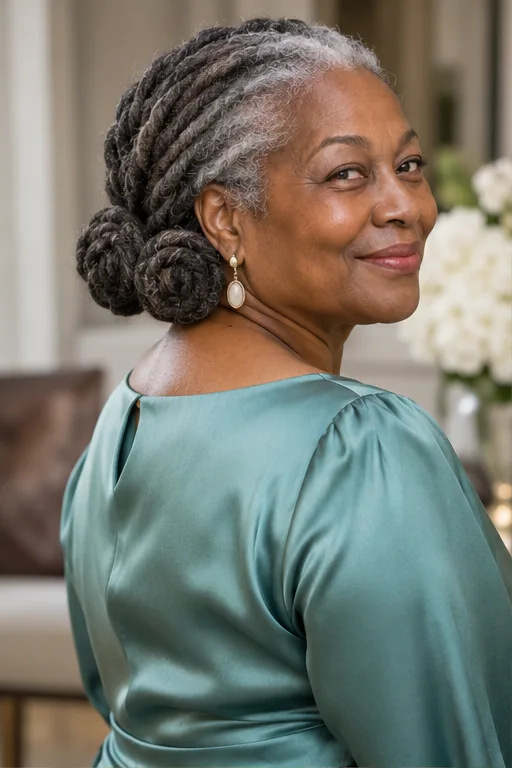
Divide the locs down the back and you get two flat coils at the nape, each holding half the length. The side-by-side shape spreads the bulk that would otherwise sit in one large bun, and the symmetry feels a little playful even with a simple center part. It’s worth trying if a single low bun feels bulky when you lean back, although you’ll want to check that neither coil presses into your collar. Ask for the coils to sit wide and flat, with the tips tucked under their own coil and the pins placed away from the center of the nape.
Ask your stylist for: Divide my locs down the back, then pin each half into its own flat low coil with the tips tucked.
10. The Vertical Loc Roll
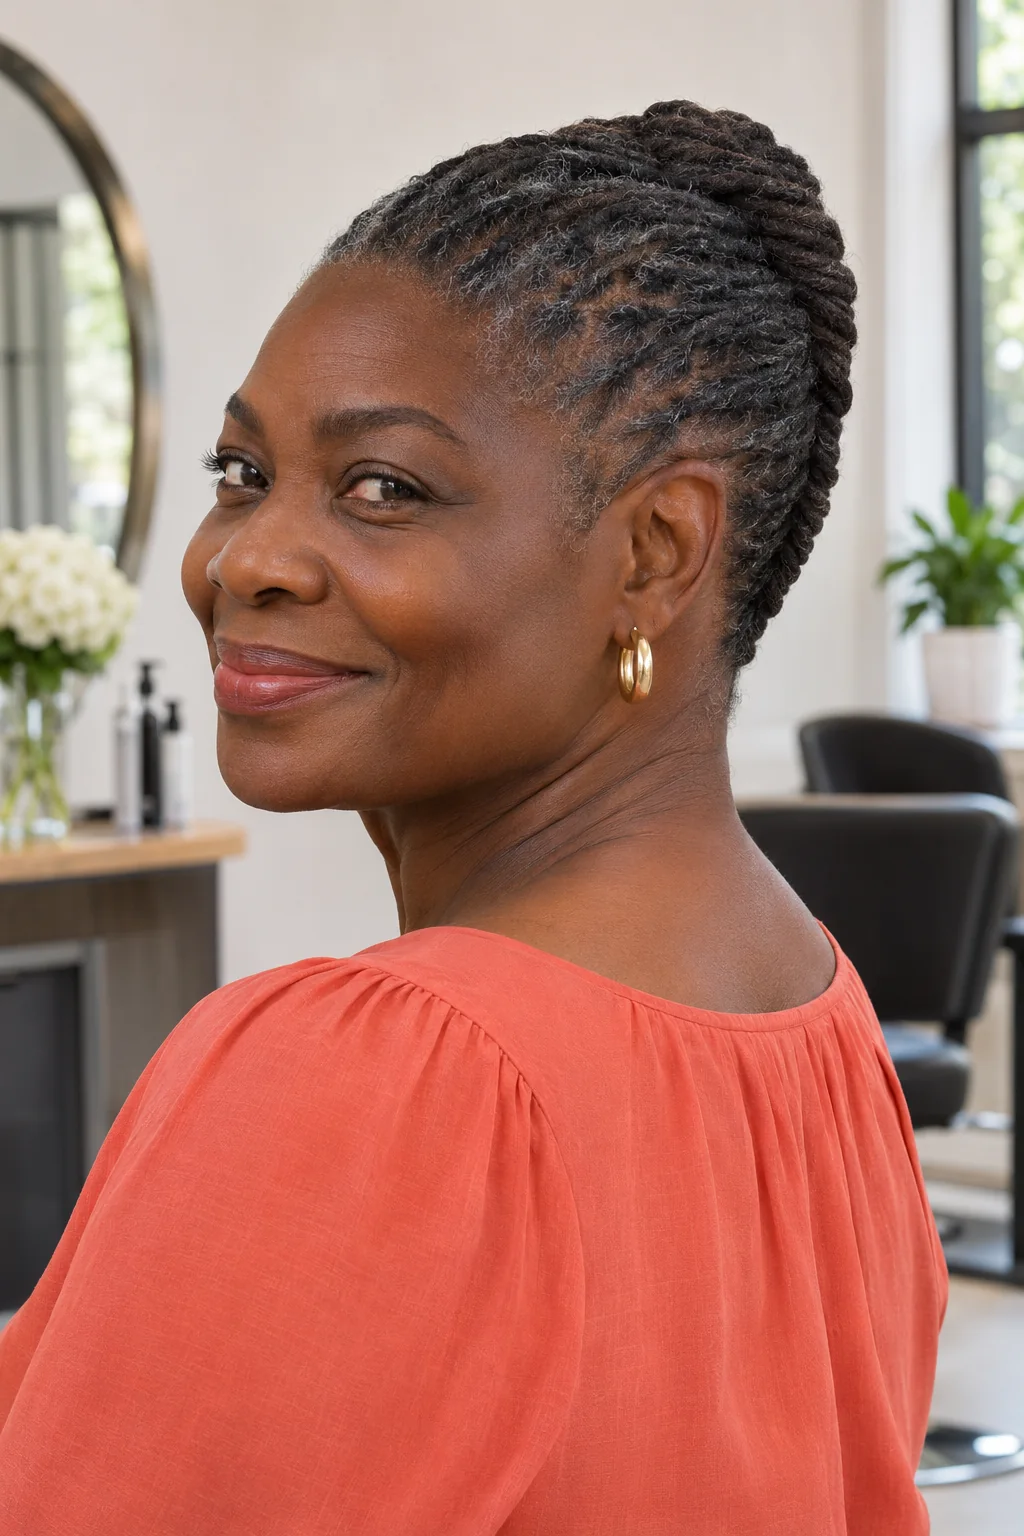
The long ends fold inward into a narrow roll that follows the back of the head from the nape upward. Its clean vertical line draws attention to your neck and makes a simple dress feel a touch more formal. Because the weight stays closer to the head than it would in a projecting bun, this can suit someone who likes an updo but dislikes the feeling of hair tipping backward. Ask your loctician to secure the roll at several points and tuck the ends inside, then tilt your head forward and turn it from side to side to check that it stays comfortable.
Ask your stylist for: Fold the length into one vertical roll close to my head and secure it in more than one spot.
11. Diagonal Barrel Twists With an Offset Coil
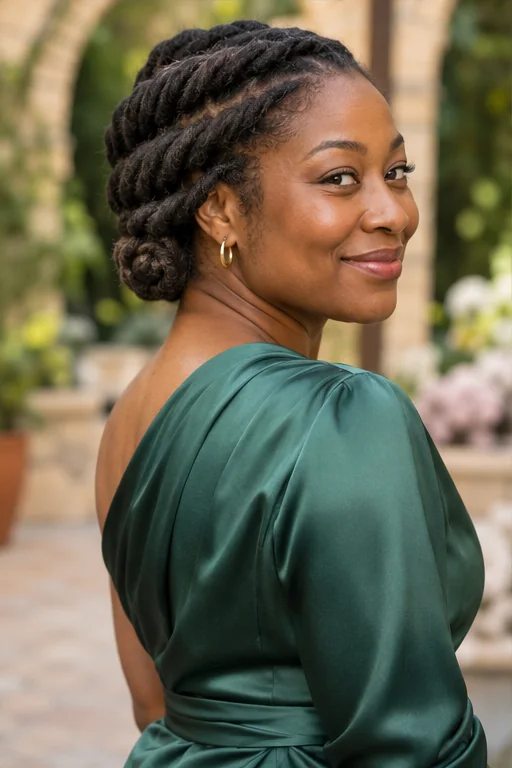
Three raised barrel twists take a diagonal path across the head before the ends gather in a low coil slightly to one side. The angled pattern makes the updo feel special from the front and gives you something to show in photos taken from the back. It’s a good salon choice for a formal event, particularly if you want the neck clear for a high collar or want to leave room for a hair comb. Tell your loctician where the comb will sit, ask for relaxed bases around the hairline, and check that the offset coil feels secure without pulling to one side.
Ask your stylist for: Use three loose diagonal barrel twists, gather the ends into an offset low coil, and leave my hairline relaxed.
12. A Stacked Crown Bun for Waist-Length Locs
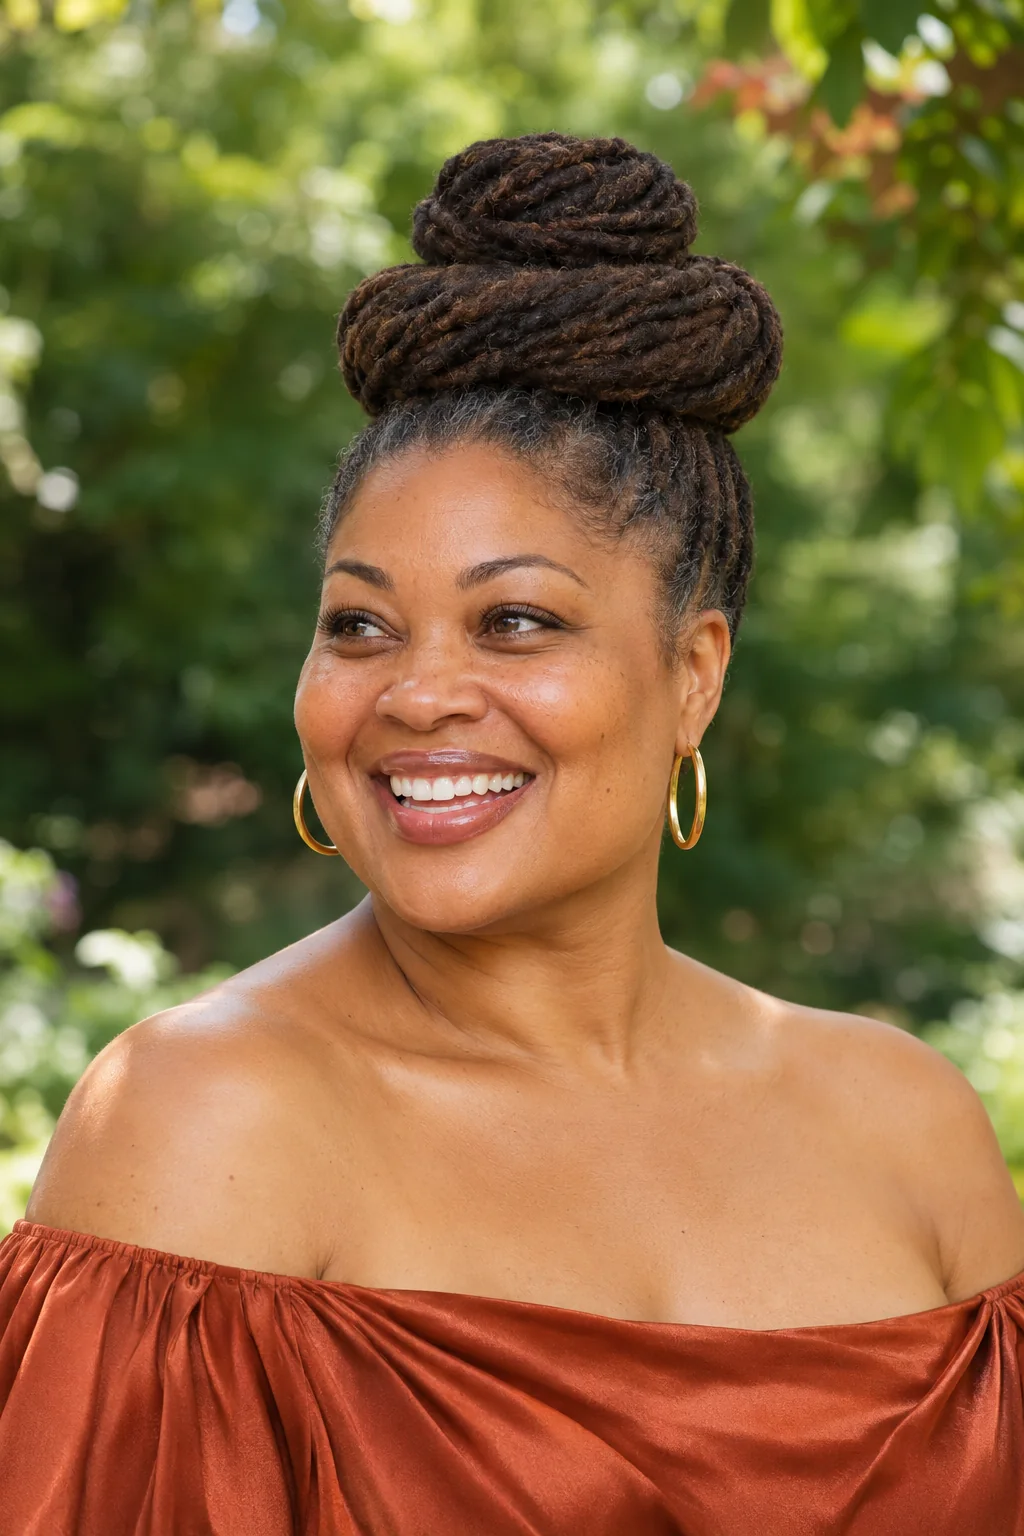
Waist-length locs can form a bun with two visible layers, a broad coil underneath and a smaller turn sitting on top. The height opens up the neck and shoulders, which makes the look feel especially celebratory with an off-the-shoulder neckline. It’s best for an occasion when you want that height and can take the style down if it starts feeling heavy. At the salon, ask to build a broad base directly over the crown, then secure the upper coil separately so one tie isn’t doing all the work. Try walking and looking down before adding a veil or decorative pin.
Ask your stylist for: Build a wide base over my crown, coil the remaining length on top, and secure both layers separately.
Before You Book the Appointment
A successful salon visit begins with the overall shape, construction and upkeep—not only the finished length. Use this quick reality check before choosing your final reference photograph.
- Small locs: Small groups are easier to tuck into a flat halo or roll. Keep them loose around the temples when you pin.
- Thick or dense locs: Try a broad base, two separate anchors or a partial updo if one high tie feels heavy.
- Chest length: Test a low wrap or half-up knot first. A full folded updo needs enough length to tuck the ends.
- Waist length: A single braid keeps the ends together. For all-up styles, try several support points and check the weight before leaving.
What to Ask Your Loctician
Show a front and back photo, then point to where you want the weight to sit. Bring your usual glasses, the hair accessory you plan to wear or a picture of your neckline. Say whether you want the ends loose, folded once or tucked completely inside the style. If a loc at your hairline feels taut before you leave, ask to loosen or release it.
Choosing a Long Loc Style for Work
Think about what your hair touches during the day. A folded ponytail can clear a standing collar. A low plait keeps the ends together if you move around a lot. If you sit against a headrest, try a side drape or half-up knot and see where it makes contact before you commit.
How Long Can You Keep a Loc Style In?
There’s no single wear time that suits every style. Take down a look that pulls, presses when you sleep or makes your scalp uncomfortable. Undo decorative pins gently and let damp locs dry throughout before wrapping them into a dense roll or bun. As the locs grow, check whether a softer tie or a lower anchor makes your favorite style easier to wear.
Start With the Length You Have
Pick one photo for the front and another for how you want the back to work. If your ends stop above the shoulders, look for a short-loc style with its own way of holding the tips. For a smaller-diameter loc pattern, Sisterlocks styling can offer different options for how to group the length.
More Hair Inspiration
- Short Loc Hairstyles — Find options for locs that end above the shoulders.
- Sisterlocks Hairstyles for Women Over 50 — See ways to arrange smaller Sisterlocks at several lengths.