If you love how a pixie opens up your face but keep saving photos of hair that flicks at the back, a pixie mullet gives you both. The smallest change at the nape can make the shape feel more playful, and a look at the profile will tell you how far you want to take it.
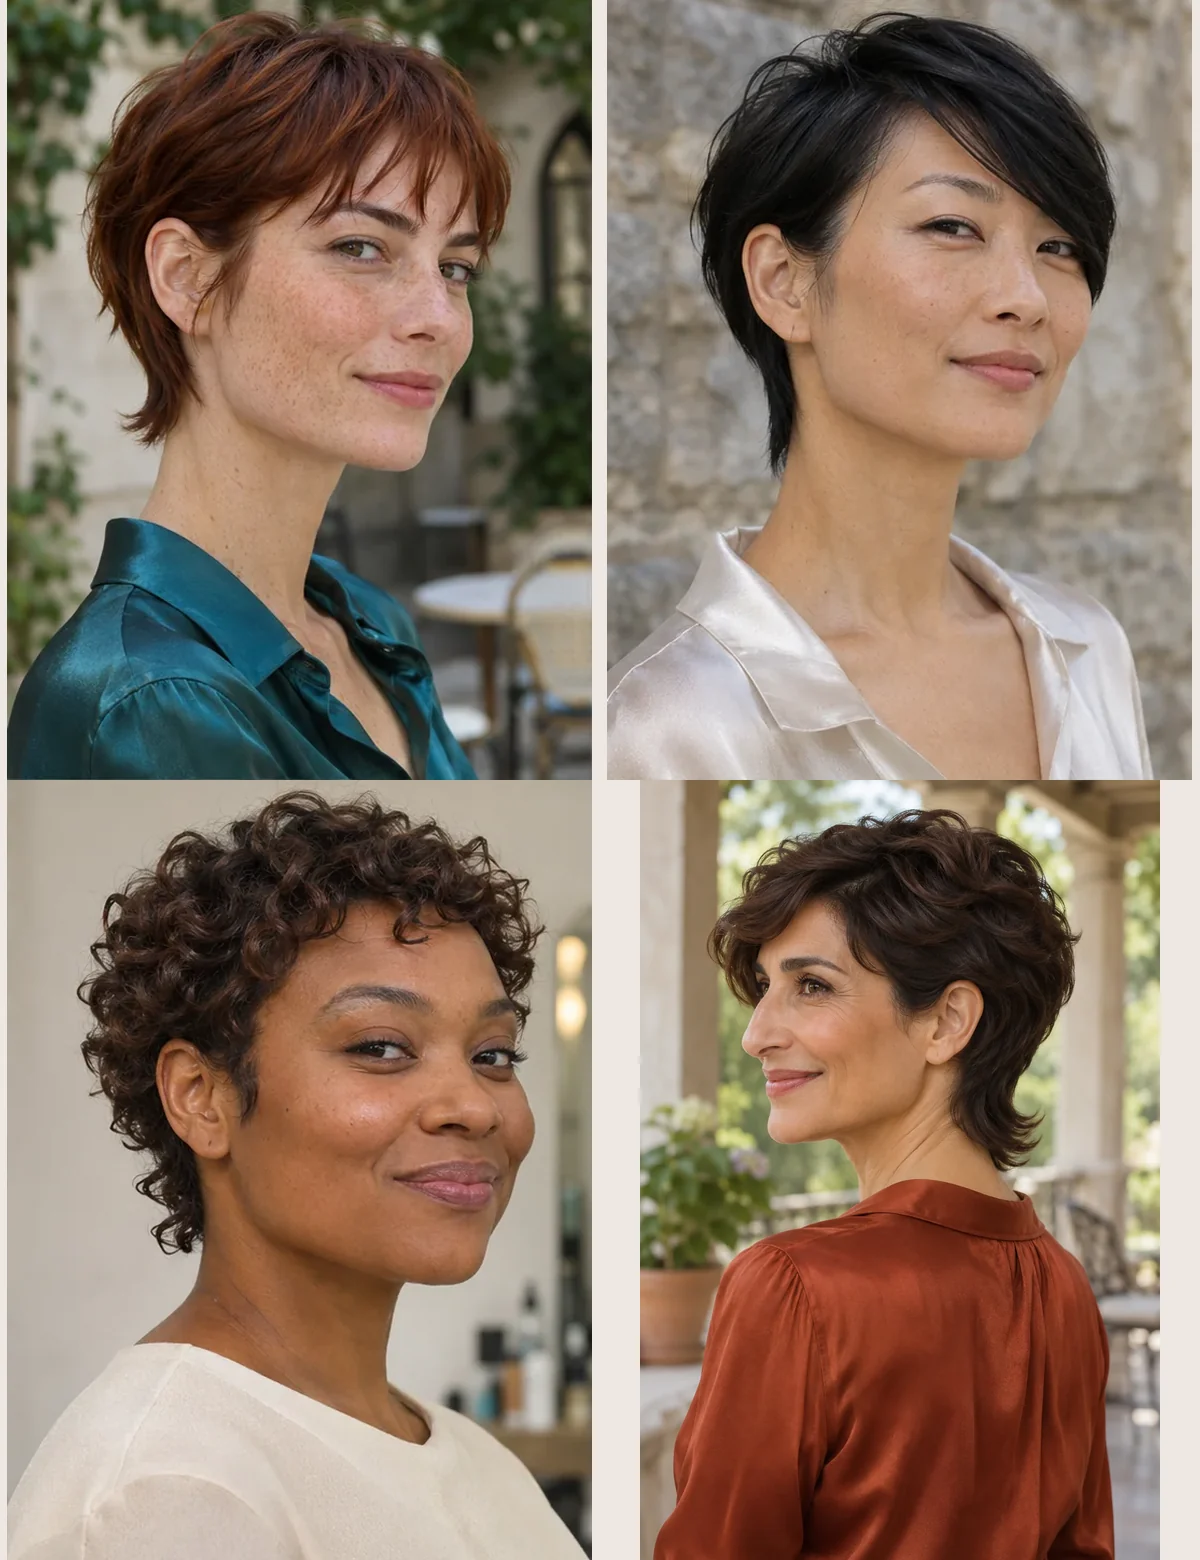
A pixie mullet, also called a mixie, has a pixie-length crown and short sides with a visibly longer section at the nape. A classic pixie usually tapers into the neckline. A bixie keeps more bob-like weight around the ears, and a full mullet often has a longer back with more length contrast. The mixie stays compact overall, even when you let the back curve toward your neck.
Find the one that feels like you: Start with the first look and let the photographs lead. Each style explains how the shape affects your features, the mood it creates and the exact words to take to your stylist.
Quick Facts
- Use a profile photo to show where you want the longest point to land.
- Decide how much of the ear to expose, especially if you wear glasses.
- Check the fringe and nape dry if either area has a strong growth pattern.
1. Soft Sideburns and a Short Nape
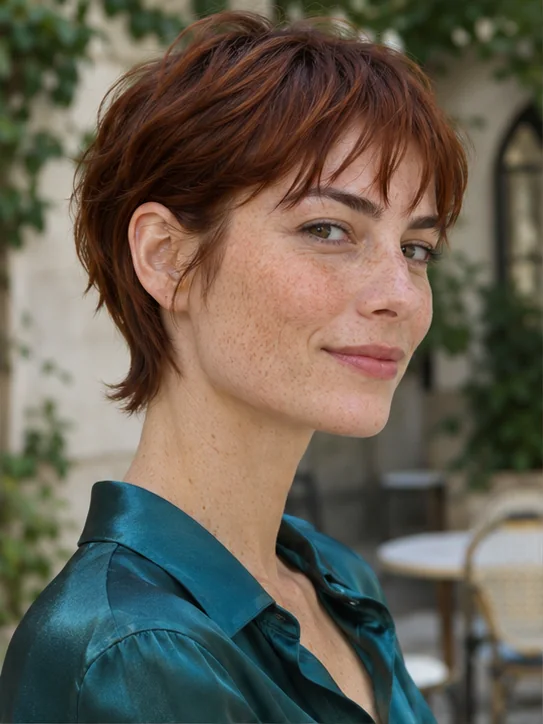
A broken brow fringe and two slim sideburns soften the front of this chestnut crop, while a small flick behind the ear gives the profile a little surprise. The open sides keep your cheekbones and earrings in view, and the short extension gives the cut a playful edge that still feels easy to wear to work. It suits straight or gently wavy hair that falls close to the head, though a strong nape cowlick may need extra length to settle. Work a dab of light paste into the dry tips, then tell your stylist to leave a soft inch at the nape and cut the fringe into small, uneven pieces.
Ask your stylist for: Leave slim sideburns and a soft one-inch nape extension. Expose the ear and break up the fringe at the brow.
2. The Side-Swept Pixie Mullet
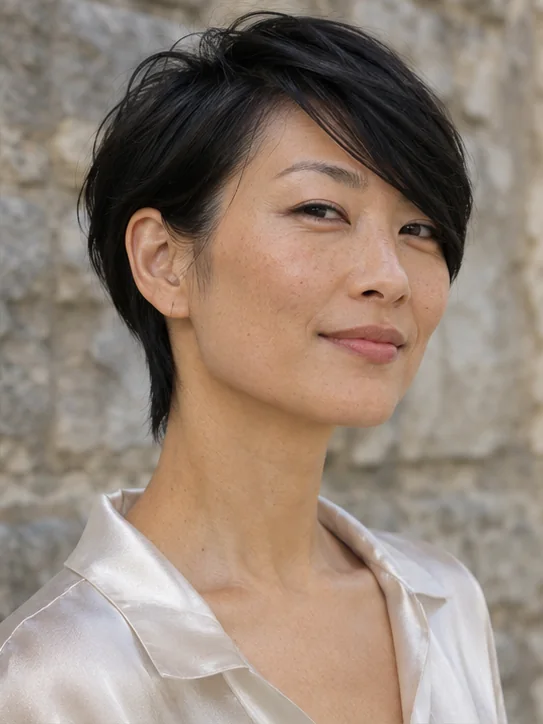
A long diagonal fringe gives this dark pixie mullet a sweeping line from the part toward one cheekbone. With the other ear clear and the back narrowing into a short extension, the cut keeps its little kick from the side, even when the front feels dressed up. Choose it if you like the feeling of hair moving across your forehead or want a softer frame around a broad brow, and be prepared to reset the part if you sleep on it. Dry the fringe across your forehead with your fingers and ask for enough length to sweep past the outer brow, with one clean ear and a narrow nape.
Ask your stylist for: Keep the fringe long enough to sweep across my forehead. Tuck one side close above the ear and leave a narrow nape extension.
3. Loose Waves With a Feathered Nape
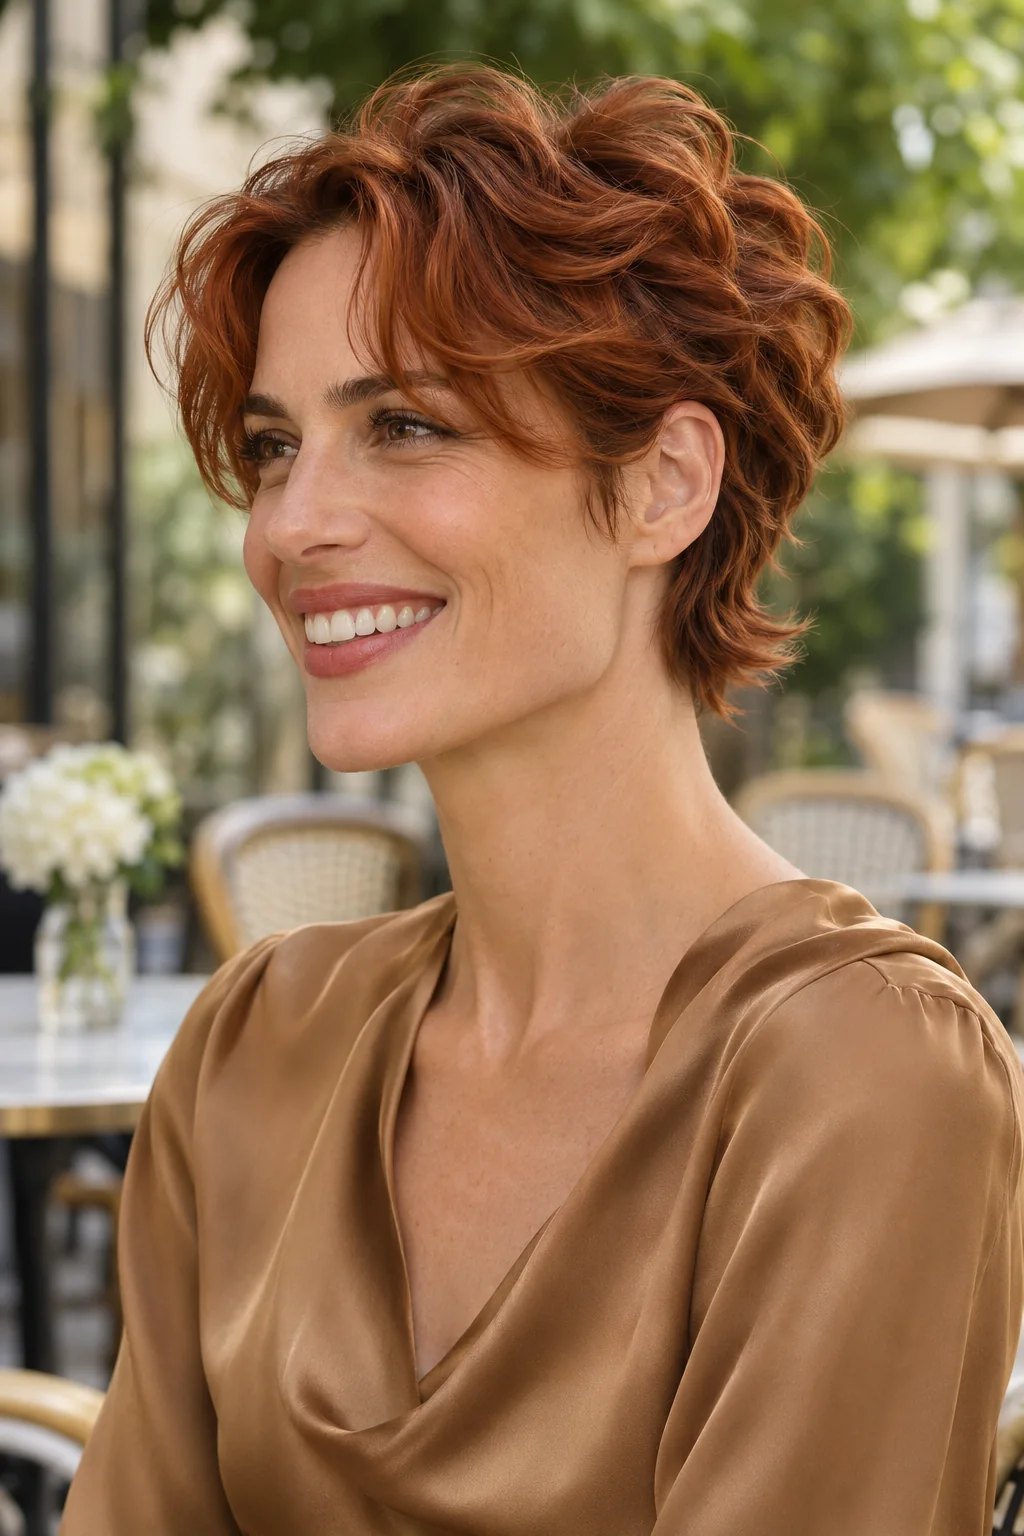
Loose copper waves make a soft ridge across the crown and turn outward at the base of the neck. The parted fringe and visible ears break up the width, so you get the lively feeling of a tousled cut without a curtain of hair around your cheeks. This shape works especially well if your natural wave needs a little length to appear, and the nape can flip in different directions from one wash to the next. Scrunch in a small amount of foam and leave the bends alone until dry. Ask for a full wave through the top and a feathered nape that lands below the short side sections.
Ask your stylist for: Keep enough length on top for a full wave, clear the tops of my ears and leave a feathered, outward-bending nape.
Pause and notice: If two photos look almost identical from the front, compare the space above the ear and where the back ends. Those details make the difference when your hair is tucked or you turn your head.
4. Springy Curls With a Rounded Crown
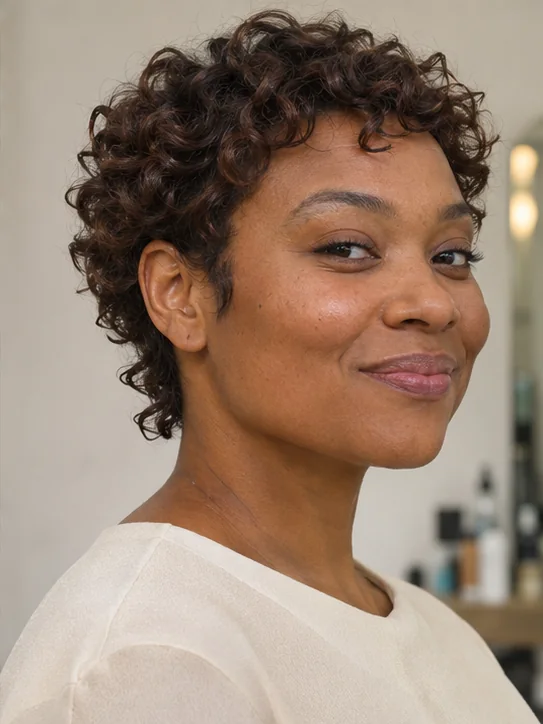
A cluster of ringlets rounds out the crown, then drops into a few longer curls at the nape, where you can see the shift in length from the side. Keeping the hair above the ears short shows the cheekbones and makes the curl shape feel buoyant, even on a day when you only have time to dampen the front. The nape will jump up as it dries, especially if the curls there are tighter than the ones on top. Refresh those back pieces with wet fingers and ask your stylist to set the ear line and nape length while your curls are dry in their usual finish.
Ask your stylist for: Shape the crown and nape in my usual dry curl pattern. Show the tops of the ears and leave two or three longer curl groups in back.
5. Silver Crop With a Soft V at the Nape
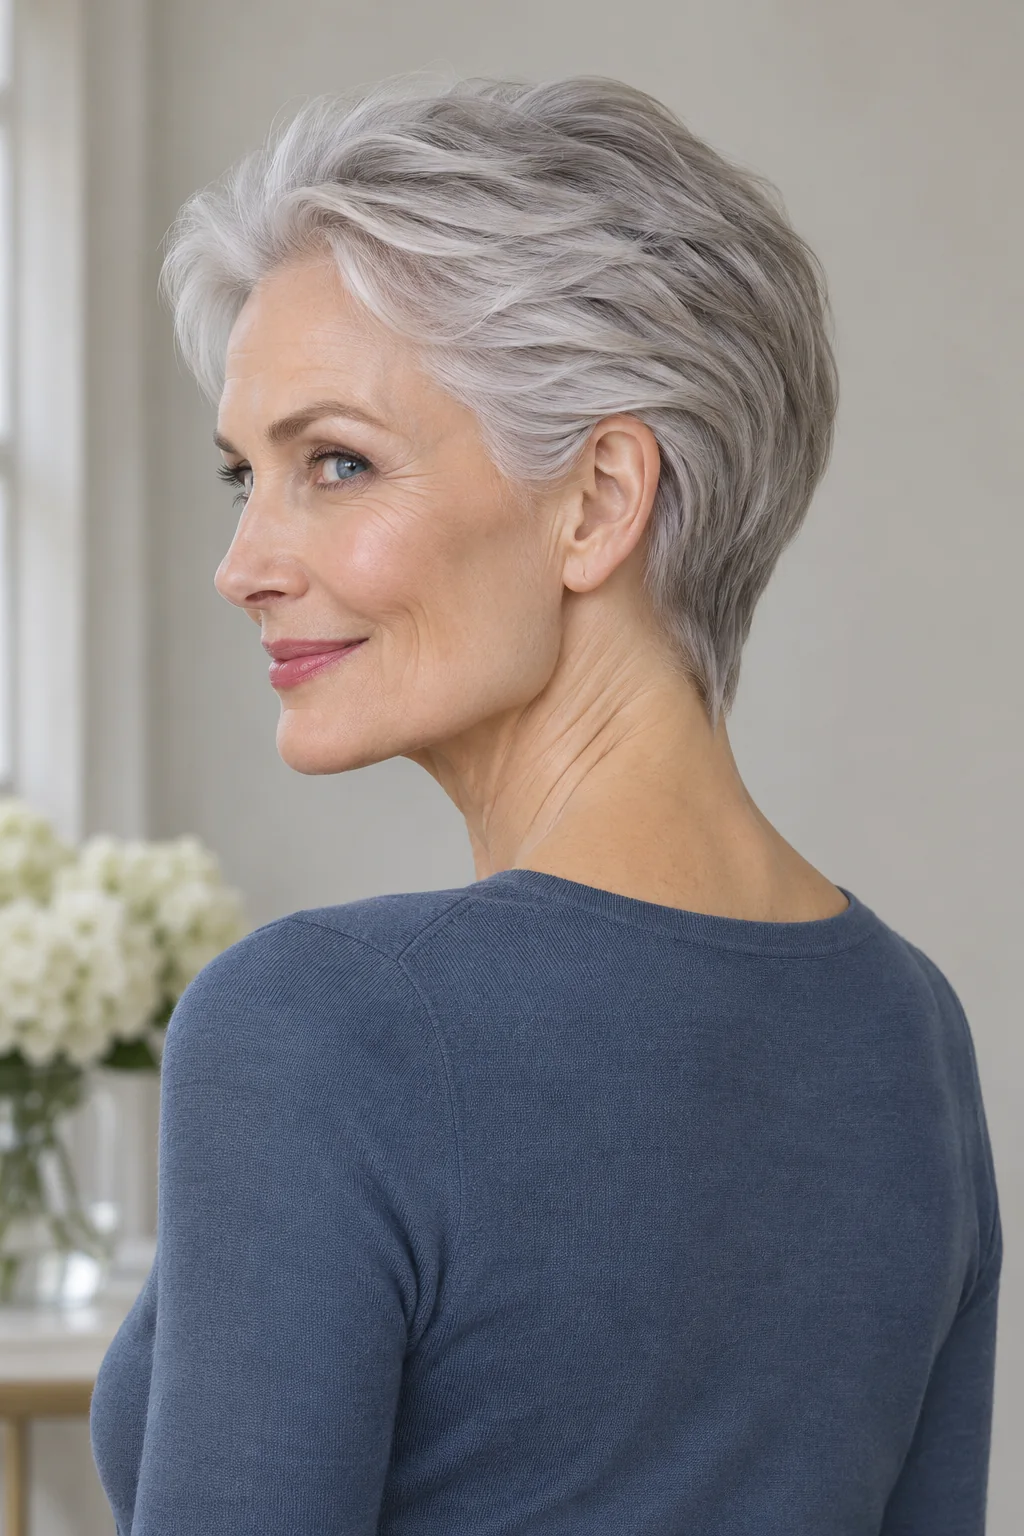
Silver layers brush back from the temples and converge into a small, soft V at the nape. The lifted front makes room for your glasses or earrings, and the neat point at the back gives a familiar short cut just enough character to feel new. It suits hair with enough density to support the swept shape, but a rigid finish can make the longer tips look stiff. Dry the temple layers back with a small brush and finish with a touch of flexible cream. At the salon, ask to keep the crown substantial and taper the back into a soft V that you can see in the hand mirror.
Ask your stylist for: Sweep the temple layers back, keep some crown density and leave a small soft V at my nape.
6. Micro Fringe With Close Temples
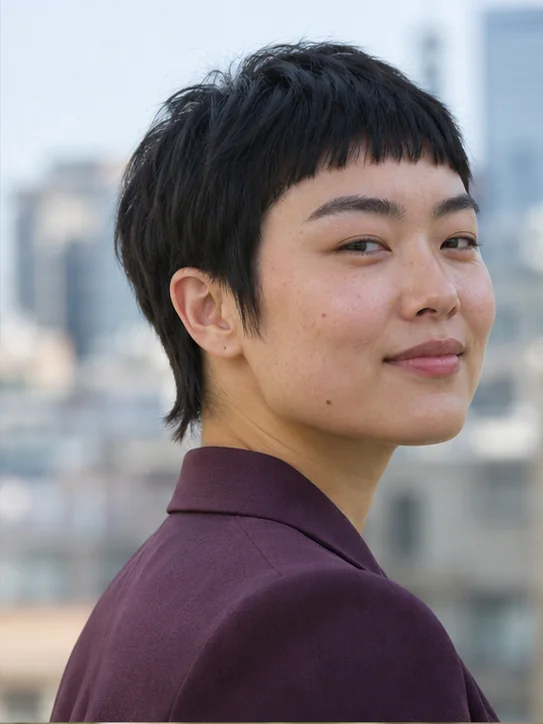
An above-brow fringe puts a clean horizontal line across the forehead, while close-cut temples leave the full outline of the ear visible. The slim nape tail breaks up that precision and makes the profile feel a little rebellious, especially if most days you wear the same simple clothes. Straight hair shows the lines clearly, though a strong front cowlick makes the shortest fringe a bigger commitment. Smooth the fringe downward with your fingertips while it dries and schedule a small fringe cleanup when the line starts to feel heavy. Ask for close scissor work at the temples, with the final fringe length set dry.
Ask your stylist for: Keep the temples close with scissors, leave the ear bare and keep a slim nape tail. Set the fringe above my brows after it dries.
Pause and notice: A fringe changes the routine as much as the look. Think about how you wear it the morning after a wash, when your usual part or cowlick has had time to settle.
7. A Choppy Crown With Light Ends
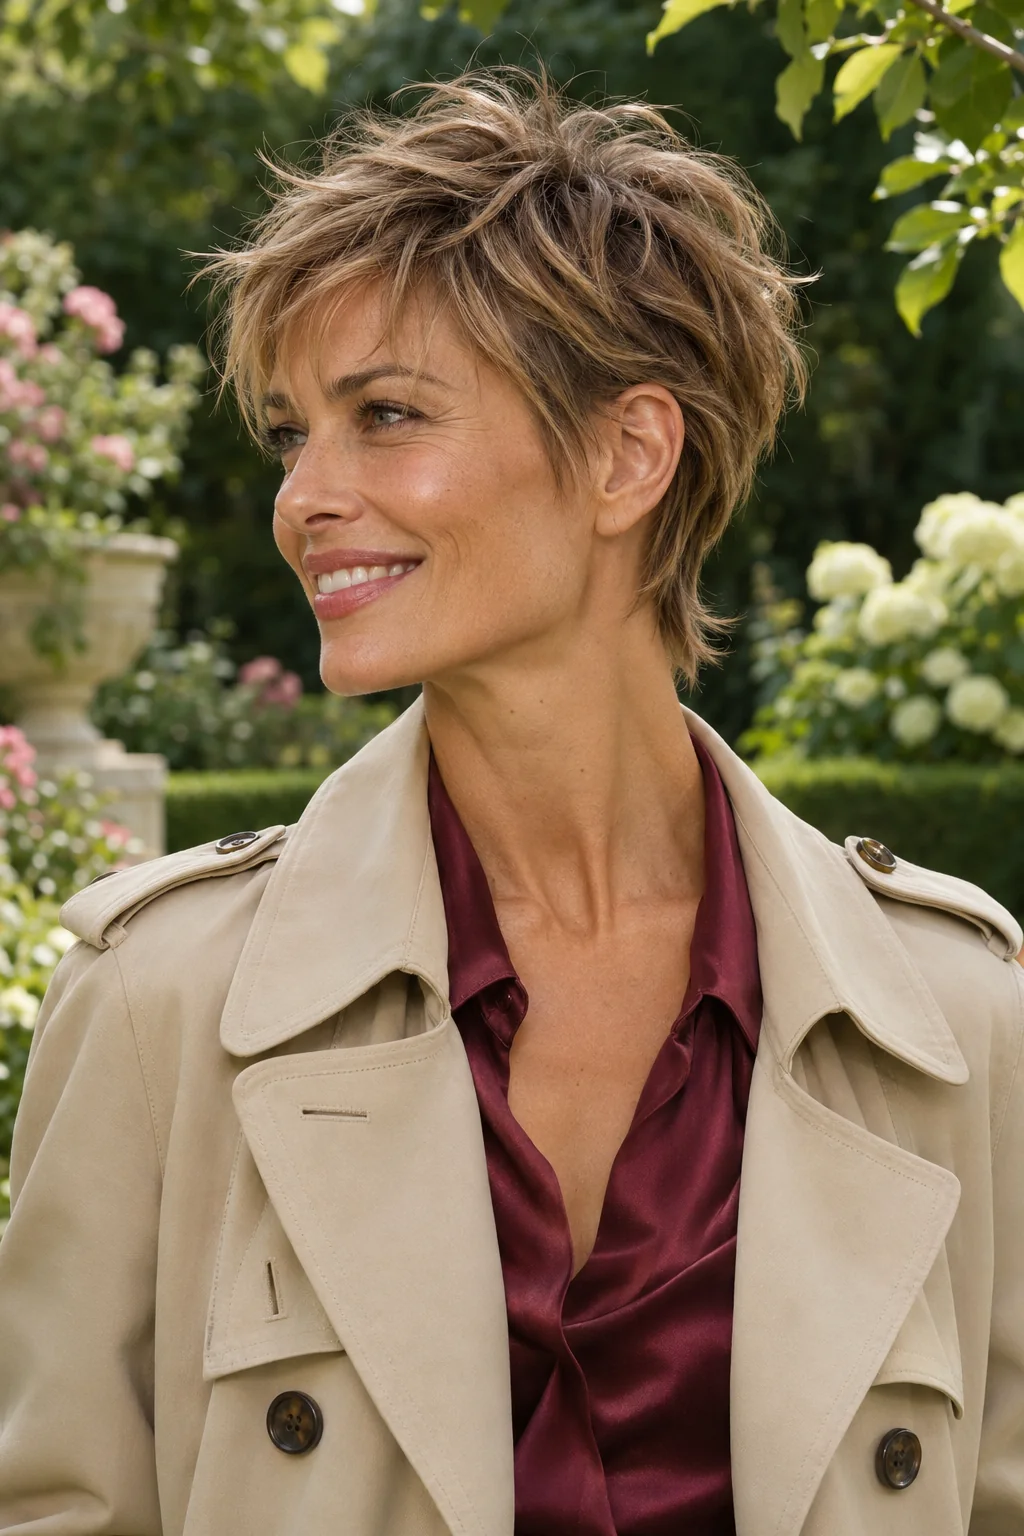
Dark blonde layers rise in little groups at the crown and settle into an airy fringe, with two or three light pieces visible at the back of the neck. The lift brings the eye upward, so a crop that usually dries close to your head can feel livelier without asking you to build volume from scratch every morning. If your hair is fine, the back still needs enough density for the outline to show. Dry the roots against their usual direction and pinch the ends with a speck of dry paste. Ask for point-cut separation at the top and a nape that stays full enough to see from the side.
Ask your stylist for: Point-cut the crown and fringe for separation, but leave enough density through the nape for the outline to read.
8. The Longer Grow-Out Mixie
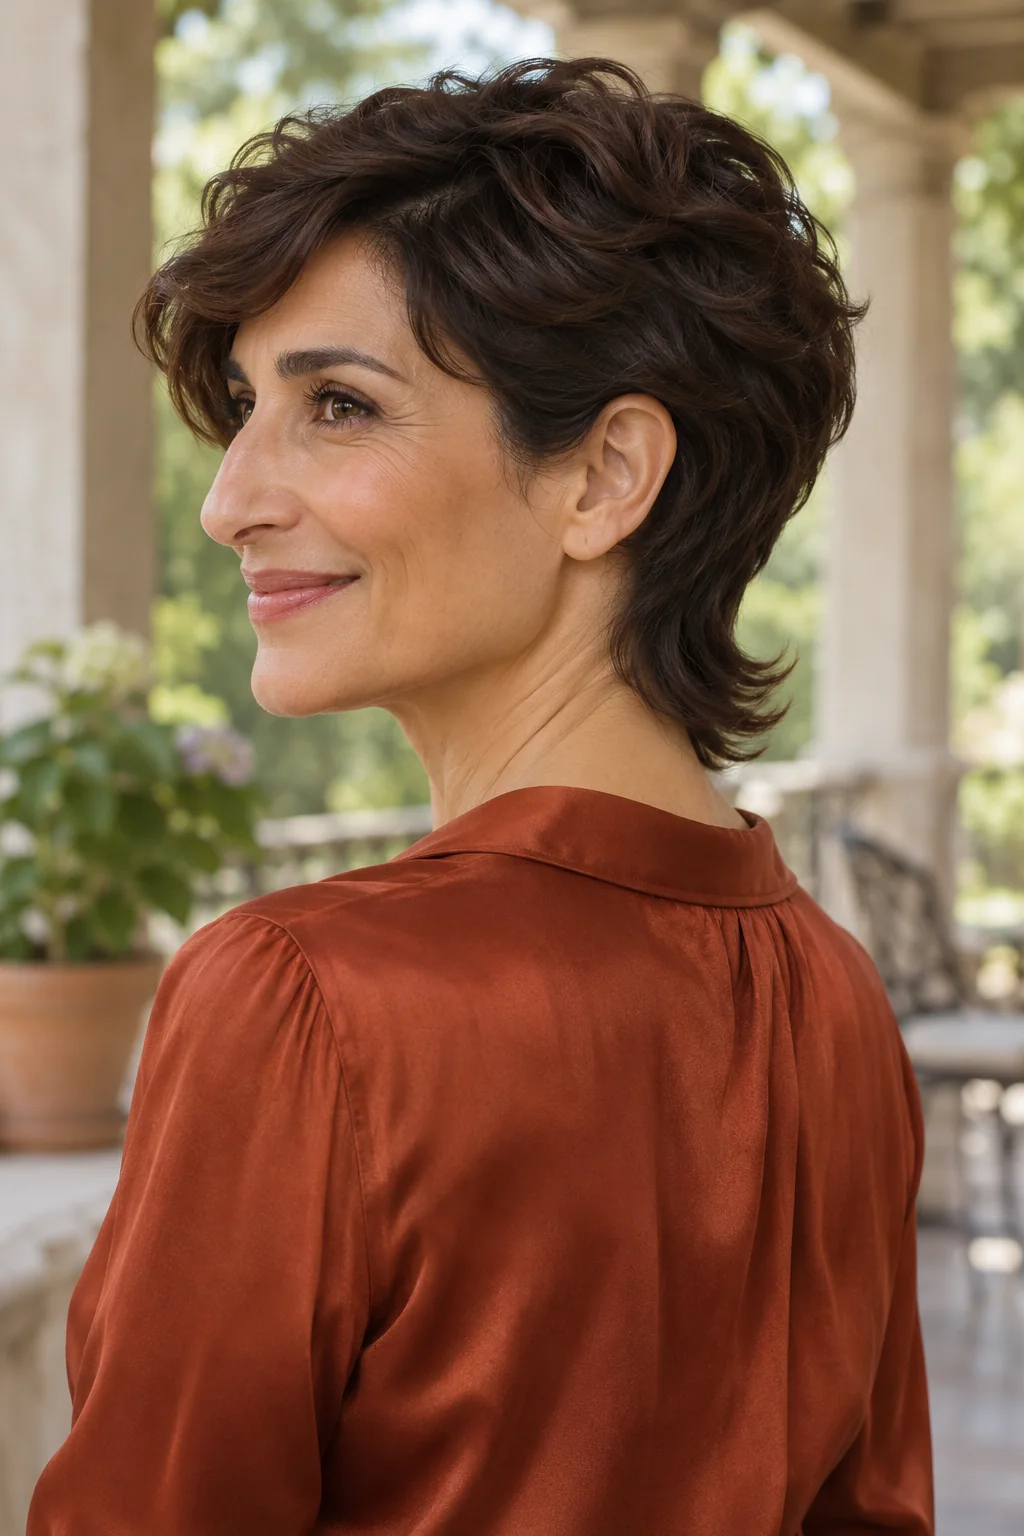
If your pixie is already growing down your neck, a longer mixie can make that stage feel deliberate. Here, the brunette nape curves toward the upper neck and the sides still sit close above the ears, leaving a clear change in length you can see from behind. The side-swept front keeps your eyes in view, and the longer back gives you something new to enjoy while you wait for the top to catch up. Use a little styling cream to guide the back into its natural bend after a shower. At your next trim, ask to tidy over the ears while keeping the crown length you’ve grown.
Ask your stylist for: Leave the back long enough to curve toward my upper neck, tidy over the ears and keep the crown length I have grown.
9. Pixie Mullet With a One-Sided Undercut
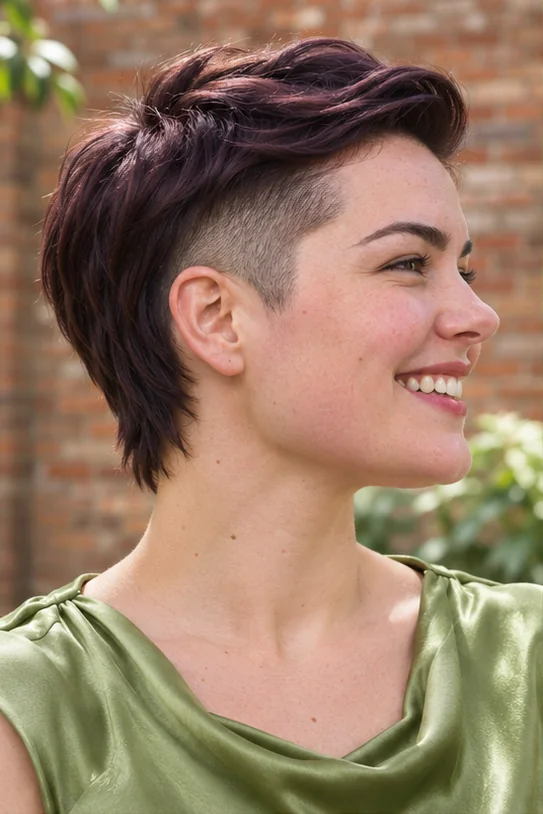
A low clippered panel above one ear puts a sharp line under the longer plum-brown crown, and the short, piecey nape keeps the back in view. That clear strip of space can make dense sides feel lighter around glasses or earrings, and the asymmetry feels bold even when you leave the top to dry on its own. If you like a clean panel, plan on a side cleanup sooner than you would with a scissor-cut temple. Smooth the top away from the clipped side to show the contrast, and ask for the opposite side to stay scissor-cut so you keep a softer profile on that side.
Ask your stylist for: Clipper one low panel above my ear, leave the other side scissor-cut, and keep the nape visibly longer with a piecey edge.
10. Tapered Pixie Mullet for Tight Coils
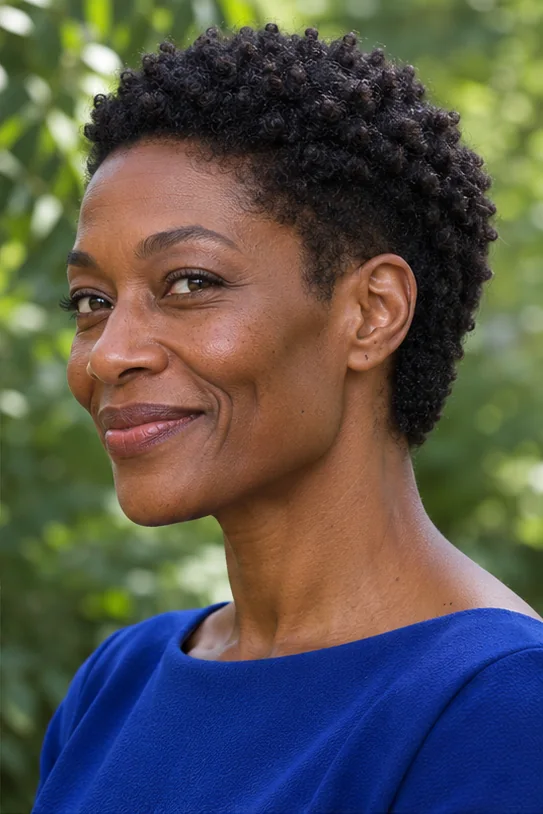
Tight coils sit close and rounded on top, with a clean taper over the ears and a fuller band of coils at the nape. The close sides open up your cheekbones, while the weight in back gives you a playful profile that still feels neatly shaped on a wash-and-go day. This is a useful reference if your nape shrinks more than your crown, because an evenly short cut can lose the difference as it dries. Refresh the back with damp fingertips and let it settle before adding more product. Ask your stylist to keep the lower band dense enough to read from the side and check the length dry.
Ask your stylist for: Taper close above my ears, keep a compact crown, and leave a dense band of coils at the nape. Check where it lands dry.
Before You Book the Appointment
A successful salon visit begins with the overall shape, construction and upkeep—not only the finished length. Use this quick reality check before choosing your final reference photograph.
- Fine hair: Keep enough hair at the nape to see the longer outline and use a few well-placed crown layers.
- Straight hair: A sharp fringe or slim tail reads clearly. Ask how the nape grows before choosing the shortest version.
- Waves and curls: Choose the length where each section falls dry. The nape can shrink differently from the crown.
- Growing out a pixie: Preserve crown length and tidy around the ears so the extra length in back looks intentional.
What to Show Your Stylist
Bring a front and profile reference and point to the exact length you want behind the ear. Say whether you want the nape to end in a soft point, separate into pieces or curve across the neck. Show how your fringe normally falls, especially if you have a cowlick or tend to tuck one side.
Styling the Fringe and Nape
For straight hair, let the crown cool after lifting the roots, then put a little flexible product on the tips. If you have waves or curls, use your usual hold product while the hair is damp and let the nape finish drying before you decide whether it needs reshaping. Keep the product light around the ear so the shorter pieces keep their separation.
How to Keep the Shape or Grow It Out
If the ear starts disappearing or the nape turns into a heavy block, book a small cleanup. For grow-out, ask to keep the crown and trim only the perimeter that feels untidy. Once you have more side length, decide whether you want to keep the difference at the nape or let the sides catch up for a bixie.
The Takeaway
Choose the profile you would enjoy seeing in the mirror when you tuck your hair behind an ear. Take that photo plus one that shows the fringe you want, and ask your stylist where each will land with your usual dry texture.
More Hair Inspiration
- Modern Mullet Haircuts for Women — Compare longer backs and stronger shifts in length.
- Bixie Haircuts for Women — See how bob-like weight changes the shape around the ear.