A pixie can feel beautifully dressed even before you choose an outfit. A smooth sweep, a clean outline around the ears or one carefully shaped wave brings the haircut into focus, leaving your face open and your morning a little more intentional. The trick is choosing a polished finish that works with the hair you actually have.
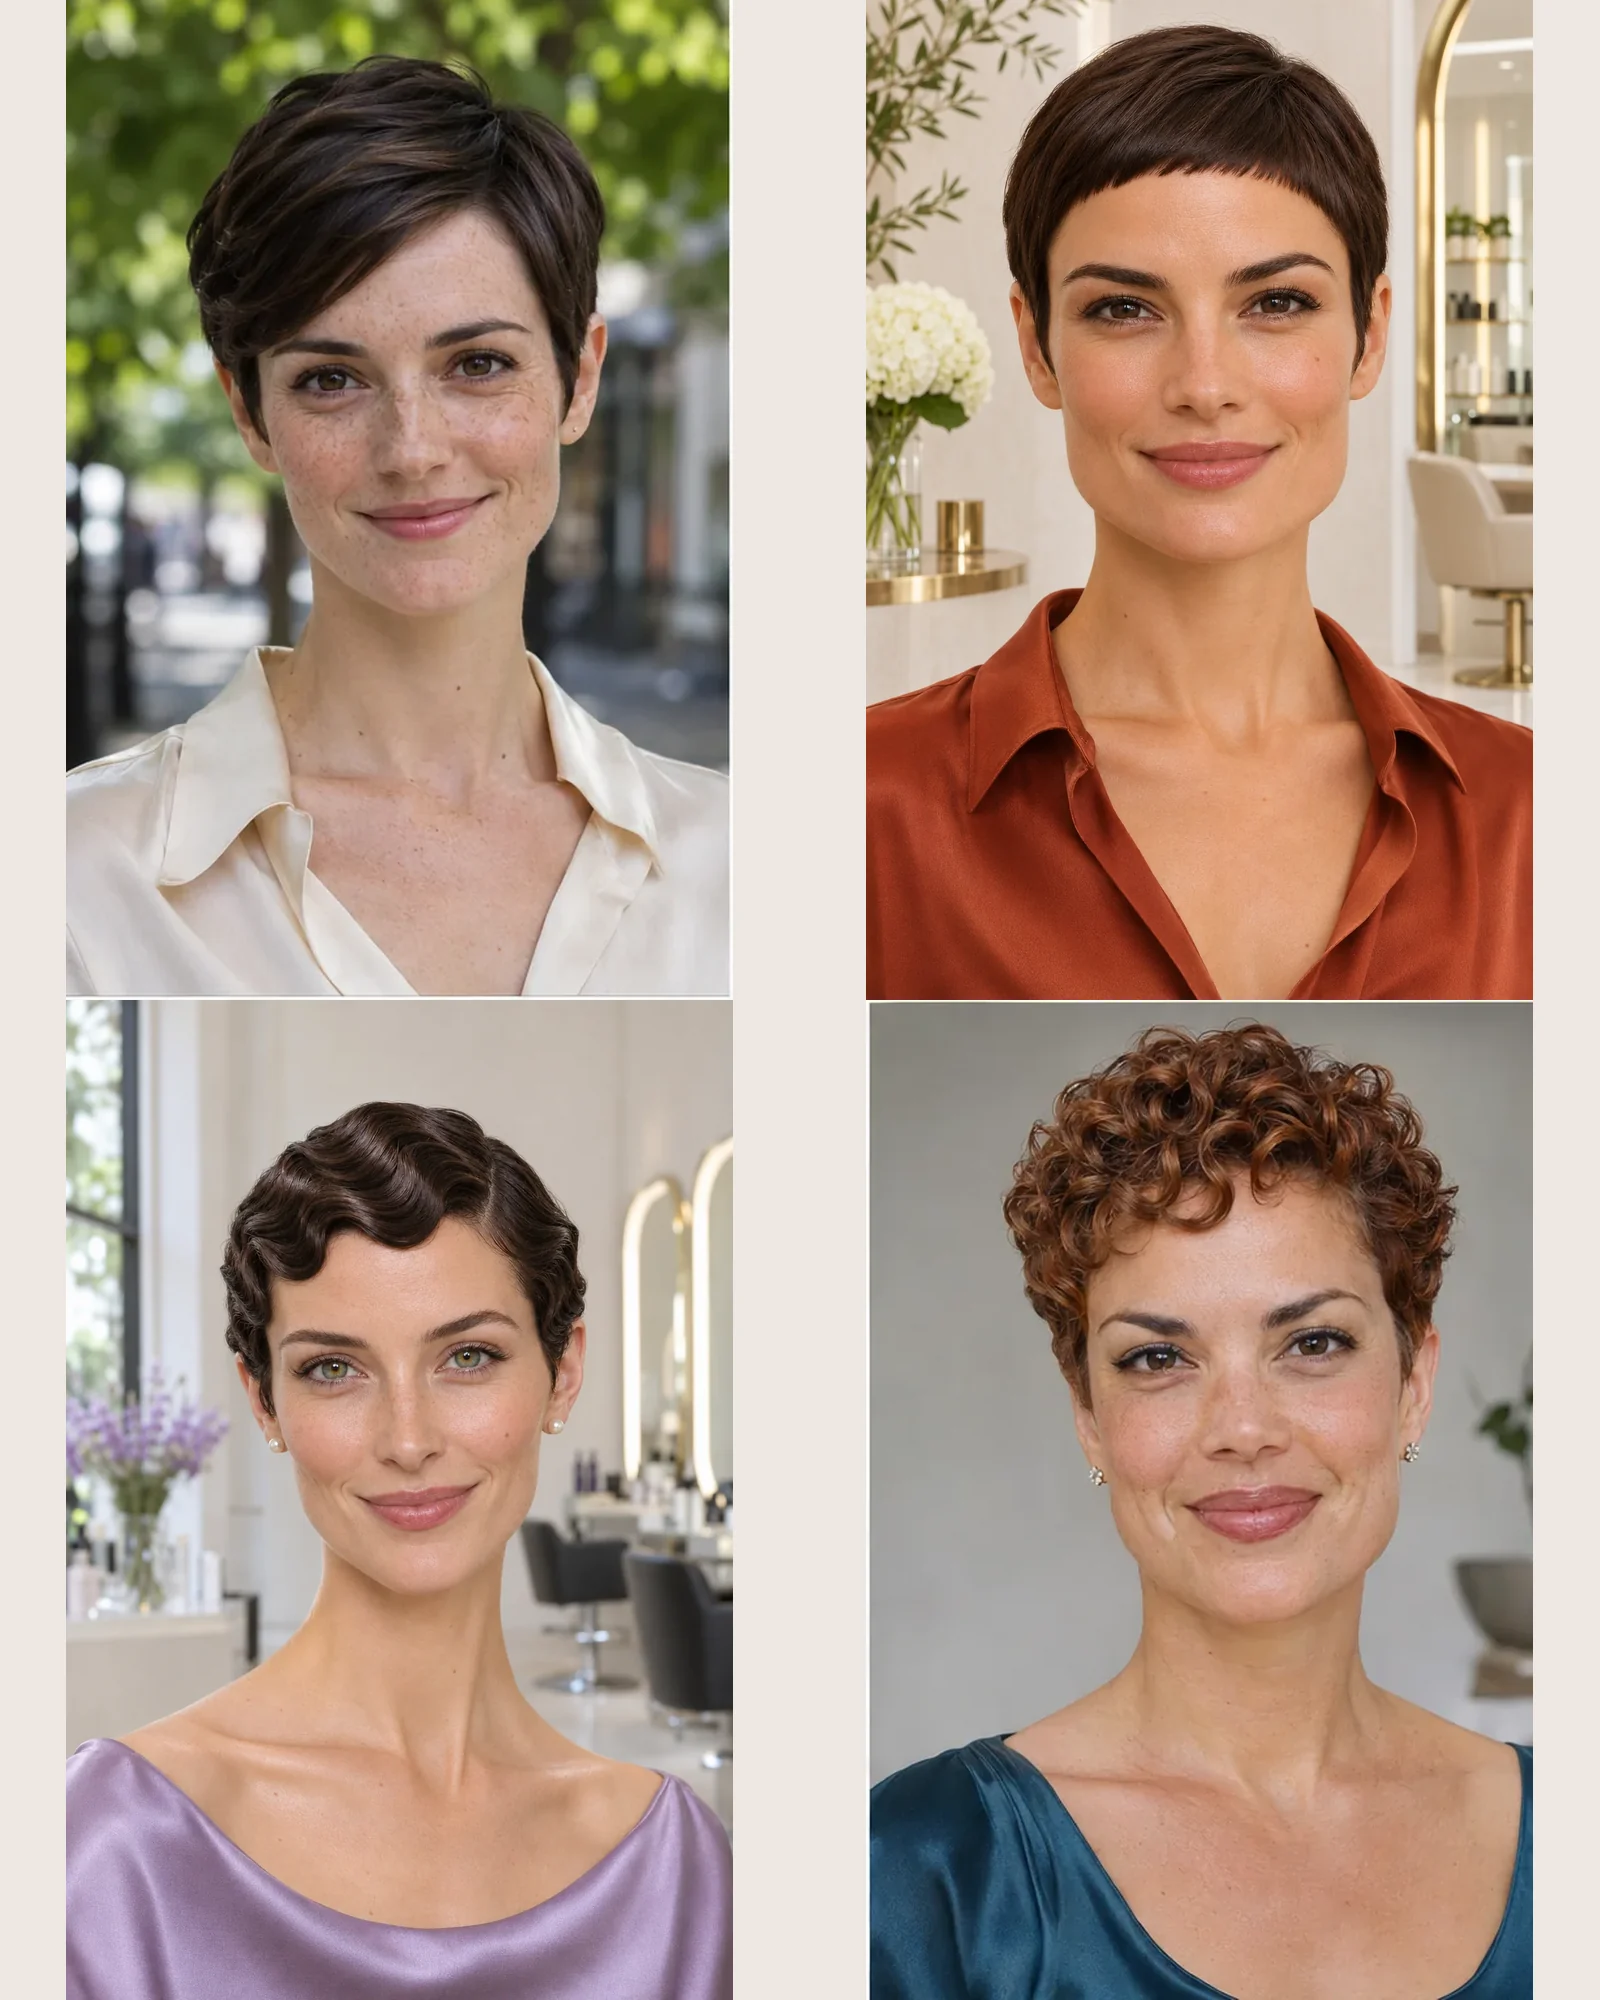
A polished pixie is a pixie haircut worn with a controlled outline and deliberately arranged surface. The sides and nape stay compact, while the top may sweep, curve, lift or form defined curls. Polished describes the finish rather than one standardized cutting technique: it does not have to mean flat, shiny or perfectly straight. A bixie carries more bob-like length and weight around the ears; a shaggy pixie relies on more visibly broken, tousled layers. These versions keep the pixie silhouette clear while showing different ways to make the top feel composed.
Find the one that feels like you: Start with the first look and let the photographs lead. Each style explains how the shape affects your features, the mood it creates and the exact words to take to your stylist.
Quick Facts
- Choose the direction of the fringe around your natural part and cowlicks.
- A smooth finish can keep movement; heavy product is not a requirement.
- Short drying time does not remove the need for styling and regular shape checks.
- Bring a front and side reference so your stylist can see the ear contour and nape.
1. The Smooth Side-Swept Pixie
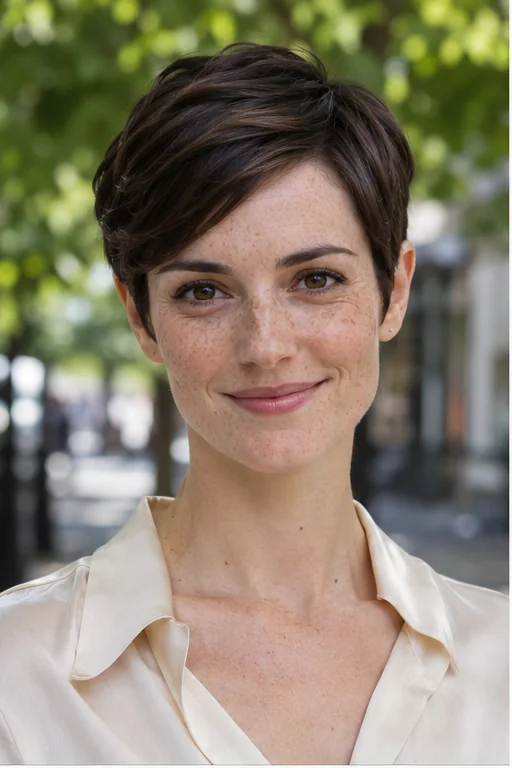
A smooth diagonal sweep crosses the forehead while the dark sides sit neatly above the ears. That gentle slant draws attention toward the eyes and softens the impression of a square jaw, making the cut feel composed enough for a presentation without looking stiff afterward. It suits straight or lightly wavy hair with a reliable side part, although a strong front cowlick may change where the sweep settles. Dry the fringe across its final direction first, then guide it into place with a small brush. Ask for a connected pixie with a compact nape and enough top length to make one continuous sweep.
Ask your stylist for: Keep a connected pixie with a compact nape and enough top length for one smooth diagonal sweep.
2. The Soft Brushed-Back Pixie
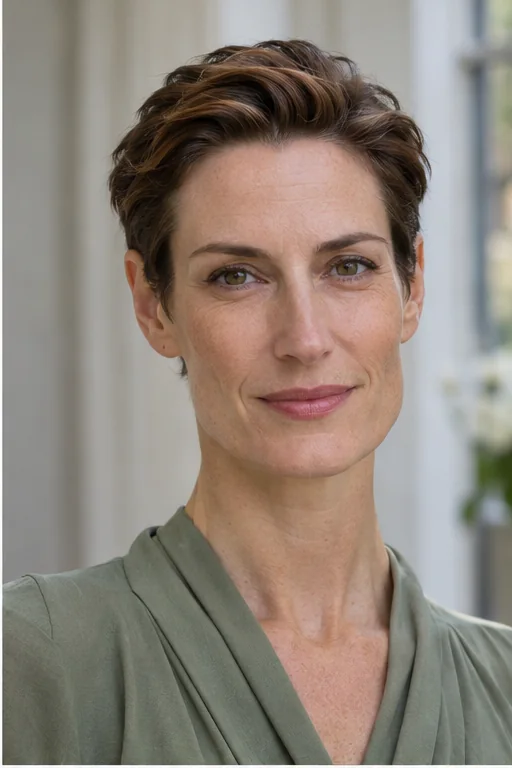
Brushing the chestnut top backward opens the forehead and leaves a soft curve over the crown. The uncluttered front brings brows and cheekbones forward, which can feel quietly confident when you want your face, earrings or favorite neckline to take the lead. This is easiest when the front hairline accepts backward movement; hair that grows firmly forward may need more daily coaxing than the photograph suggests. Use a little light styling cream on damp hair and direct the roots back before smoothing the surface. At the salon, request connected top length with low lift and closely blended scissor-cut sides rather than a tall pompadour.
Ask your stylist for: Leave enough connected top length to brush backward with low lift, blending into close scissor-cut sides.
3. The Small Sculpted Quiff
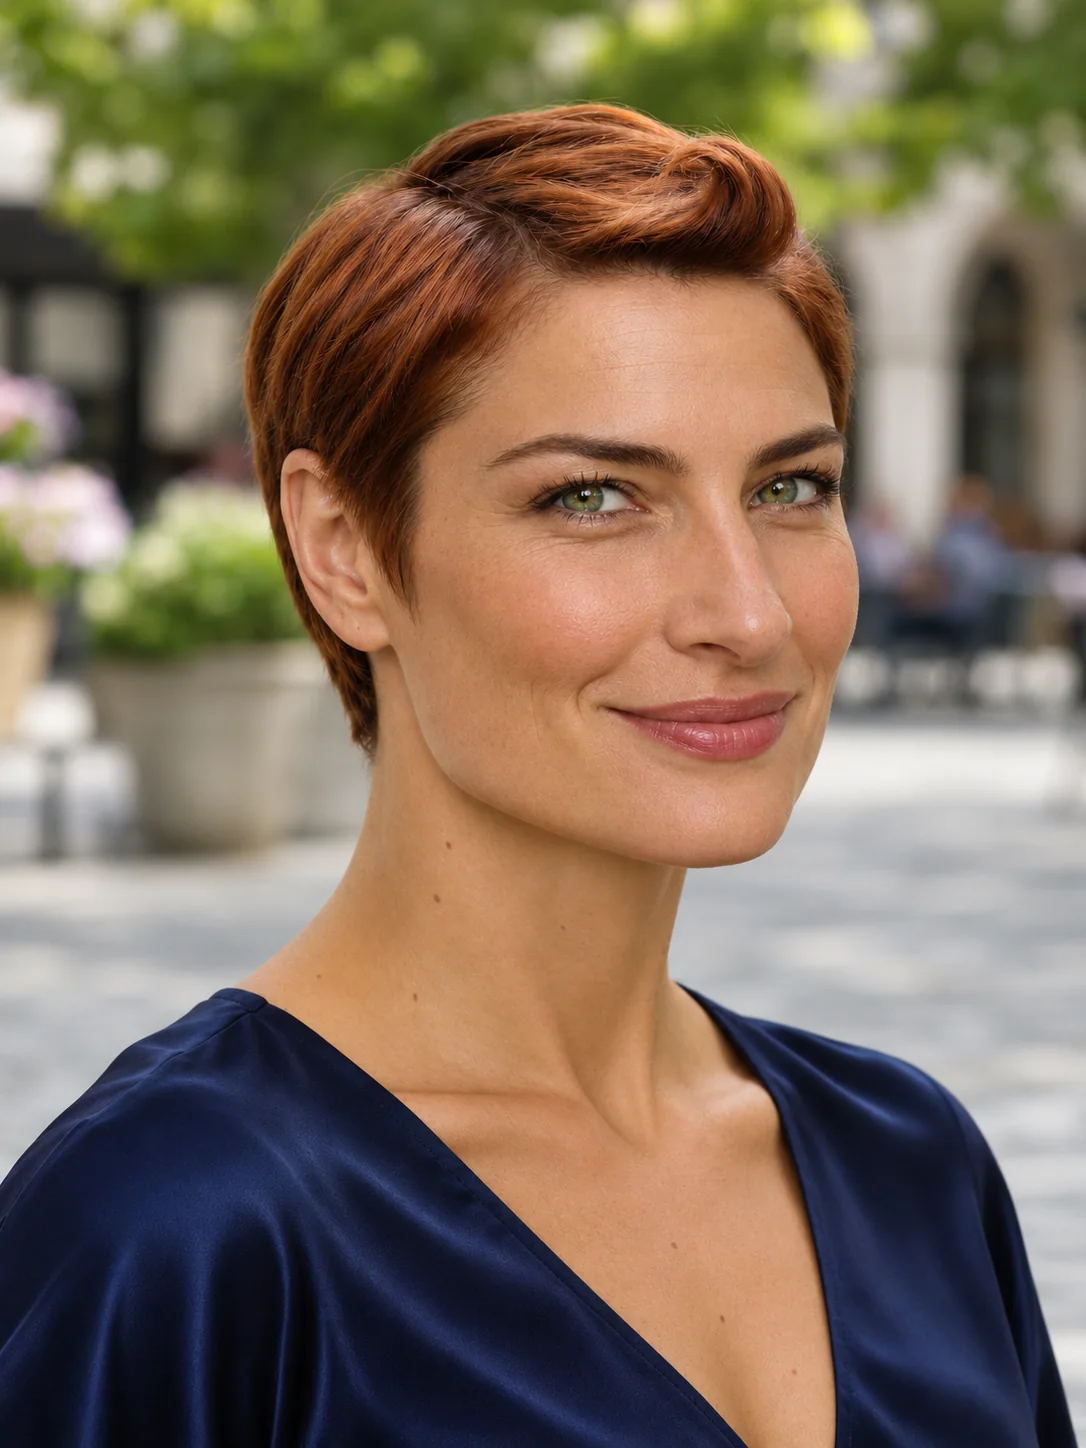
One rounded lift above the forehead gives this copper pixie its shape, with the crown settling lower behind it. Keeping the height concentrated at the front can make a short, broad face appear a little longer and adds a spirited, dressed-up feeling to an otherwise compact crop. Choose it if you enjoy a few minutes with a dryer, since the lift usually needs setting rather than simply being combed into dry hair. Raise the roots with a small brush, let them cool and finish with flexible hold. Ask your stylist to preserve the front length while keeping the crown lower and the sides closely fitted.
Ask your stylist for: Keep the sides close and preserve enough front length for a small rounded quiff, with a lower crown behind it.
4. The Compact Forward Fringe
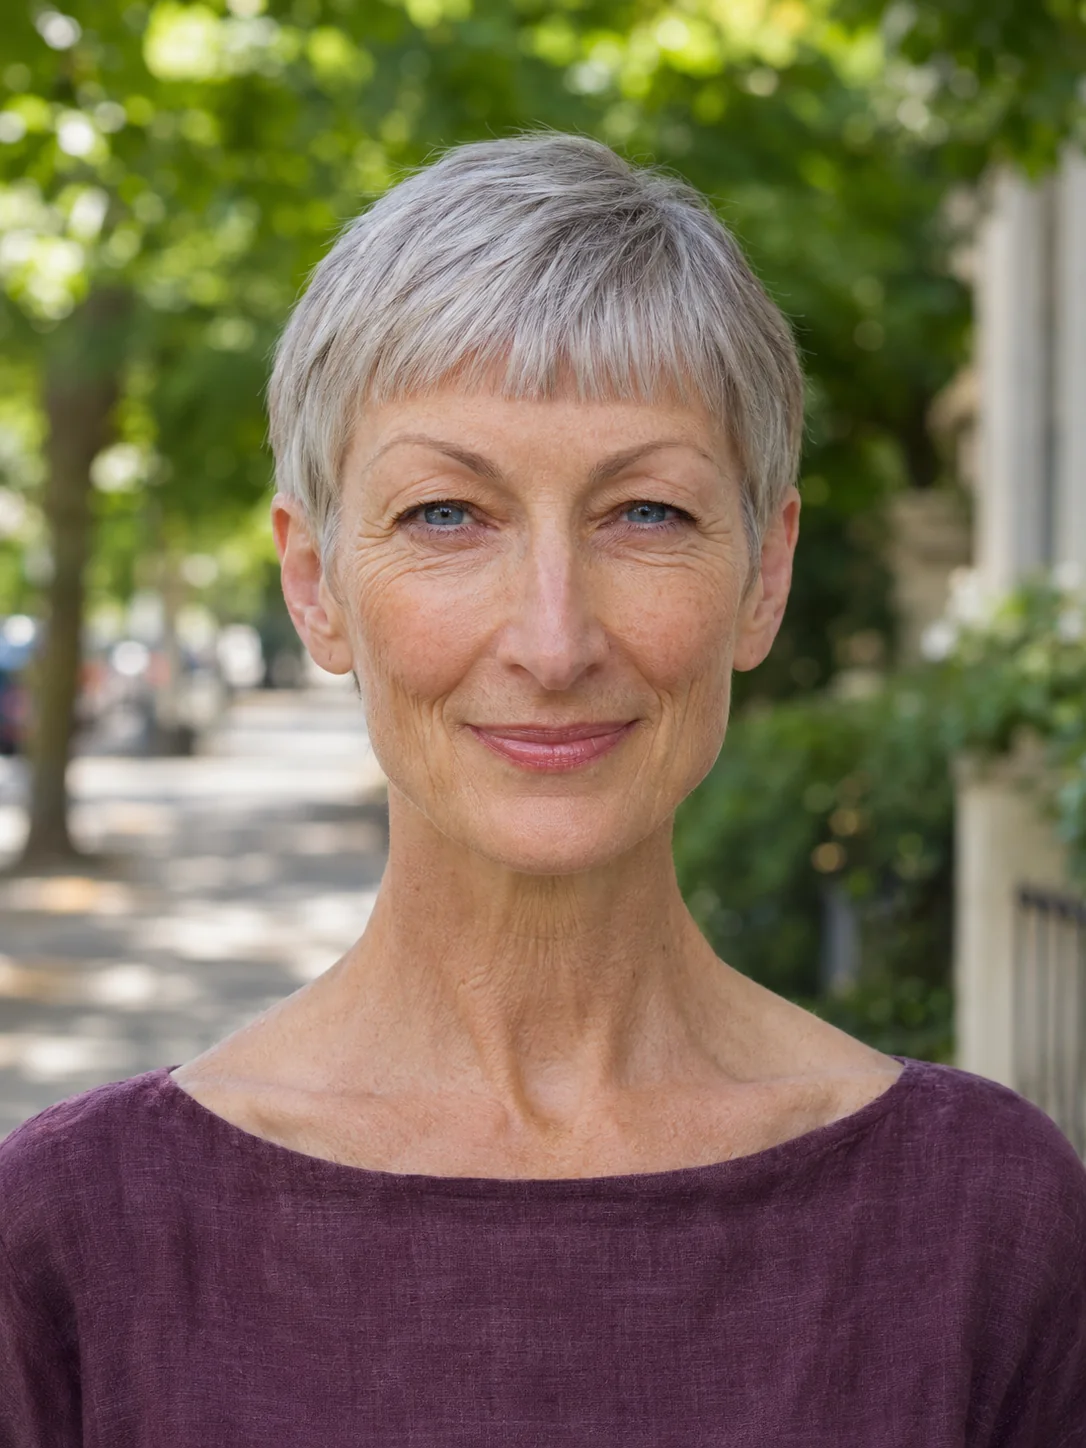
The silver top moves forward into a short, softly edged fringe, keeping the entire silhouette close to the head. A little coverage above the brows can balance a high forehead, and the tidy outline feels modern without asking you to build height every morning. It is a useful option for hair that already grows toward the face, provided the fringe is left long enough to settle instead of sticking upright. Work a trace of cream through damp hair and dry downward with your fingers. Ask for a connected compact pixie with tapered temples and a forward fringe whose final length is checked after drying.
Ask your stylist for: Cut a connected compact pixie with a short forward fringe and softly tapered temples, checked dry.
Pause and notice: Try the direction before committing to the length. A stylist can dampen the front and show whether it naturally settles forward, sideways or back; that small test tells you more about daily effort than shine in a photograph.
5. The Curved Baby-Fringe Pixie
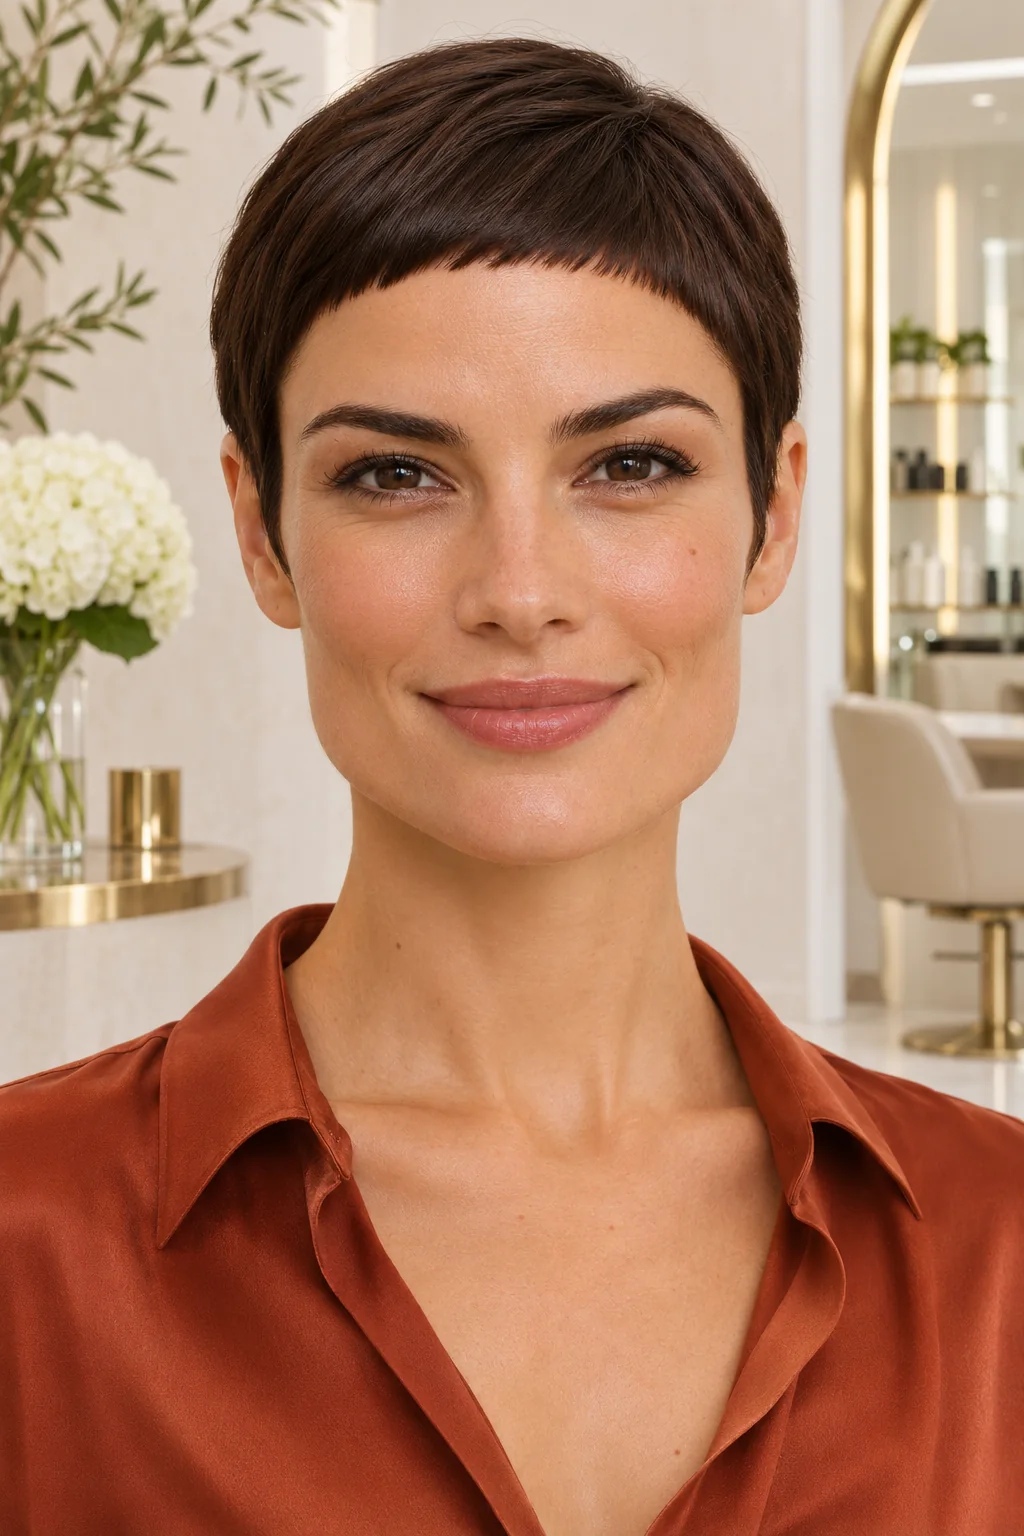
A shallow curve across the forehead makes this very short fringe feel softer than a ruler-straight edge. The longer corners lead toward the temples, drawing attention to the eyes and giving a compact brown pixie a playful, deliberate character. This is for someone comfortable showing most of the forehead, because the fringe cannot be swept aside as easily as a longer version. Style it while damp and use only what remains on your fingertips after applying cream to the top. Tell your stylist to cut a curved baby fringe above the brows, leave the temple edges slightly longer and check for any hairline that springs upward.
Ask your stylist for: Shape a shallow curved baby fringe above my brows, with slightly longer temple edges and a smooth connected top.
6. The Defined Diagonal Fringe
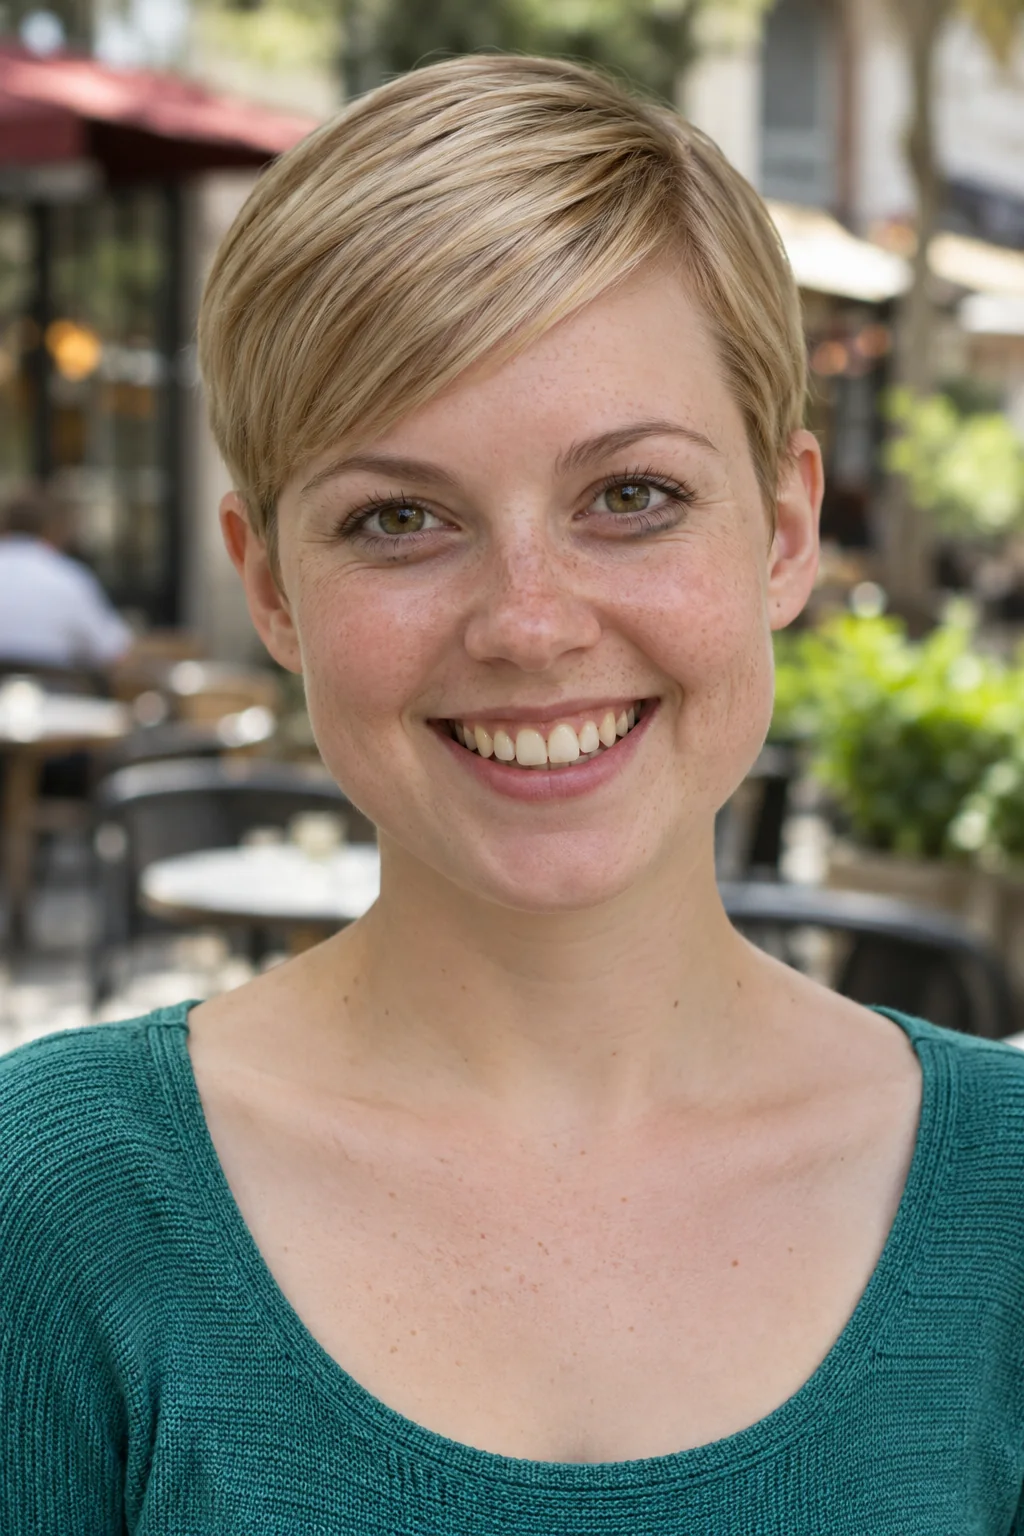
One sandy blond fringe follows a definite diagonal toward the outer brow while the sides stay close and light. The line adds an asymmetrical accent without covering an eye, helping a simple crop feel expressive and a little bolder on days when your clothes are understated. It suits someone happy to keep a consistent part, as switching sides can disrupt the carefully placed length. Smooth the fringe with a small flat brush and stop adding product before individual strands look greasy. Ask for a diagonal fringe ending near the outer brow, compact ear contours and a connected top that avoids the heavier outline of a bixie.
Ask your stylist for: Leave one defined diagonal fringe ending near my outer brow, with compact sides and no bob-like weight around the ears.
7. The Sleek Pixie With a Low Undercut
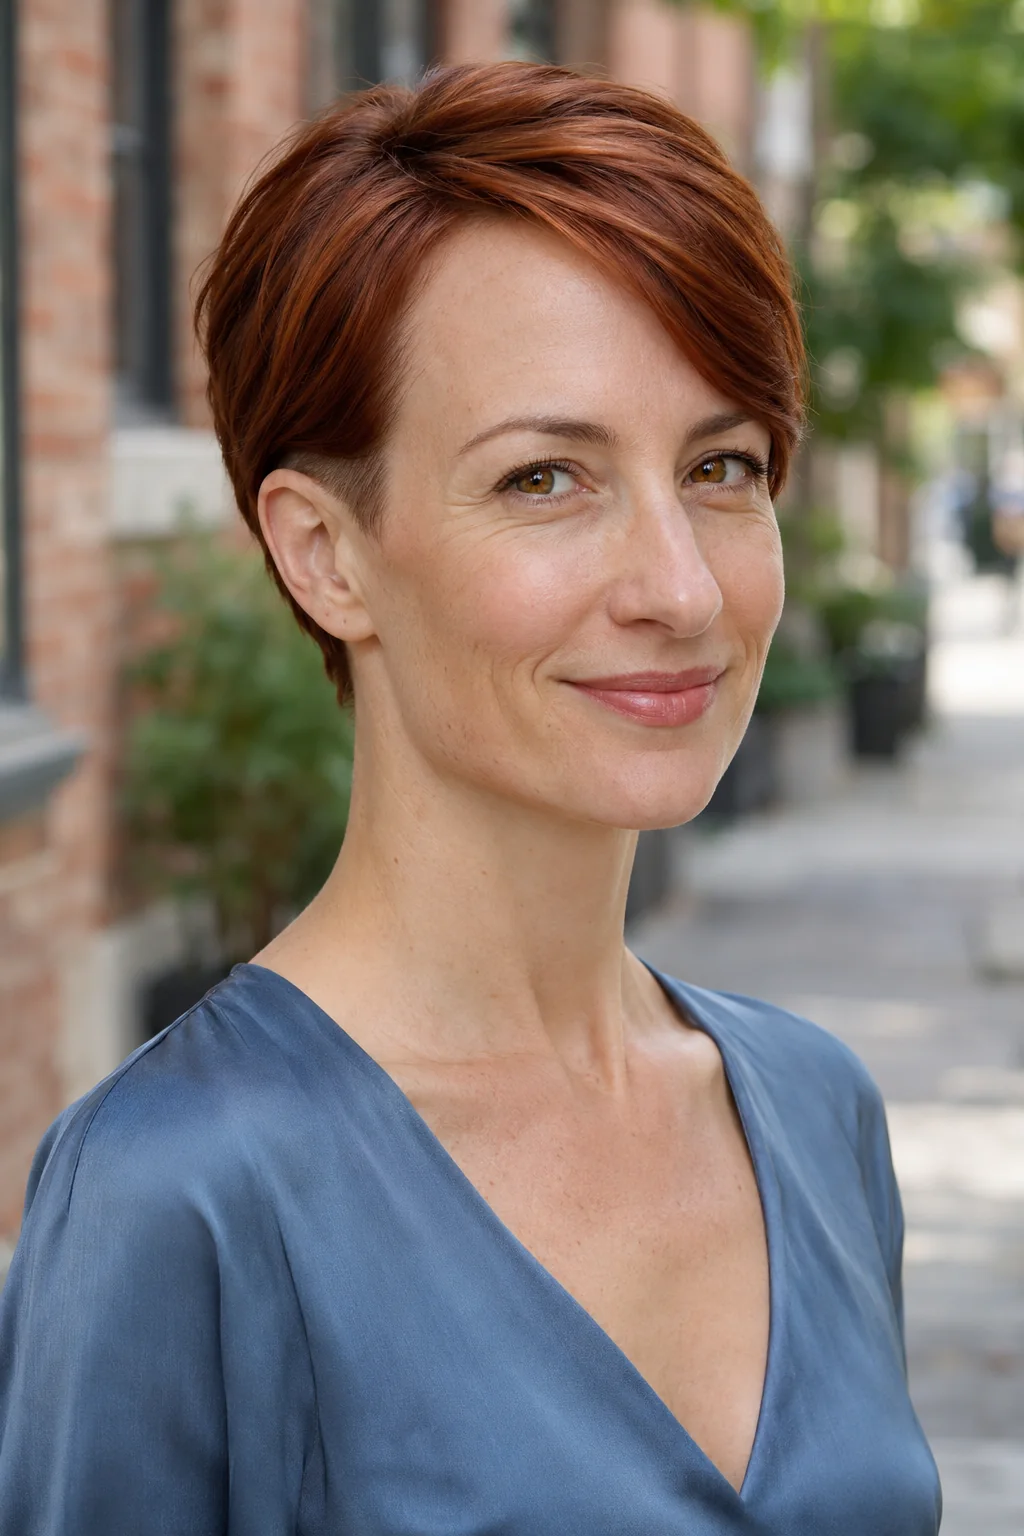
The auburn cover layer lies smoothly over a narrow clipped band low around the ear, creating a clean contrast rather than a high shaved side. Removing a little hidden bulk can help dense hair sit closer, and the visible edge gives the polished finish a confident, slightly rebellious note. It works best if you are comfortable with regular edge cleanups and the temporary ledge that can appear while the clipped section grows. Direct the longer layer over the undercut before deciding how much shine product you need. Ask your stylist to show the proposed boundary with a comb and agree on how much skin should remain visible.
Ask your stylist for: Keep a smooth connected cover layer and place a narrow low undercut around the ear, agreeing on how much will show.
8. The Rounded Scissor-Cut Pixie
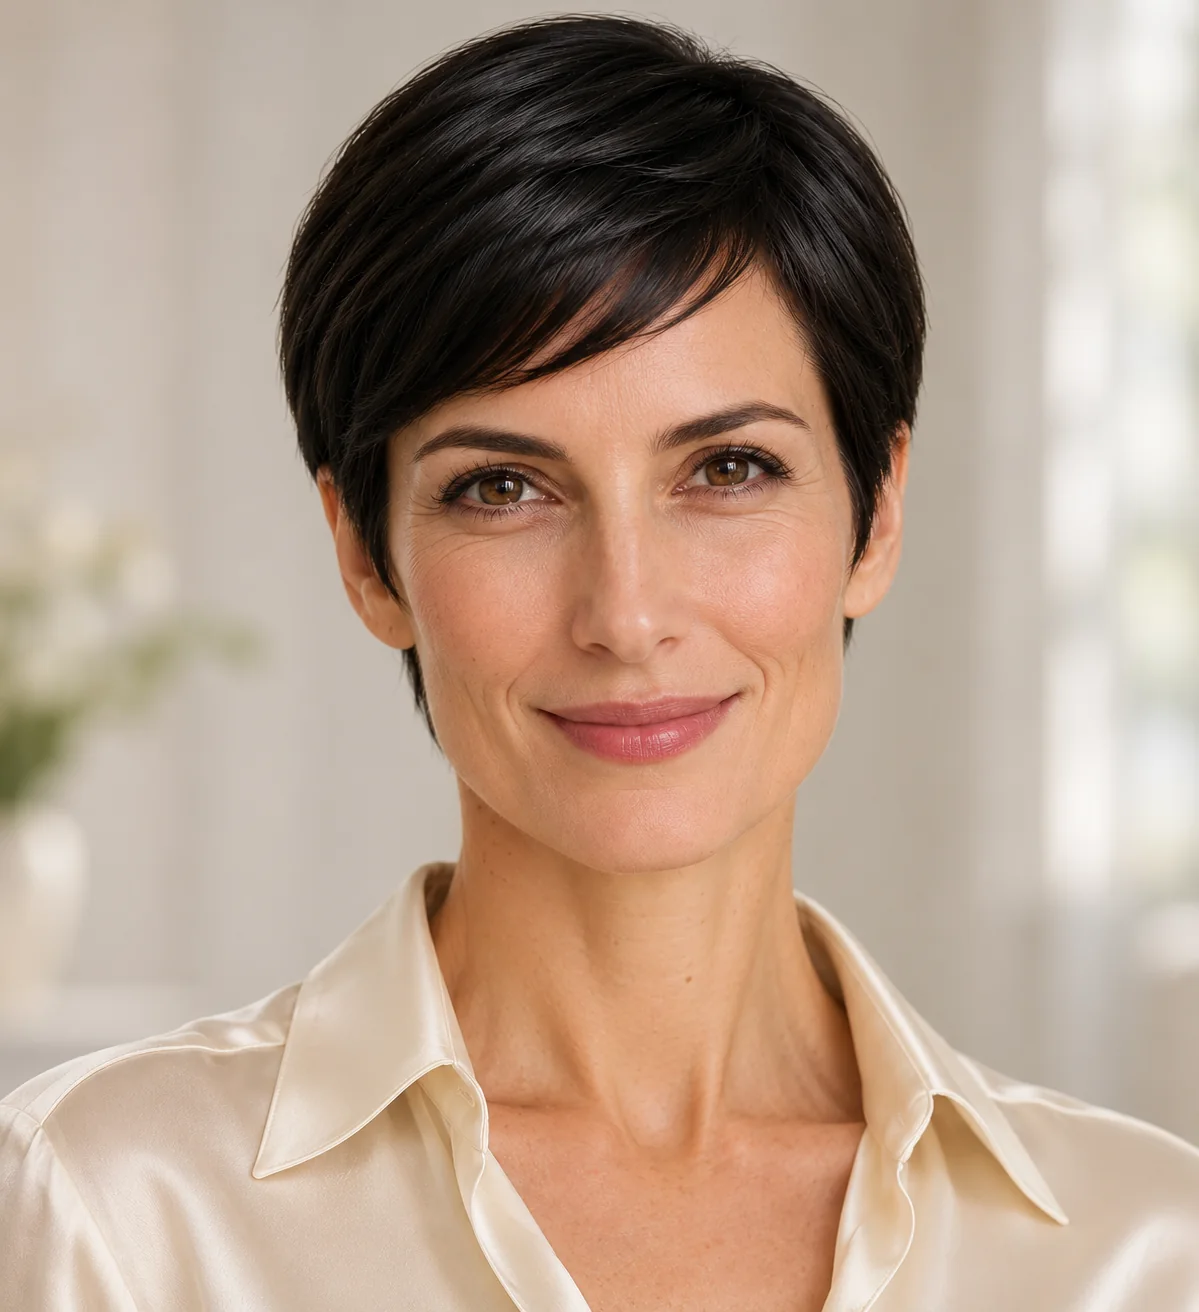
This black pixie follows the curve of the head, with a gently rounded crown and temples blended using scissors. The soft contour can temper angular features and gives the cut a calm, refined feeling, particularly if you prefer an outline that stays tidy without a visible shaved boundary. Straight or slightly bending hair makes the shape easiest to see, while very dense hair may need selective weight removed underneath. Dry with the brush following the head rather than lifting every root. Ask for a rounded connected crown, soft scissor-cut temples and a natural short nape, leaving enough surface length for the hair to lie smoothly.
Ask your stylist for: Build a gently rounded connected crown with softly blended scissor-cut temples and a natural short nape.
Pause and notice: Polished does not have to mean pressed flat. Keep the crown lift, natural wave or curl that makes the cut comfortable for you, and use the ear and nape outline to give the whole shape clarity.
9. The Long-Top Pixie With One Tucked Side
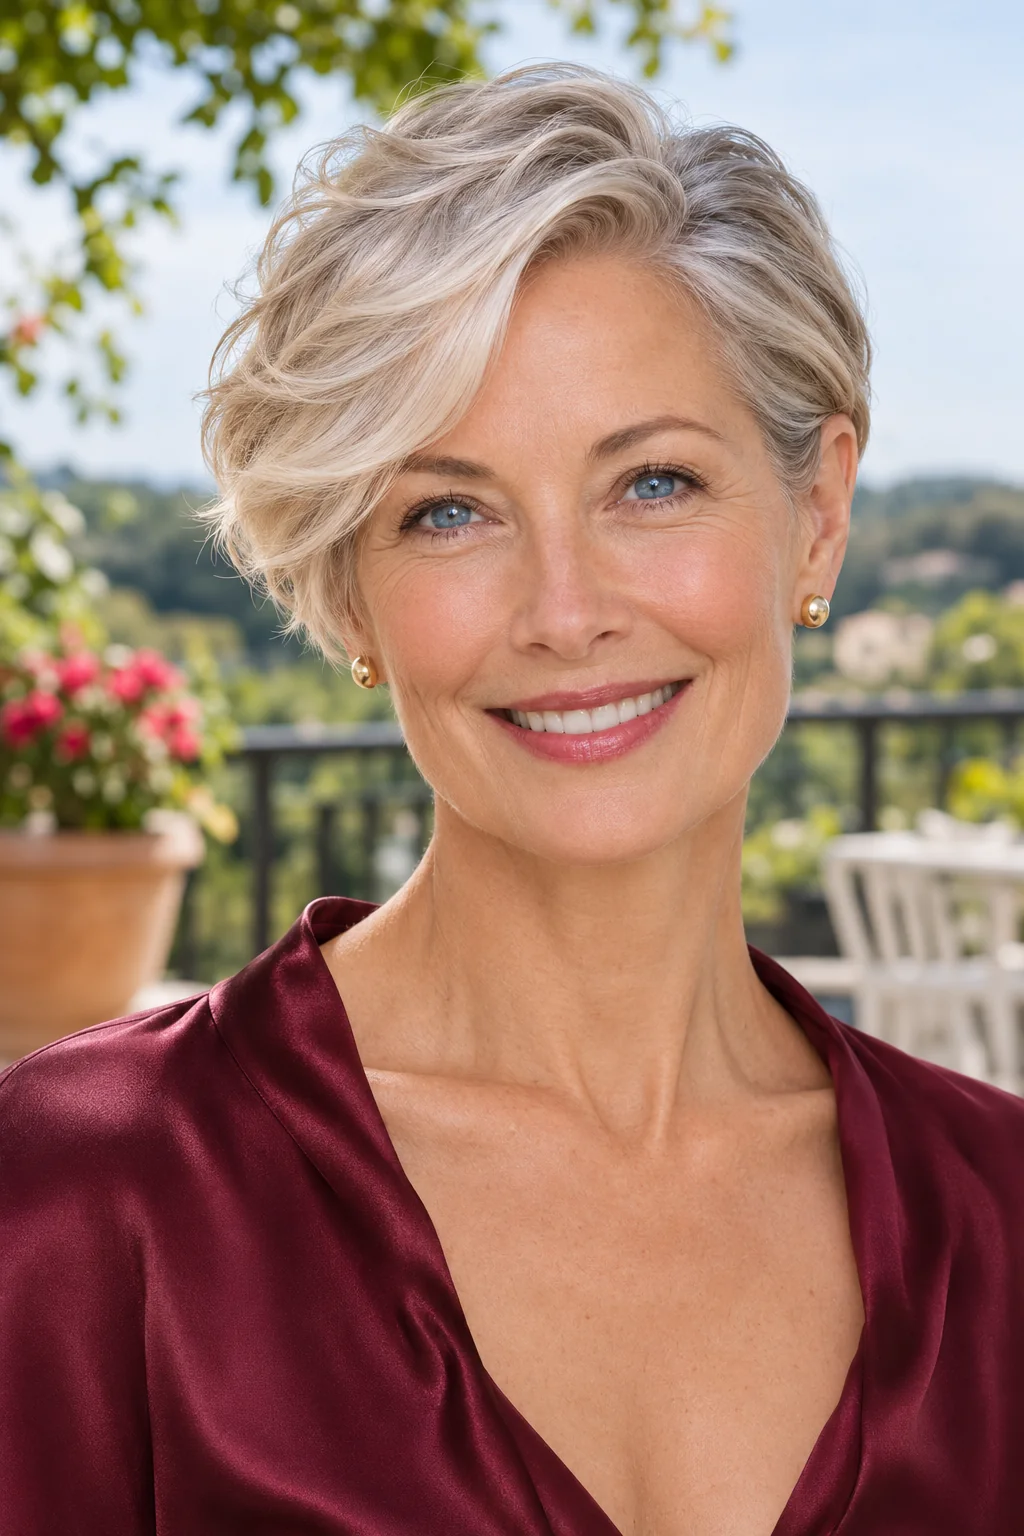
A longer silver-blond top travels across the head while one side slips neatly behind the ear. That small tuck opens a cheekbone and gives you a graceful, slightly dressier option when you want softness without a bob-shaped shelf around the neck. It suits someone who likes a little flexibility during pixie grow-out, although the tucked section needs enough length to stay put. Smooth a small amount of light cream over the surface and test the tuck before applying spray. Ask your stylist to preserve length just above the ear, connect it to the top and keep the nape short enough that the cut still reads as a pixie.
Ask your stylist for: Leave tucking length above the ear with a longer connected top, but keep the nape short and the silhouette clearly pixie.
10. The Sculpted Finger-Wave Pixie
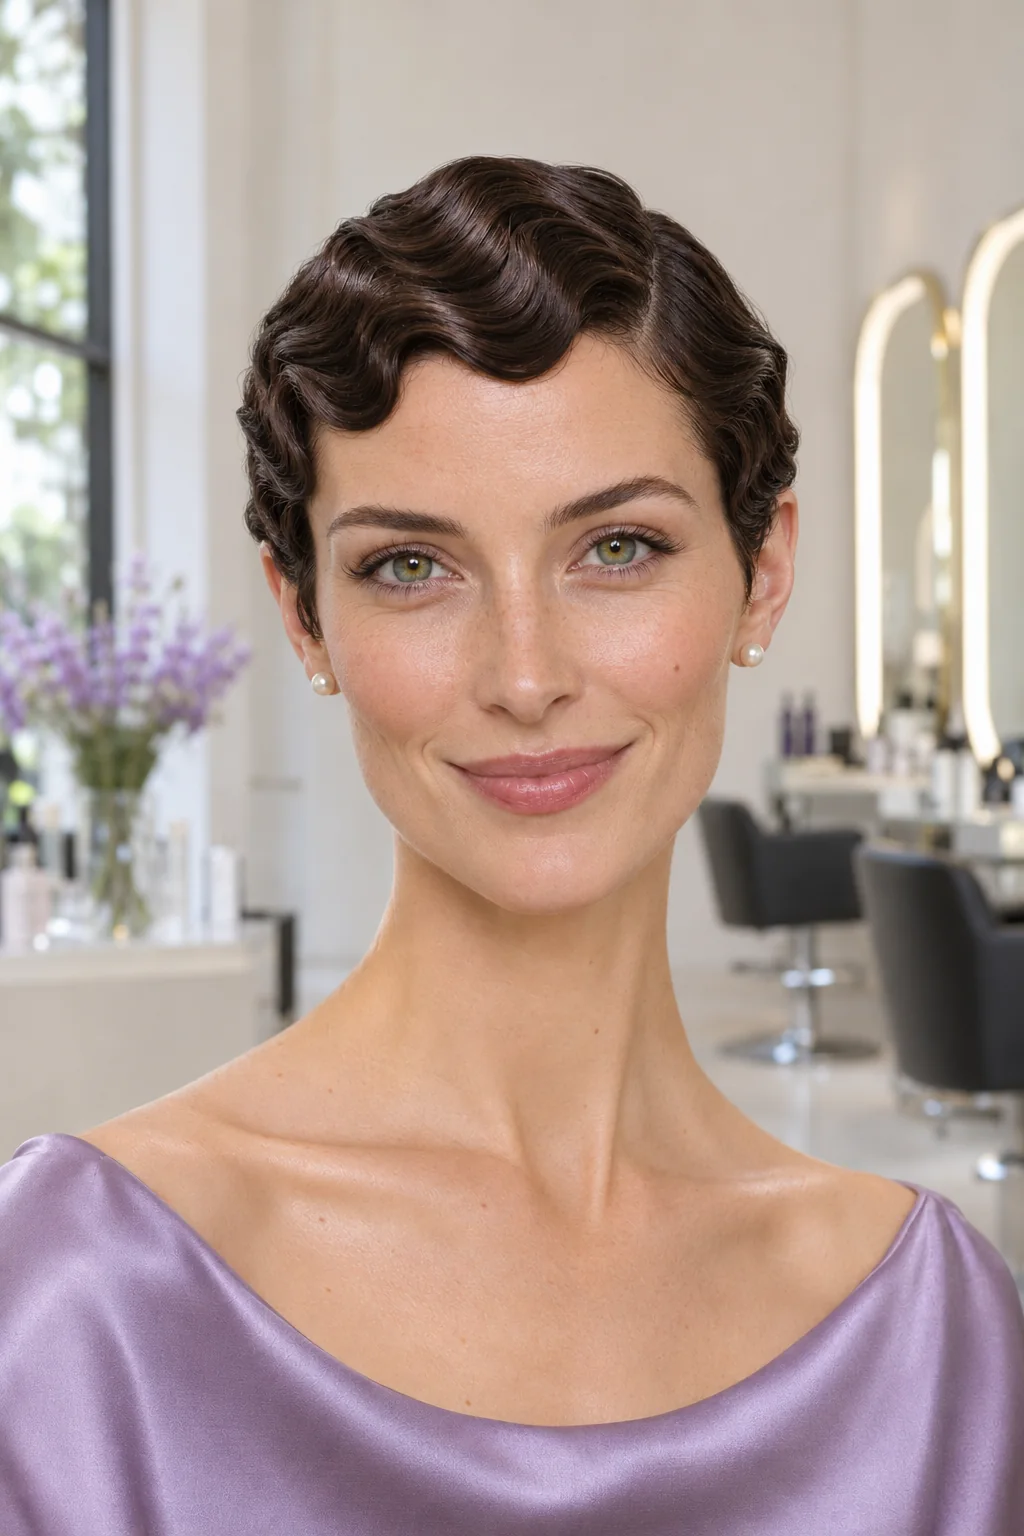
Shallow S-shaped ridges travel across this dark pixie, with the hair held close instead of brushed into fluffy volume. The repeated curves soften the outline around the forehead and create a glamorous, vintage feeling that can make even a simple evening outfit feel special. This is a styled set rather than a permanent cutting effect, so choose it when you have time to shape damp hair and let it dry completely. Ask for enough connected surface length to form shallow waves and have your stylist demonstrate the setting direction. Use a suitable setting lotion or gel sparingly, then avoid combing through the finished ridges.
Ask your stylist for: Keep a close pixie with enough connected surface length to form shallow S-waves, and show me a set suited to my hair.
11. The Softly Waved Pixie
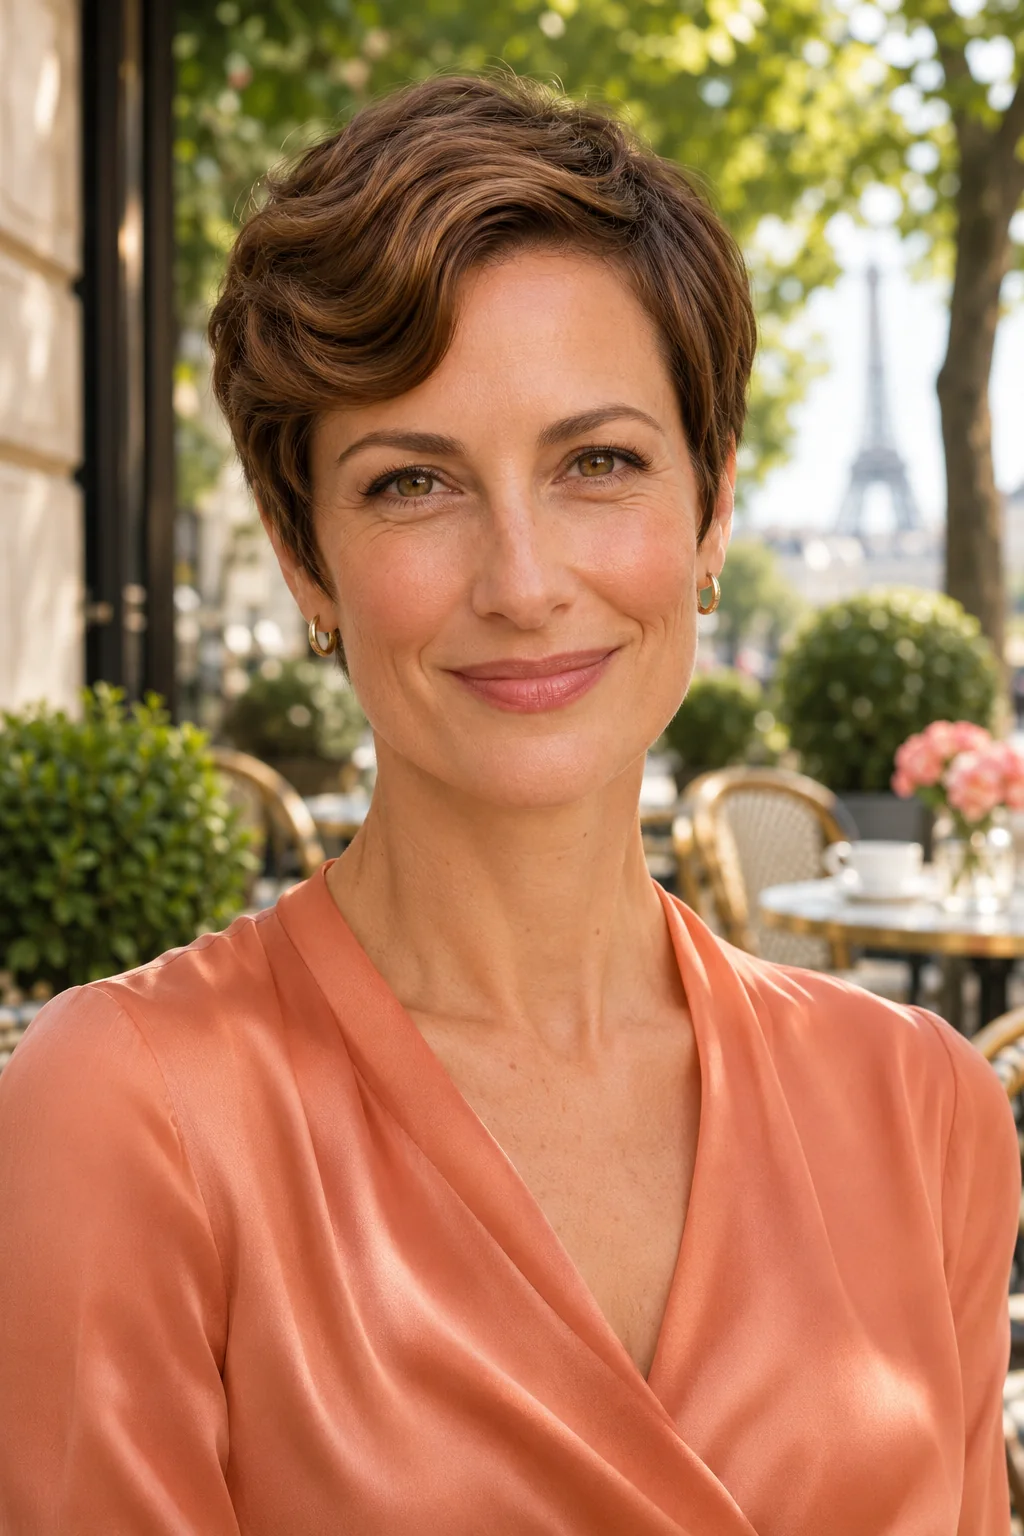
A soft wave bends across the brown top while the short sides follow the head, giving the pixie movement without a tousled outline. Keeping that natural curve can add gentle width to a narrow face and feels relaxed enough for everyday clothes while still looking deliberately arranged. It is a good match for hair that already makes a broad bend; forcing a tight curl pattern into this shape would take more effort. Scrunch a little foam into the top, guide the front wave and leave it alone as it dries. Ask your stylist to retain enough length for the bend and refine the fitted outline in its dry state.
Ask your stylist for: Leave enough top length for my natural wave to form, keeping the sides fitted and shaping the outline dry.
12. The Pixie With Defined Short Curls
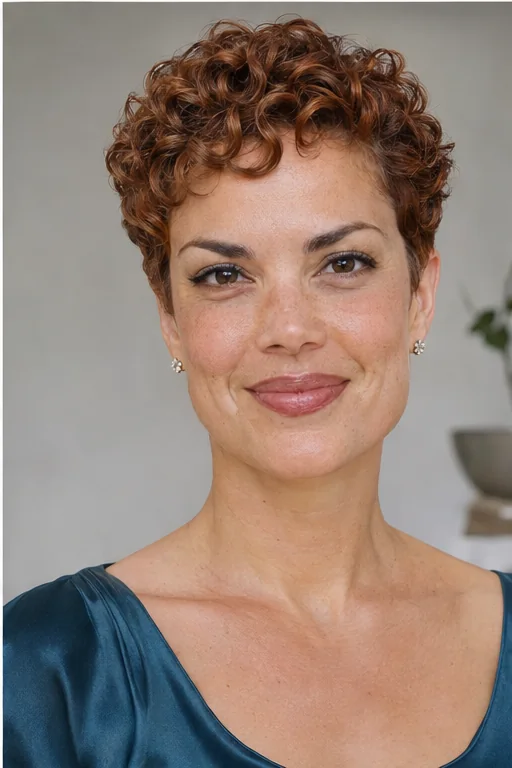
Short auburn ringlets gather into a compact rounded top, with the temples and nape tapered enough to keep the ears and neck open. Defined curl groups give the surface an intentional pattern, adding softness around the forehead and a buoyant, self-assured feeling without pretending curly hair must lie flat to look polished. This version suits someone who enjoys setting their curls after washing and refreshing only the pieces that need it. Apply your usual curl product to wet hair and avoid disturbing the groups until dry. Ask for a dry-shaped pixie with complete ringlets on top and tapered edges that respect your different shrinkage patterns.
Ask your stylist for: Shape my curls dry into a compact pixie with tapered temples and nape, preserving enough top length for complete ringlets.
Before You Book the Appointment
A successful salon visit begins with the overall shape, construction and upkeep—not only the finished length. Use this quick reality check before choosing your final reference photograph.
- Fine hair: Keep enough density in the top and fringe to avoid a separated, see-through finish; apply product sparingly.
- Thick hair: Discuss selective internal weight removal so the outer surface can lie smoothly without losing its shape.
- Waves: Use the natural bend as part of the design rather than automatically straightening it.
- Curls: Choose defined curl groups and a compact dry outline; polish does not require removing your texture.
What to Ask for at the Salon
Bring a reference showing the front and another showing the ear and nape. Explain which part you like: a smooth surface, a compact outline, a particular fringe direction or a defined wave. Say how your hair dries without help and how often you are willing to style it. Ask where weight should remain and where selective removal would help, rather than asking for thinning everywhere. Before the final detailing, check the dry shape with your normal part and any glasses you wear.
How to Get a Smooth Finish Without Heavy Hair
Start with a small amount of product and add more only where needed. Dry the roots in the direction you want the hair to travel, keeping the airflow moving along the surface. A small flat brush helps a sweep; a small round brush can set modest lift. Let the shape cool before touching it. If the fringe separates or looks oily, adding more serum is unlikely to help: refresh that section and use less next time.
Can a Polished Pixie Be Low Maintenance?
It can be quick to wash and dry, but a sleek outline usually needs some attention between appointments. Hair that already follows your chosen direction may need only damp fingers and a little cream. A backward finish on forward-growing hair, a sculpted quiff or finger-wave set asks for more time. Choose the photograph you can realistically recreate, and ask your stylist to show an ordinary-day finish as well as the salon version.
Maintaining the Shape and Growing It Out
Plan a shape check around four to six weeks for a close outline, then adjust the interval to your growth and comfort. Clipped edges can need attention sooner than a soft scissor taper. To grow the pixie, protect length through the top and above the ears while tidying only the areas that lose their outline first. A side sweep or tuck can help during that stage. Tell the stylist you are growing it before a cleanup so the appointment preserves your progress.
The Takeaway
Choose the direction and outline first, then decide how much smoothness, lift or curl definition feels like you. A good polished pixie should make your features feel visible and your routine understandable. Take your favorite reference to the salon and ask to practice the finish before you leave; being able to shape it yourself is what makes the cut feel yours.
More Hair Inspiration
- Pixie Haircuts With Glasses — Compare fringe and ear placement around the frames you wear.
- Long Pixie Cuts With Bangs — Explore more front length if a compact fringe feels too short.