Sometimes a haircut looks right until the ends land exactly where your jaw turns. Move them a little higher and the whole line comes into view. Move them lower and the hair frames your face in a different way. That small choice can matter more than going short or growing it long.
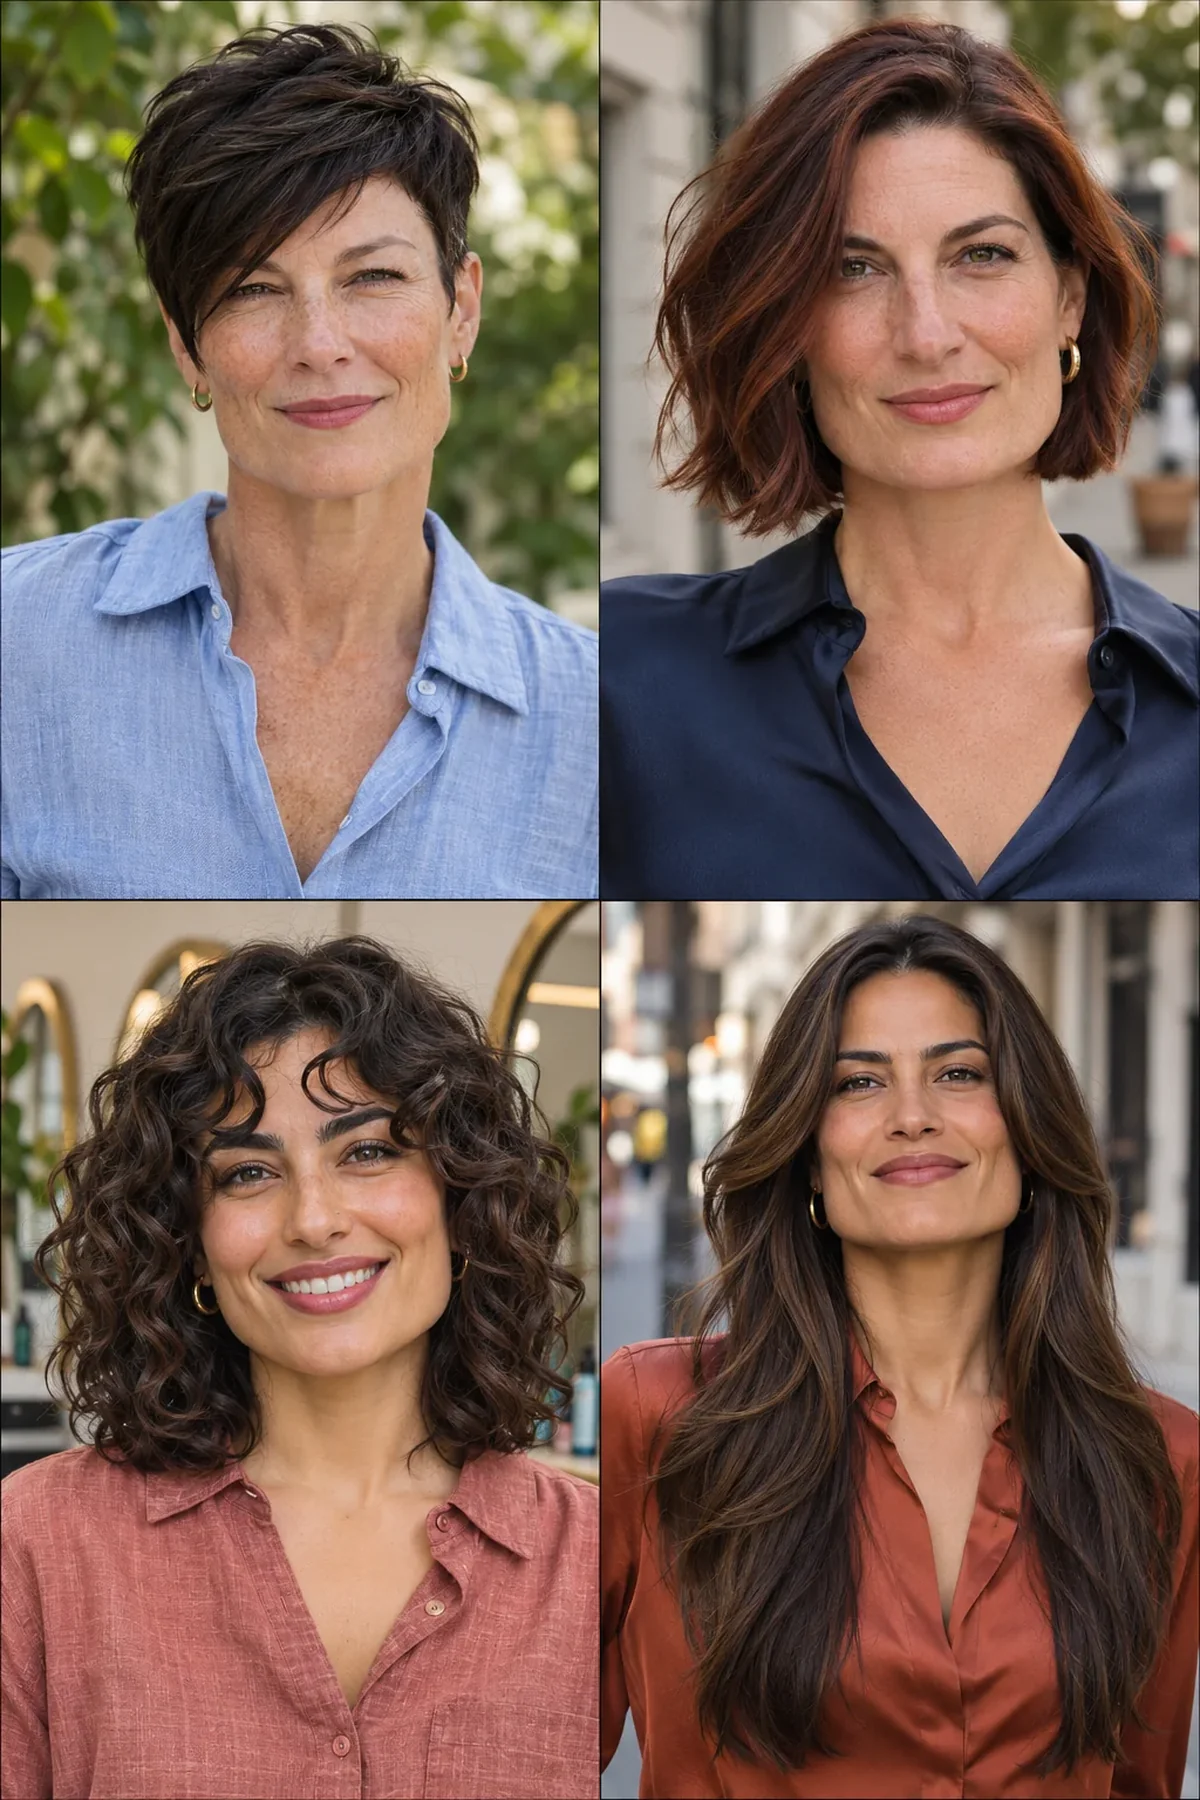
A square face usually has a defined jaw with visible corners and a forehead and cheekbones of roughly similar width. It differs from a round face, which has a gentler curve at the jaw, and a rectangular face, which has similar angles with more length. Haircuts for square faces can show off those angles with a clear short edge, or use a diagonal fringe, shifting volume or longer layers to soften the outline. Use the photos to compare where the shortest pieces and the widest part sit when the hair is dry.
Find the one that feels like you: Start with the first look and let the photographs lead. Each style explains how the shape affects your features, the mood it creates and the exact words to take to your stylist.
Quick Facts
- An edge above the jaw leaves the angle visible. An edge below it moves the strongest line down.
- Side fringe creates a diagonal near the eyes. A split fringe opens the center of the brow.
- Check curls dry and ask to see how much of the front reaches your usual ponytail.
1. The Long Side-Swept Pixie
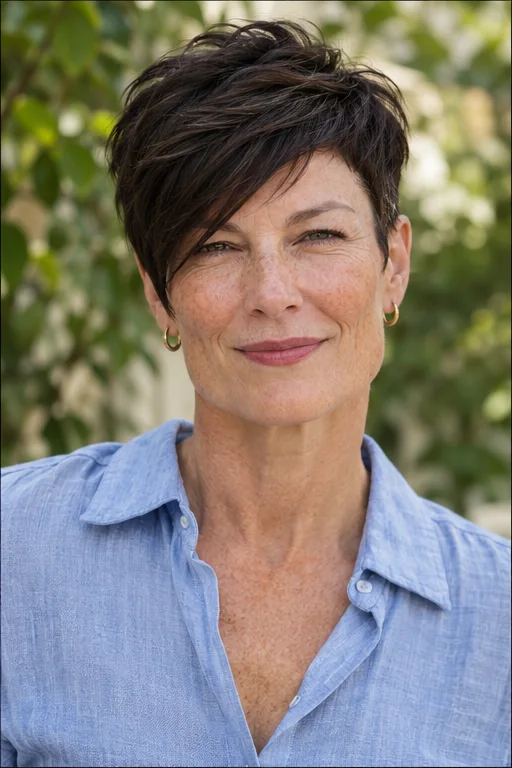
A pixie can make a square jaw the best part of the haircut. This one clears the ears and neck, then sends a long section diagonally across the forehead so the eye follows the sweep before settling on the jaw. It feels brisk and put-together when you’re getting dressed in a hurry, especially if your straight or slightly wavy hair already falls to one side. Dry the fringe in its usual direction while the roots are damp. Ask for a brow-to-cheekbone diagonal fringe, close sides and a soft nape that won’t need a razor-sharp edge to look intentional.
Ask your stylist for: Leave a brow-to-cheekbone diagonal fringe and enough top length to sweep it across, with close sides and a soft nape.
2. Short Curls With Height
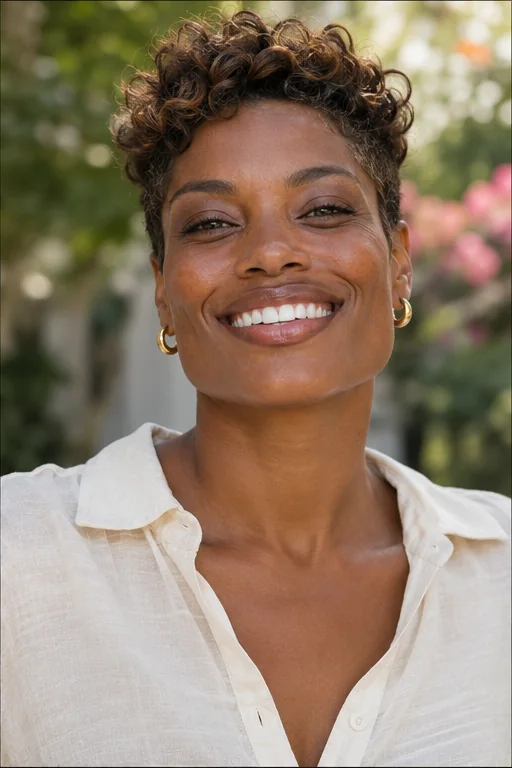
If your curls spring upward as they dry, give the top enough length to do exactly that. A compact shape at the temples lets the cheekbones and jaw stay visible, while the higher ringlets draw attention to your eyes. It can feel spirited and a little dressed up even when you leave the house in a plain tee. Pat in a little water to revive the curls at the crown and leave the drier sides alone if they’re sitting well. Ask for the highest dry curl length over the crown, compact temples and a soft taper around the ears.
Ask your stylist for: Shape the short curls dry, with the tallest ringlets over the crown, compact temples and a soft taper around the ears.
3. The Jaw-Exposing Micro Bob
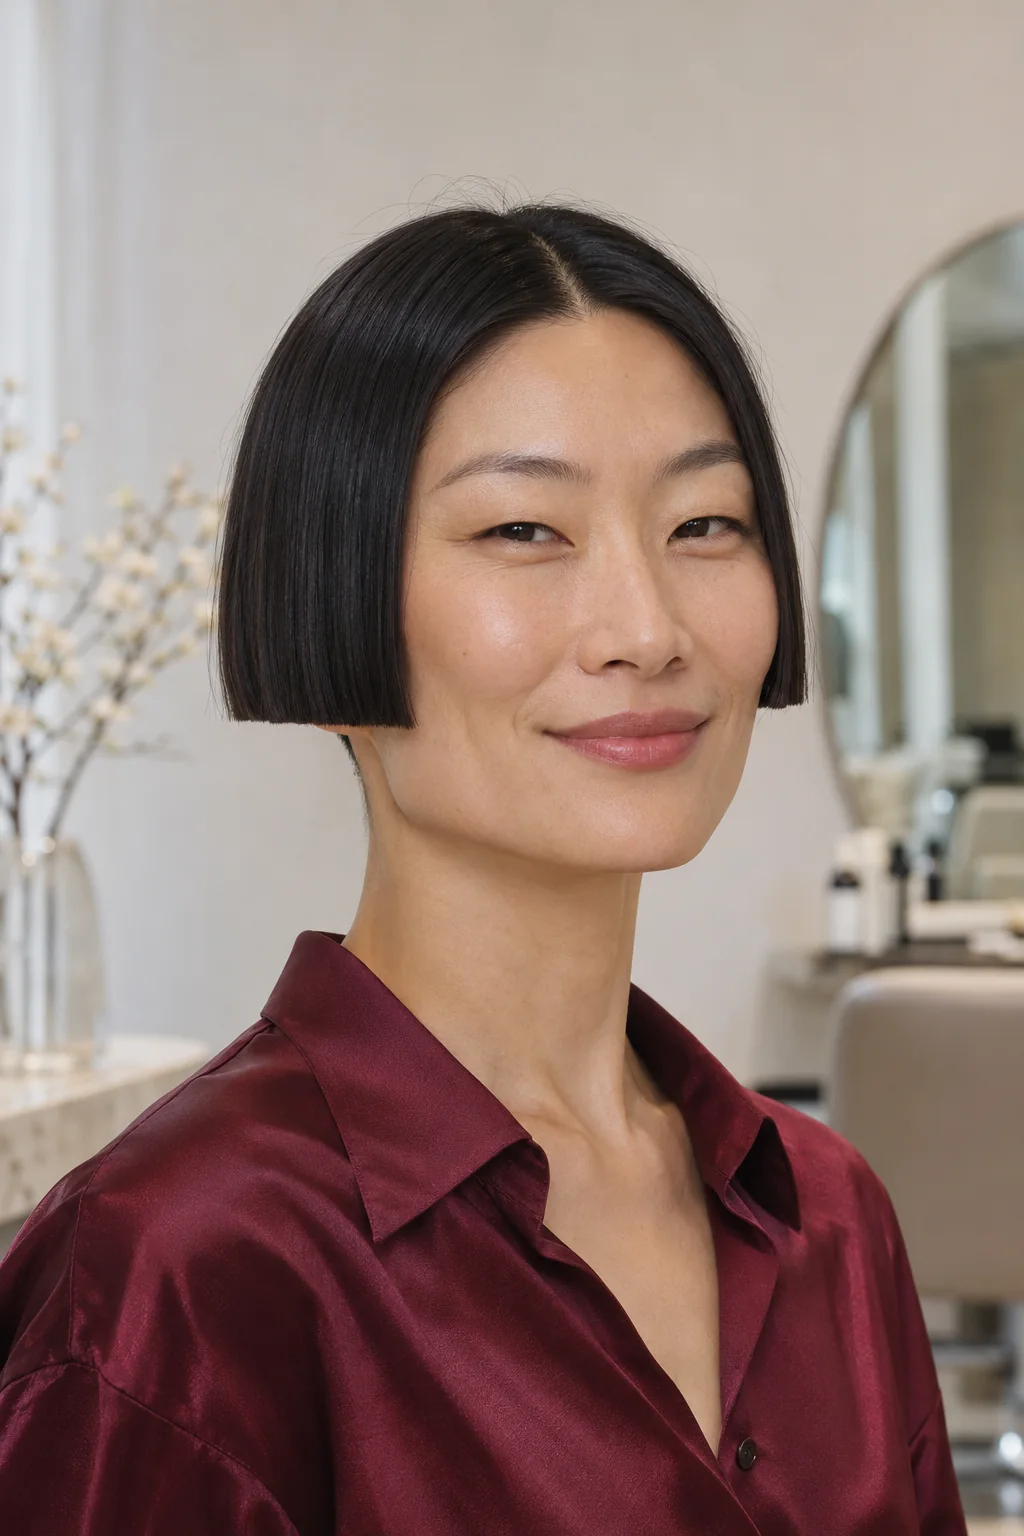
A bob that ends around the lips creates a clear space between the haircut and the jaw. With a straight edge and a center part, that gap makes an angular profile look deliberate, like a great neckline that happens to show off your favorite earrings. It’s a bold little cut for straight hair that lies close to the head, and it feels sharp even with minimal styling. Check for a nape cowlick before committing, since a short edge has little weight to hold it down. Ask for a level lip-length line, full corners and a clean nape with no surface layers.
Ask your stylist for: Cut a level lip-length bob with a center part, full corners and a clean nape, without adding surface layers.
4. The Off-Center Bob Below the Jaw
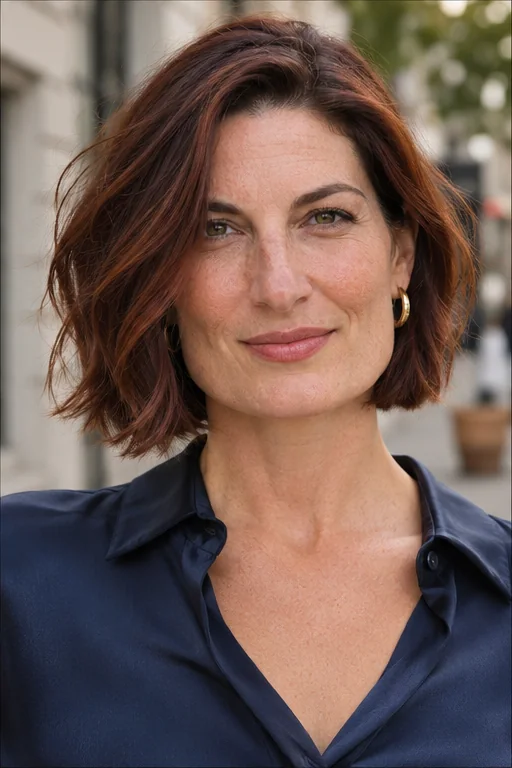
Move the part just off center and a simple bob starts to fall differently on each side. Here the heavier side bends across one cheek before joining an edge below the jaw, which gives a defined lower face a softer outline without thinning out the ends. The result can feel quietly polished, especially on hair with one natural bend and little appetite for a curling iron. Set that heavier section into place while damp and give it time to dry before tucking it. Ask for a full edge below the dry jawline and minimal interior release where the bend needs room.
Ask your stylist for: Cut a full bob just below the jaw when dry, with an off-center part and a small amount of interior release.
Pause and notice: Hold a fingertip just above the corner of your jaw, then move it just below. The micro bob and the offset bob use that small distance to create two distinct outlines.
5. The Rounded Curly Bob
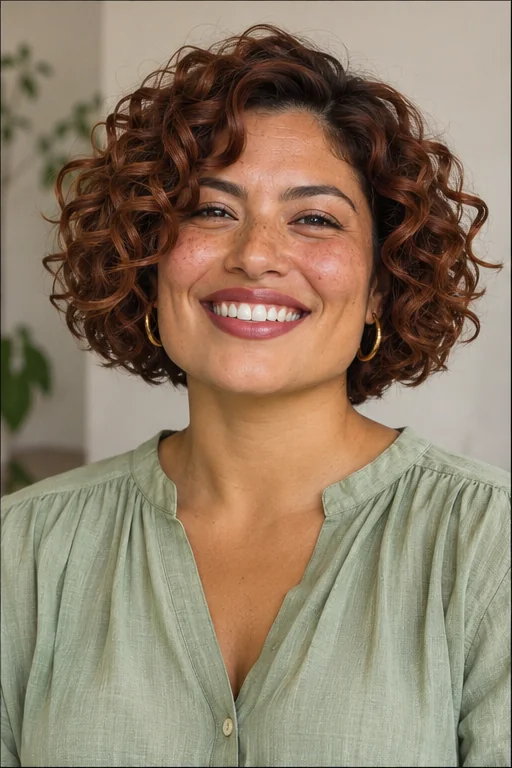
Look for the widest point first. In this rounded bob, the ringlets sit out around the cheekbones and settle closer by the time they reach the lower edge, so the volume frames your eyes and leaves the jaw readable. It’s a buoyant shape that can make everyday curls feel more defined and ready to go, especially when your curls are springy enough to support the shorter sides. Scrunch in a light gel while wet and wait until the hair is dry to loosen the cast. Ask for cheekbone-level width and a tapered edge checked below the jaw after the curls spring up.
Ask your stylist for: Round the curls around the cheekbones and taper the dry hem below the jaw, keeping a few longer curls at the front.
6. The Full-Ended Collarbone Lob

You can change the line around your face without adding a fringe or losing the ability to put your hair up. This collarbone lob keeps its ends full and puts the strongest horizontal line well below the jaw, which can give fine hair more visual weight and make a defined jaw feel less like the only feature in view. It has an understated, capable look that suits a busy week. Try your usual low ponytail at the consultation so your stylist sees what needs to reach. Ask for a blunt collarbone edge with the front long and the ends left dense.
Ask your stylist for: Keep a blunt collarbone perimeter and enough length to tie back, with no short face frame or thinning at the ends.
7. The Shoulder-Length Shag
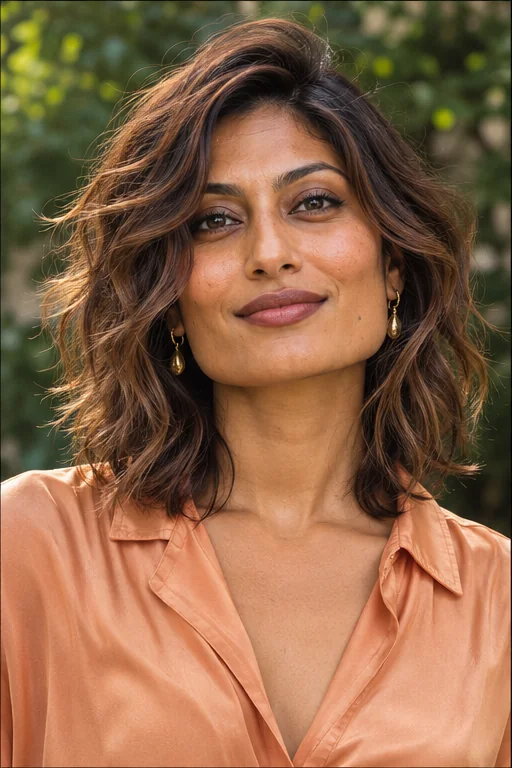
A little space between the layers makes this shag come alive. Cheekbone-length waves open the sides of the face, crown layers add lift and the longest pieces skim the shoulders with a light, broken edge. The shape can feel easygoing and expressive if your waves already bend in different directions, and it keeps the eye moving past the jaw rather than following a single strong line. Scrunch a small amount of foam into damp hair, then resist brushing out the shorter pieces. Ask for cheekbone layers and a lifted crown with enough weight left at the shoulder to keep the ends from looking wispy.
Ask your stylist for: Place the first wavy layers at the cheekbones, connect them to a lifted crown and keep a light shoulder-length edge.
8. Collarbone Curls With a Split Fringe
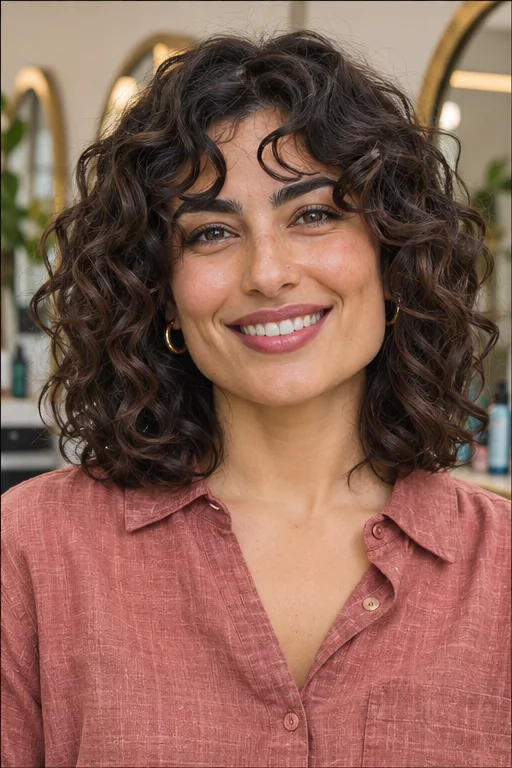
A few short curls on either side of the part make room for your eyebrows and pull attention upward. The longer ringlets settle near the collarbone, so you get a noticeable change at the front without giving up the length you like around your neck. It’s a playful option for springy curls, especially if you enjoy a little variation in where the fringe lands from day to day. Refresh the fringe separately with damp fingers and a trace of your usual styler. Ask for an open curly fringe, short at the brow and longer at the temples, and have both lengths checked dry.
Ask your stylist for: Keep the dry curls at the collarbone and shape an open fringe with short brow curls that lengthen toward the temples.
Pause and notice: For fringe, think about what your hair does after sleep. A side fringe works with a familiar part, while curly fringe can shift from day to day. Save the shape you would enjoy wearing on an ordinary morning.
9. The Midlength Cut With Side Fringe
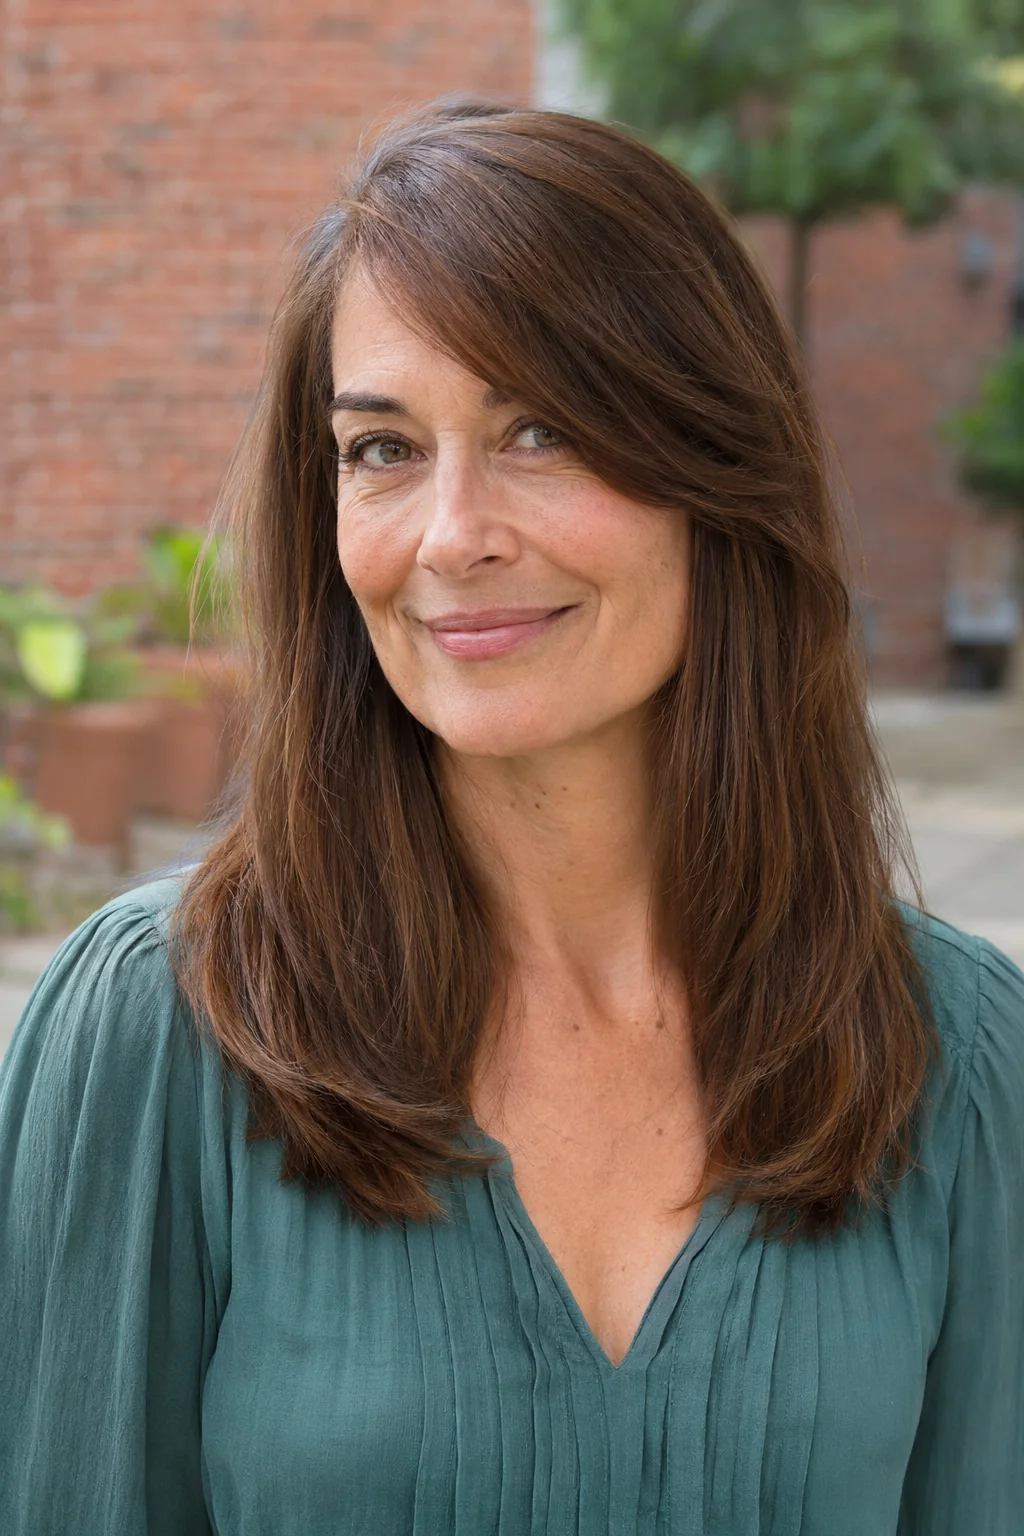
For a noticeable change you can grow out gradually, try a long side fringe with the rest of the cut just below the shoulders. The sweep crosses the brow at an angle and brings attention to one eye, while the longer edge leaves the jaw clear. That small change can feel unexpectedly elegant, particularly if you often wear your hair down and favor the same part. Ask your stylist to see how the fringe falls before trimming, then dry the roots first at home so it follows that direction. Request a diagonal outer-brow-to-cheek fringe with no additional short pieces across the forehead.
Ask your stylist for: Keep the length below the shoulders and connect a long side fringe from the outer brow into a cheek-length section.
10. Long Layers Starting at the Cheekbone
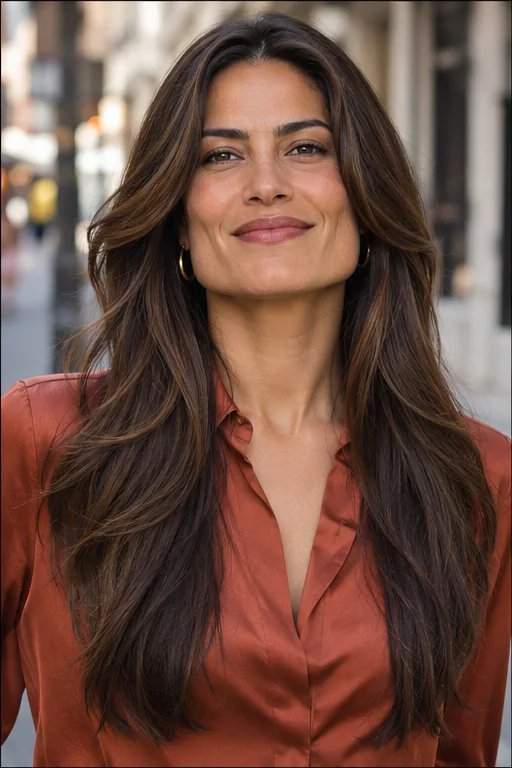
Take the front pieces up to the cheekbones and suddenly there’s something to notice long before your eye reaches the ends. This version keeps a substantial long edge, but the front opens in several steps, which can draw attention to the cheekbones and give thick hair a livelier swing. It feels a little glamorous even with a basic top, especially if you like a soft brush finish. Check how much of the front you want to stay in a low tie before cutting. Ask for a cheekbone starting point and connected layers through the collarbone, leaving the back long and full.
Ask your stylist for: Keep the back long and full, start the shortest face layer at the cheekbone and connect the front through the collarbone.
11. Long Low Layers With a Shallow U
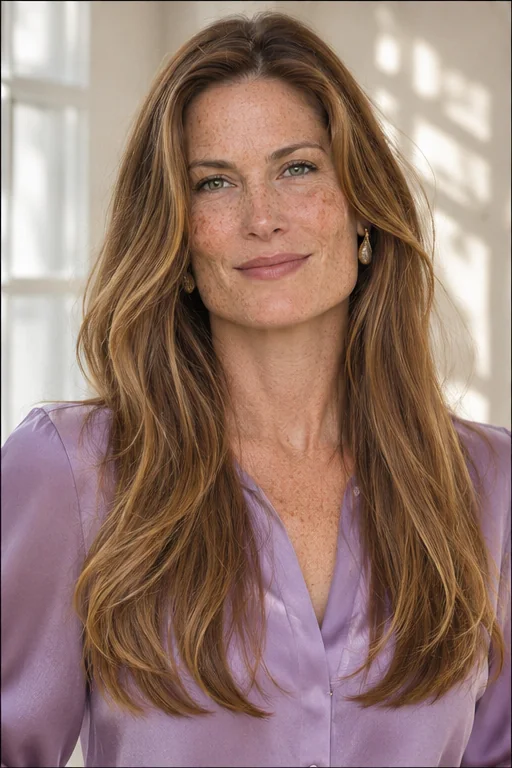
If you tuck your hair behind both ears or tie it back most days, keeping the face-length pieces long can be a relief. Here the movement begins below the collarbone and ends in a shallow U, so the hair falls in uninterrupted lines beside the jaw before it starts to swing. It’s a calmer, more understated shape for someone who wants their long hair to feel lighter at the ends without losing its familiar weight. Let it dry loose before deciding whether the ends need a brush. Ask for low layers below the collarbone, a shallow U edge and full front pieces.
Ask your stylist for: Keep the shortest layer below the collarbone, with a shallow U hem, full front pieces and no short face frame.
12. Long Coils With Volume Below the Jaw
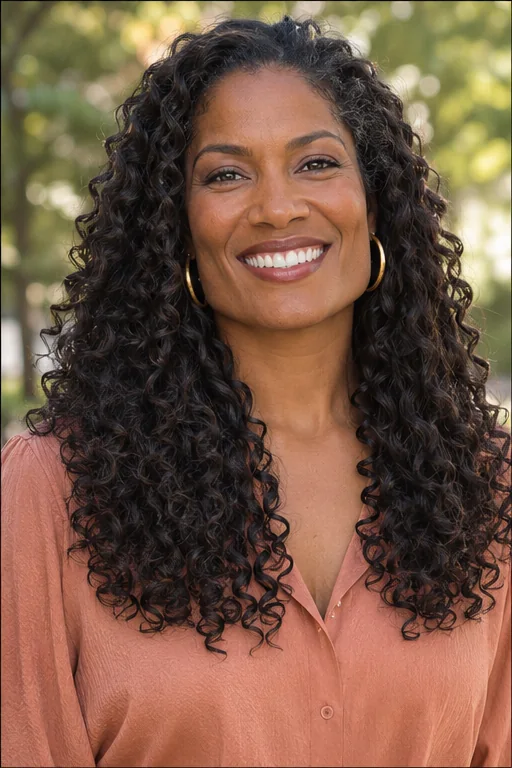
Long coils can make a square face look beautifully framed when their fullest curve sits below the jaw. This cut leaves the sides longer so the top stays closer to the head, then lets the coils spread into a rounded outline toward the shoulders and chest. It can feel both grounded and striking if you love visible volume but prefer a little space around your eyes. Stretch one section only enough to show your stylist how much it shrinks. Ask to compare the dry outline from the front and side, with the widest point below the jaw and the perimeter gently rounded.
Ask your stylist for: Check the outline dry, preserve length at the sides and place the broadest curve below the jaw, with a softly rounded hem.
Before You Book the Appointment
A successful salon visit begins with the overall shape, construction and upkeep—not only the finished length. Use this quick reality check before choosing your final reference photograph.
- Fine or lower-density hair: Start with a full bob or lob edge. Try an off-center part or a small fringe section before asking for layers throughout.
- Dense straight or wavy hair: Discuss where the weight naturally sits. A shoulder shag shows deliberate movement, while low internal shaping can help a fuller bob settle.
- Curls and coils: Compare the dry silhouette from front and side. Point to where you want the widest curve, then agree on the shortest fringe or temple curl.
What Haircut Suits a Square Face?
Decide whether you want to draw attention to your jaw, bring the eye toward your cheekbones, or keep your front long enough to tuck back. A lip-length bob opens the jawline. A longer lob places its strongest edge lower. If you want something between the two, try a below-jaw bob with a soft bend or ask for a cheekbone-length front section on a longer cut.
What to Ask for at the Salon
Bring a front photo and a side view with a hair texture like yours. Point to where you want the first piece and the longest edge to fall when dry. Show how you part your hair, where it tends to bend, and what you pull back for work or exercise. Ask how much weight the stylist will leave at the edge, especially if your hair is fine.
Styling, Trims and Grow-Out
Reset a fringe while the roots are damp and smooth the sides only as much as your cut needs. A lip-length edge usually shows growth sooner than a collarbone edge. As short fringe grows, have it blended into the side when it starts to reach the cheekbone. If you want the cut to grow longer, ask to tidy the shape while keeping as much length as you can.
The Takeaway
Choose one photo for the jawline or cheekbone effect you like and another for the length you want to keep. If both show hair that behaves like yours on a regular wash day, you’ll have a clearer conversation in the salon chair.
More Hair Inspiration
- Blunt Bob Haircuts — Compare full edges and different bob lengths before choosing where yours should land.
- Face-Framing Layers — See how the starting point changes the way layers fall around the face.