You might remember the sweep of a ’90s haircut before you remember whose picture you took to the salon. Short pieces lifted off the cheeks, the ends swung when you turned your head, and somehow a simple T-shirt looked more dressed up. The part worth borrowing today is the shape underneath that bounce.
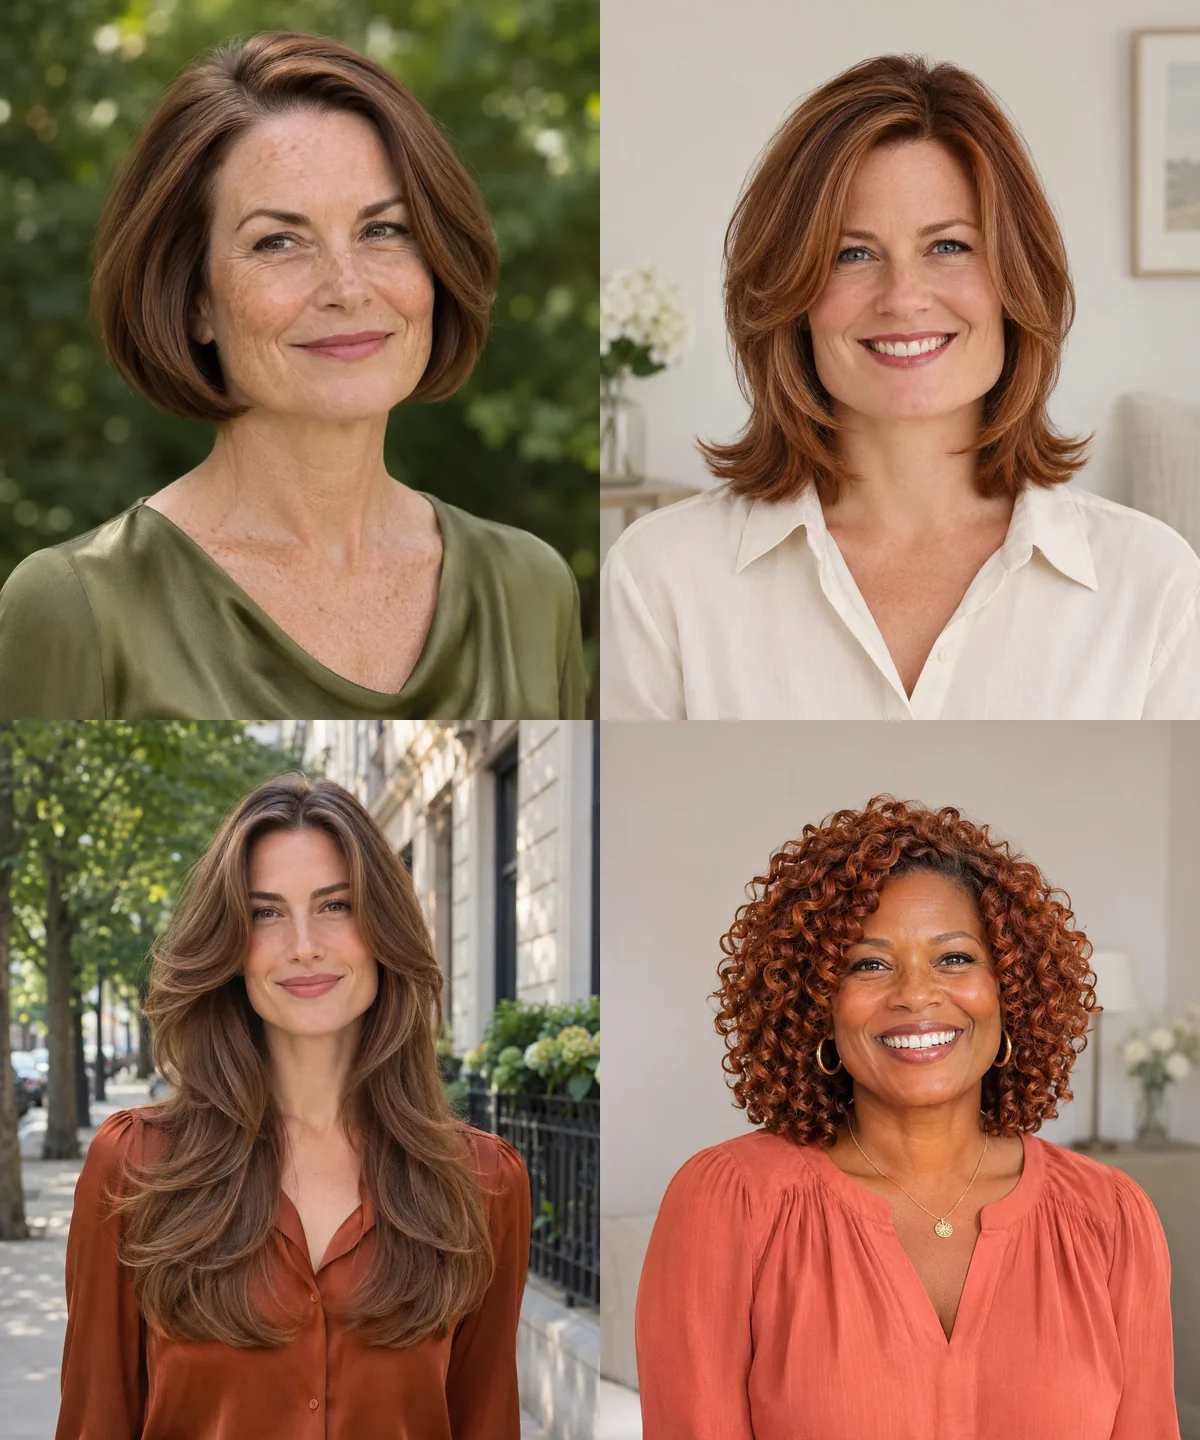
A ’90s layered haircut uses rounded, overlapping layers through the sides or crown, often with shorter pieces that sweep around the cheeks and jaw. Those pieces give the cut its curved silhouette. The Rachel is one recognizable shoulder-length version. A ’90s blowout is the brush-and-roller finish you can put on many cuts, while a shag usually shows a more broken edge and a bigger contrast between the crown and the longest pieces. Start with where you want your shortest piece to fall on an ordinary day, then pick the length you want to keep.
Find the one that feels like you: Start with the first look and let the photographs lead. Each style explains how the shape affects your features, the mood it creates and the exact words to take to your stylist.
Quick Facts
- A full hem and a small face frame can suit fine or lower-density hair.
- Shorter layers at the crown give lift but can limit what stays in a ponytail.
- Use dry photos to compare where layers land on wavy or curly hair.
1. The Rounded Jaw-Length Bob
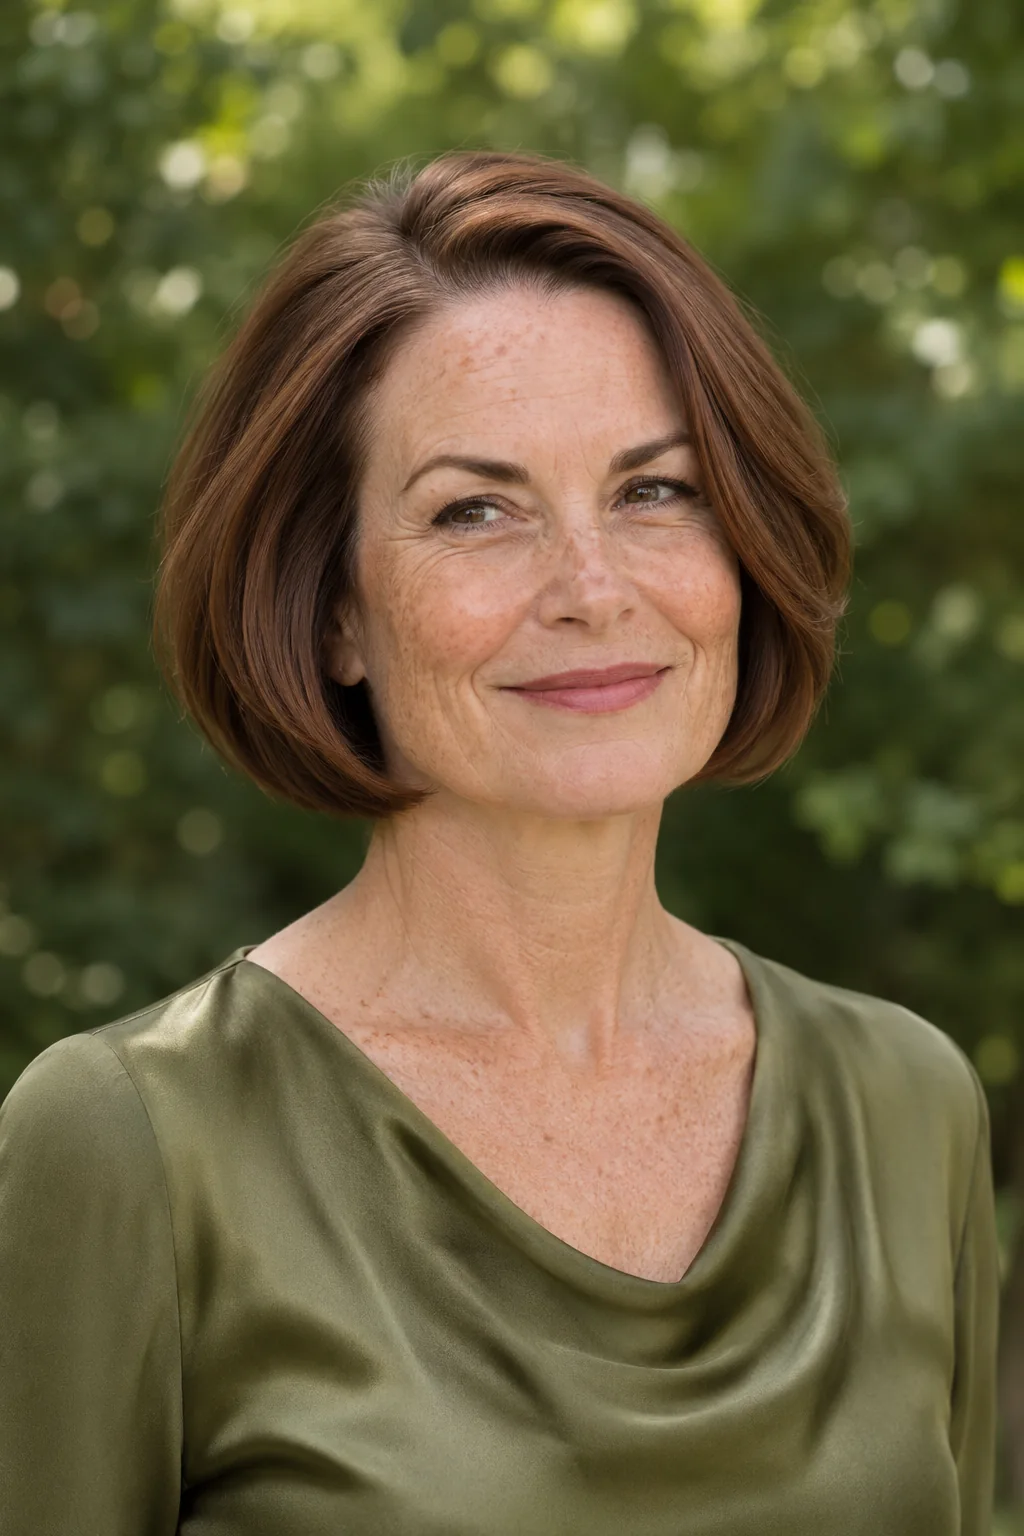
A jaw-length bob gives the rounded layers somewhere to spring without covering the neckline. Here the shortest pieces sit high on the sides and settle into a substantial edge, so medium-density straight hair gets lift around the cheeks and still looks tidy after an ear tuck. It can feel quietly dressed up on days when all you’ve done is put on earrings. Wrap the top around a medium brush and let the bottom settle with a small bend. Ask for round layers through the upper sides and a full jaw-length hem with a low, clean nape.
Ask your stylist for: Cut a jaw-length bob with compact round layers through the upper sides, a full edge and no stacked wedge at the nape.
2. The Full-Ended ’90s Lob
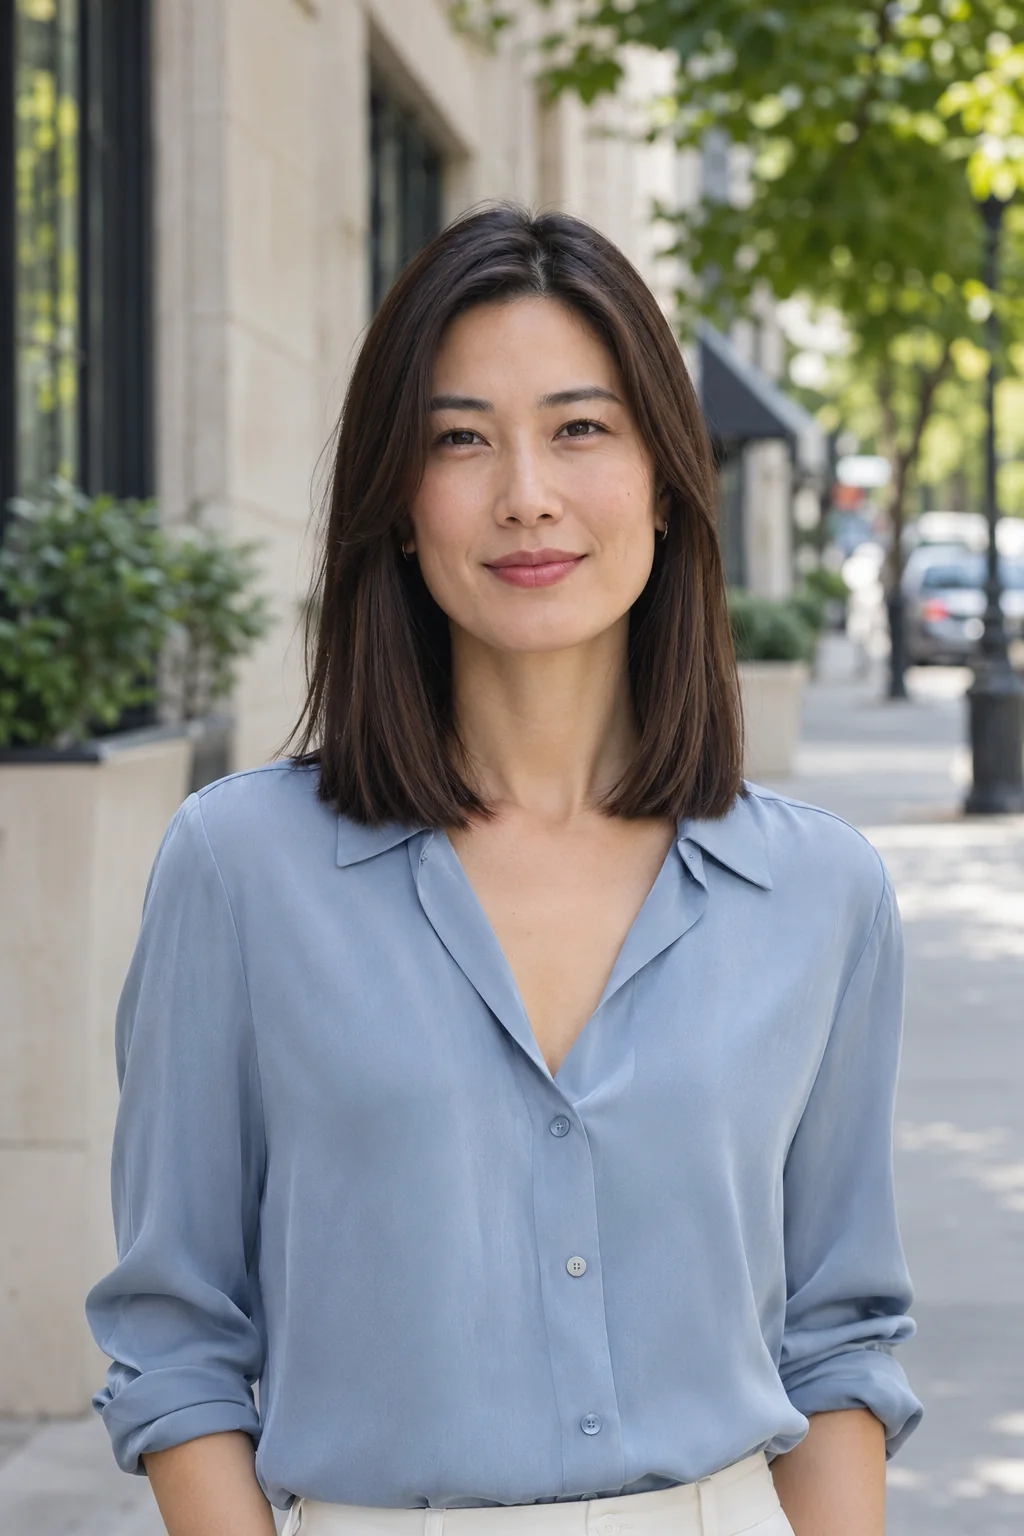
If you love the little sweep across the cheek in a ’90s cut but worry about losing fullness at the ends, save this lob. Its layering stays in a narrow section near the face, where it can draw attention to the cheekbones and give a simple work outfit a more polished feel. The collarbone edge still gathers into a low ponytail, although a few front pieces may slip out. Dry the frame over one medium roller and leave the back straight. Ask your stylist for a full collarbone hem and a shallow cheekbone-to-jaw frame with minimal layering behind it.
Ask your stylist for: Keep a full collarbone edge, with a small section of cheekbone-to-jaw framing and almost no layers in the back.
3. The Rounded Shoulder-Length Rachel
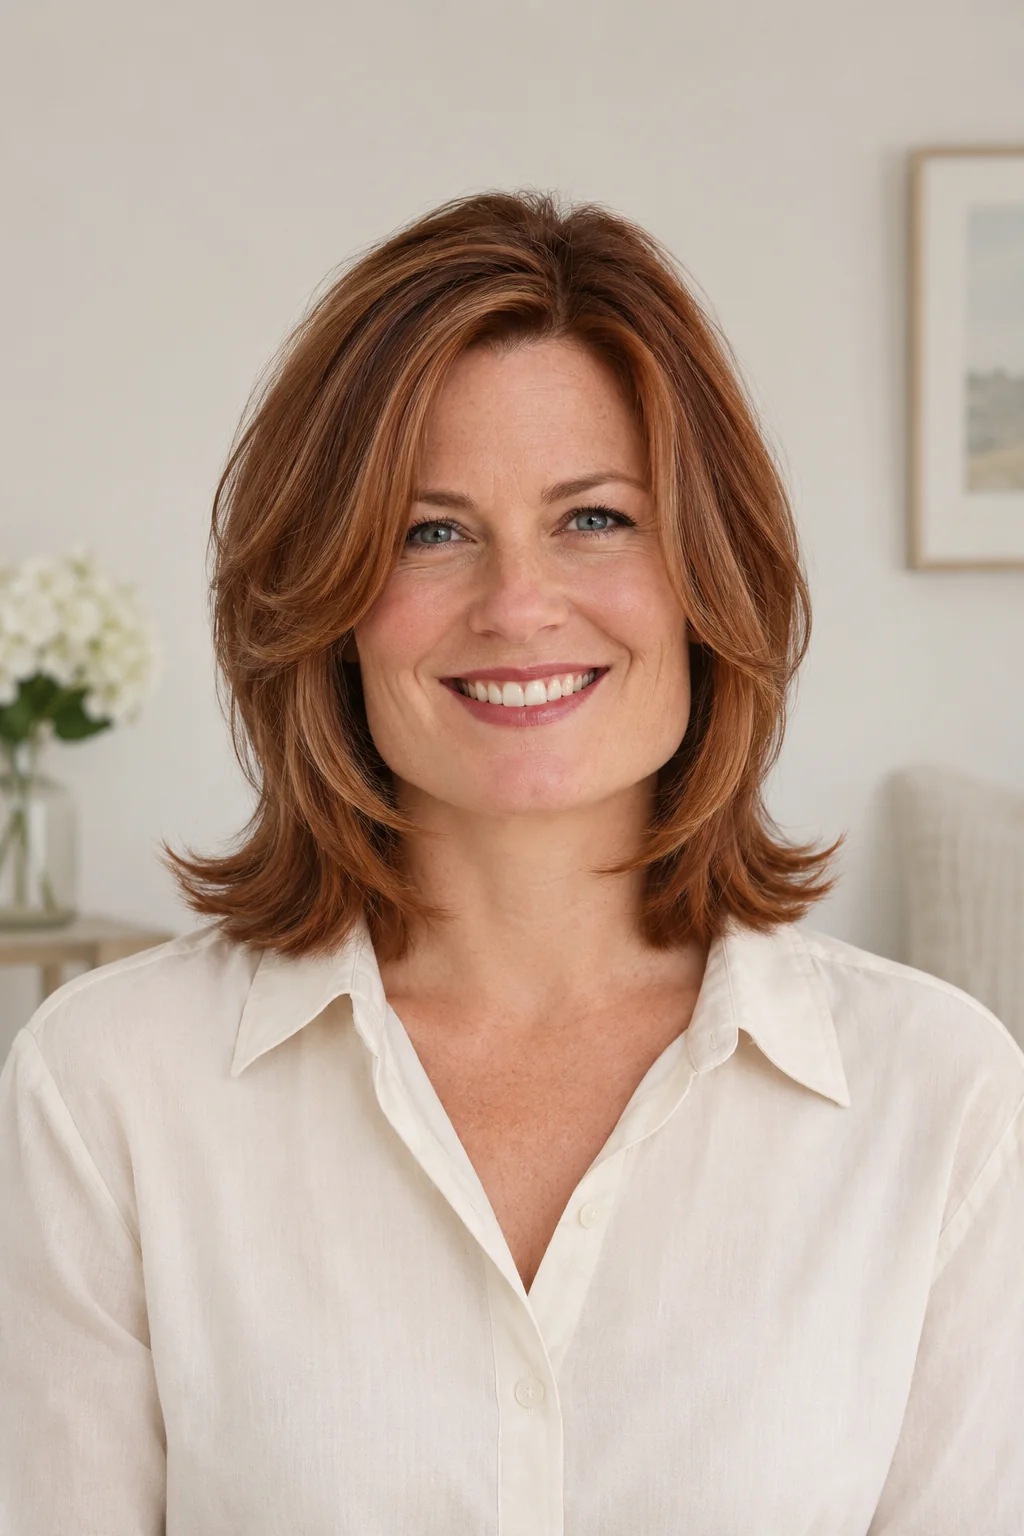
The recognizable Rachel shape comes from the change of direction at the ends. The upper layers curve in toward the jaw while the bottom tier kicks softly out at the shoulders, so a dense head of straight hair looks lighter around the face and keeps its swing. That flick can make the cut feel playful even with a plain white shirt and jeans. Curve the sides in with a brush, then turn the last inch of the bottom sections out. Ask for a rounded shoulder-length shape with connected cheek-to-jaw layers and enough weight at the ends to show both directions.
Ask your stylist for: Cut connected cheek-to-jaw layers into a rounded shoulder-length outline, with enough weight at the ends to flip.
4. The Medium Cut With Curtain Bangs

Curtain bangs give this shoulder-length version its softest line. The center opens at the brows and the sides swing past the cheekbones into the layers, giving the eyes a clear frame and making a low ponytail feel a little more romantic. It works well on soft waves if your usual part sits close to the center, though a strong cowlick may need a longer opening. Dry the fringe forward while it’s damp and part it once it cools. Ask for a brow-length center, longer cheekbone corners and a continuous connection into the sides.
Ask your stylist for: Cut an open brow-length center with cheekbone-length corners and connect those corners into the shoulder-length layers.
Pause and notice: Try holding your fingers at your cheekbone, then at your jaw. Each point puts the first curve in a different place. Save the photo that matches where you want yours to start.
5. The Side-Swept Cut With Crown Lift
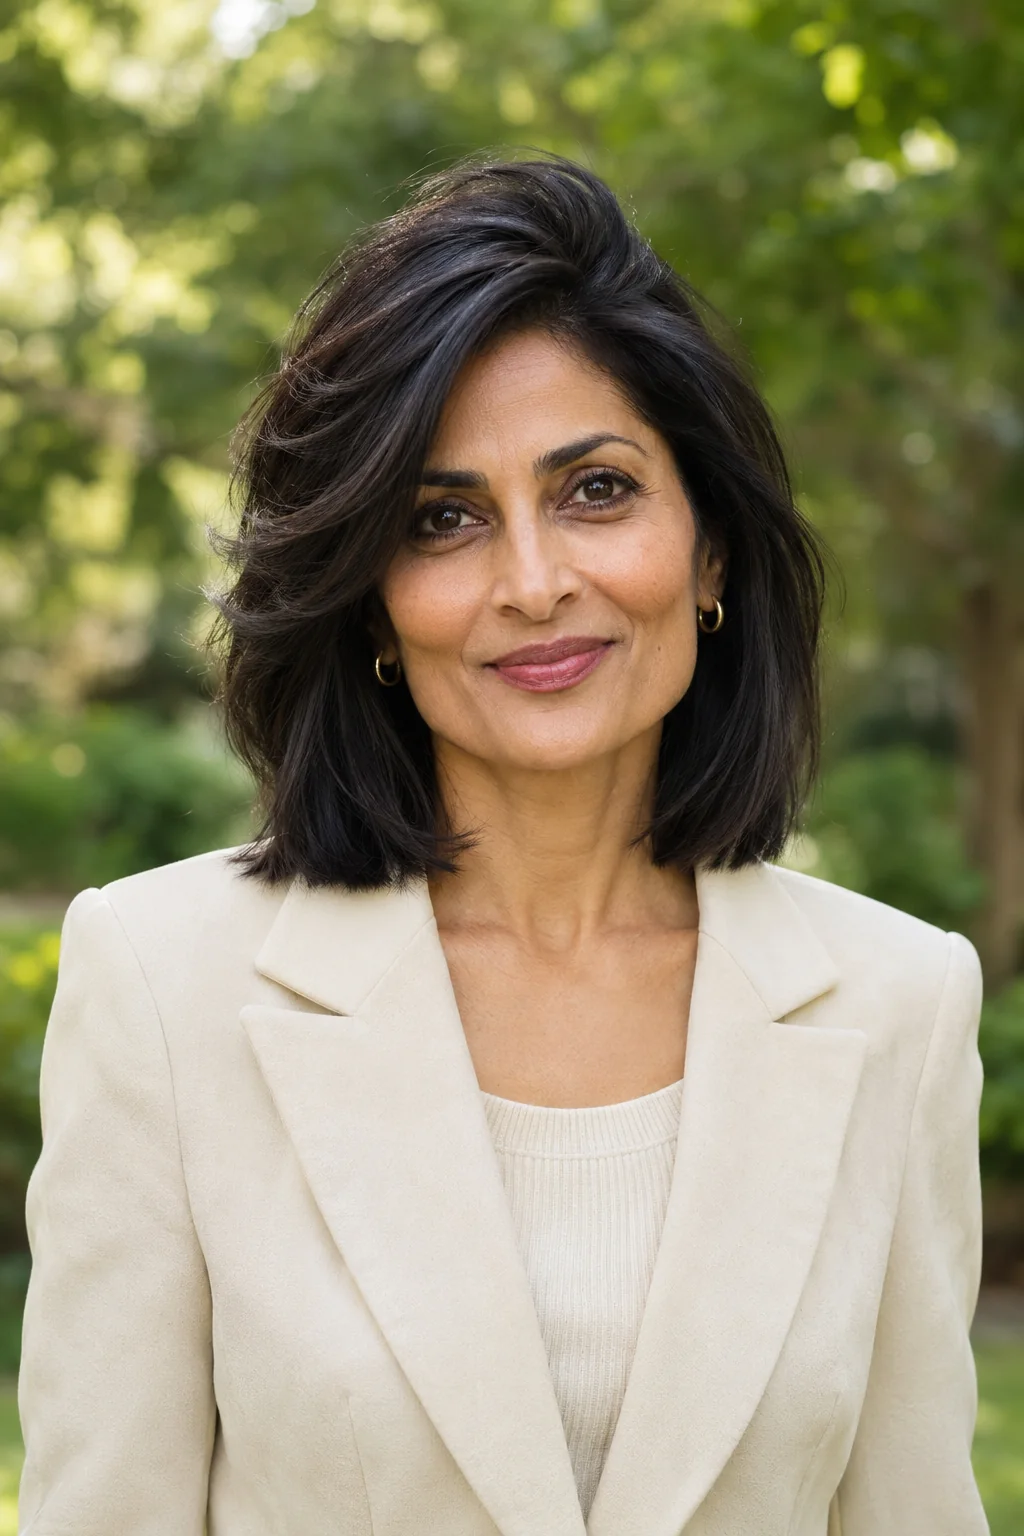
A side part changes where the volume sits on this shoulder-skimming cut. The shorter crown layers rise behind a long diagonal sweep, which opens one side of the face and gives the outline a confident, slightly dramatic tilt. It suits medium-to-thick hair that tends to lie flat on top, though the lifted side needs a reset if you sleep on it. Clip the roots in the opposite direction while they cool, then sweep the hair back. Ask for a shorter connected crown and a long diagonal front that follows your natural part, with weight left in the lower edge.
Ask your stylist for: Keep the sides and ends substantial, with a shorter connected crown and a long diagonal front that starts at my natural side part.
6. The Long Supermodel Cut With High Framing
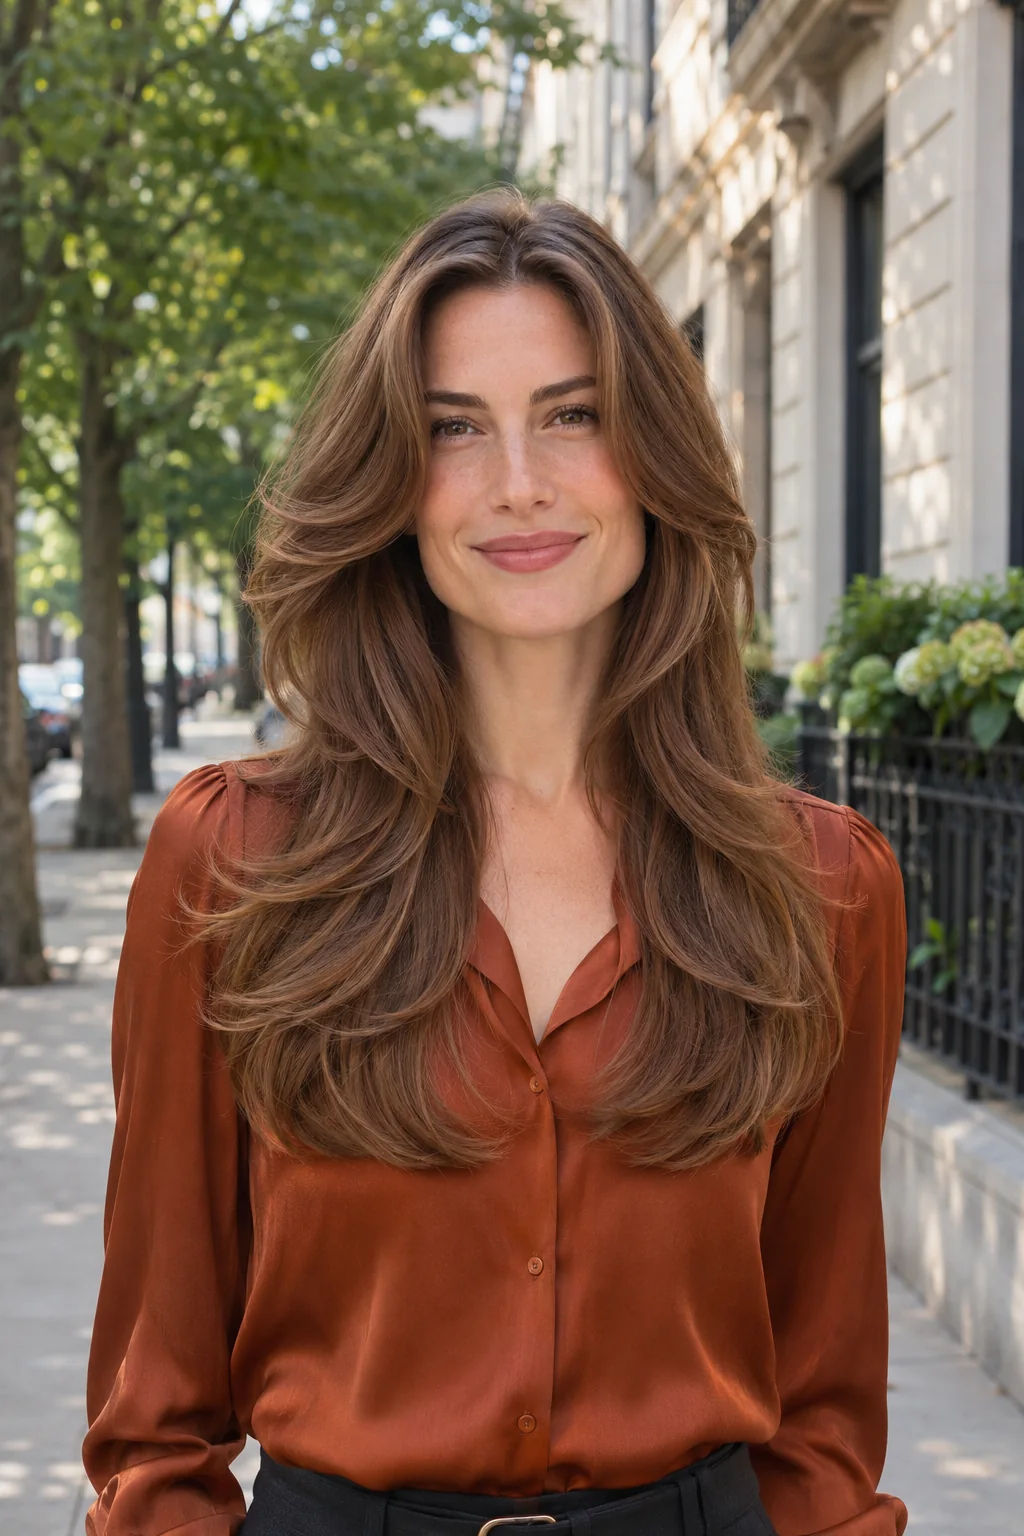
The big sweep starts with cheekbone-length pieces that open away from the face and overlap the long layers behind them. The high frame lifts attention toward the eyes and gives dense long hair movement around the shoulders, which can make an everyday outfit feel more glamorous without taking off the length. Those short front pieces will escape a high ponytail, so try a low tie if you wear your hair up for work. Set the front in wide rollers and let it cool fully before releasing it. Ask for broad connected layers, cheekbone framing and a full long baseline.
Ask your stylist for: Start the frame at the cheekbones, connect it into broad rounded layers and preserve the length and fullness at the back.
7. The Long Cut With Layers Below the Jaw
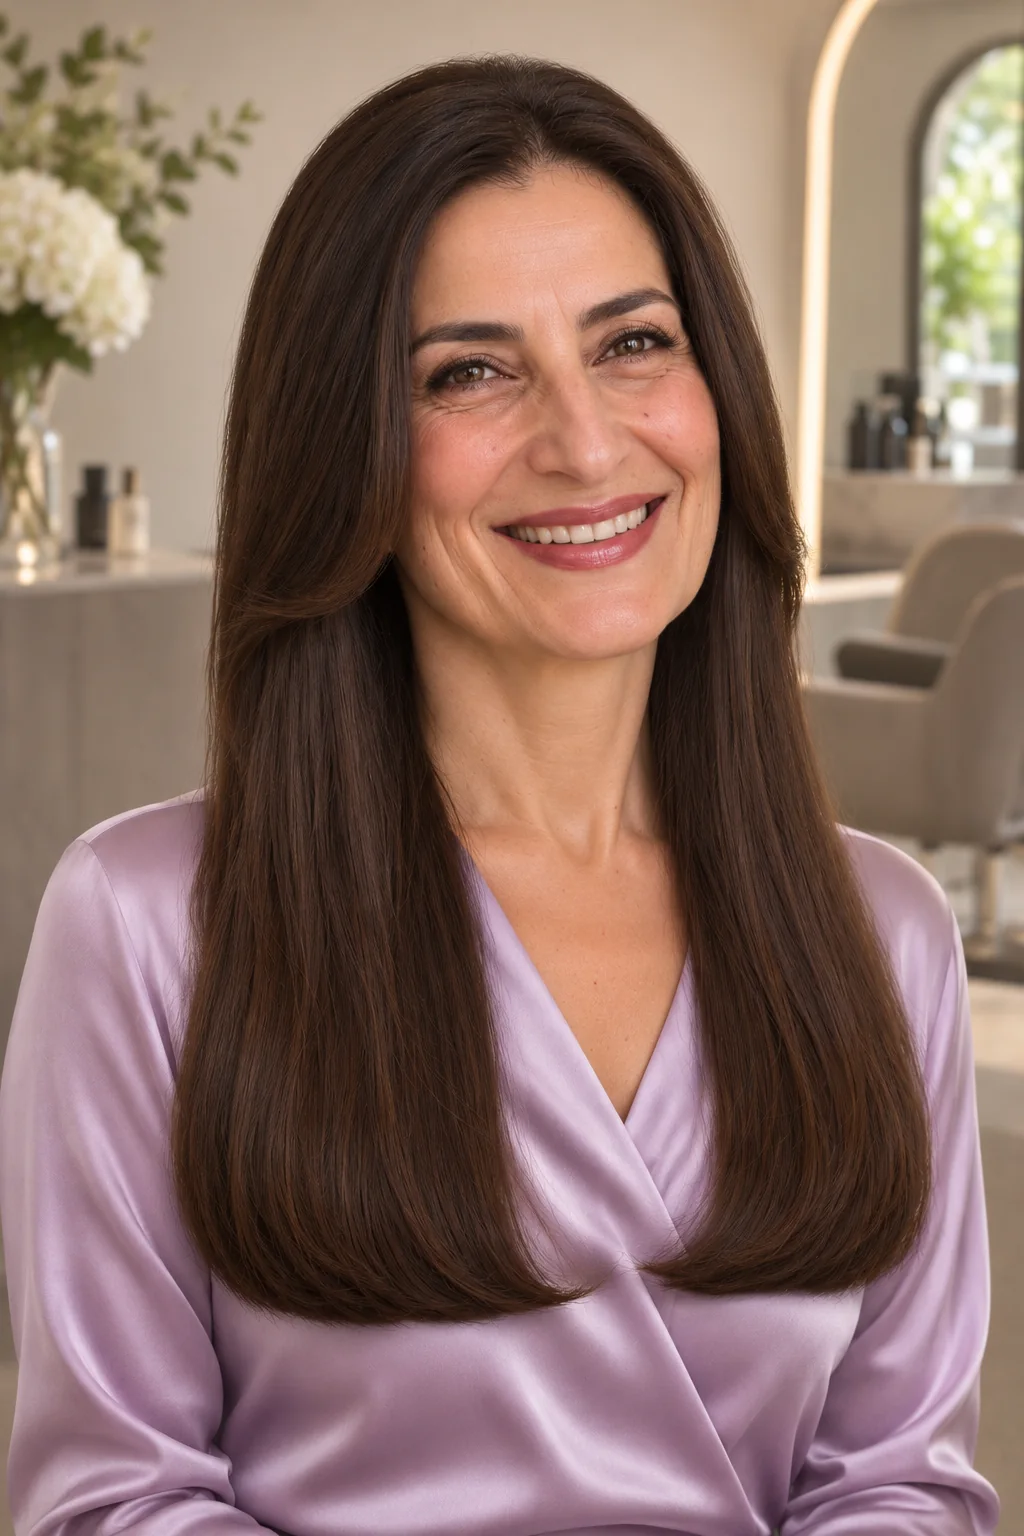
On this version, the layers start low enough that most of the hair still slips neatly into a ponytail. The long curved sections begin around the jaw and below the collarbone, where they give straight hair a slow, polished swing and keep a narrow set of ends looking substantial. It can feel composed at work without needing a full roller set before you leave. Bend just the longest ends over a large brush when you want to show the rounded outline. Ask for a jaw-length frame, long connected layers below the collarbone and a shallow U at the back.
Ask your stylist for: Start the shortest visible piece at the jaw, place the back layers below the collarbone and leave a shallow U-shaped hem.
8. The Rounded ’90s Cut for Natural Curls
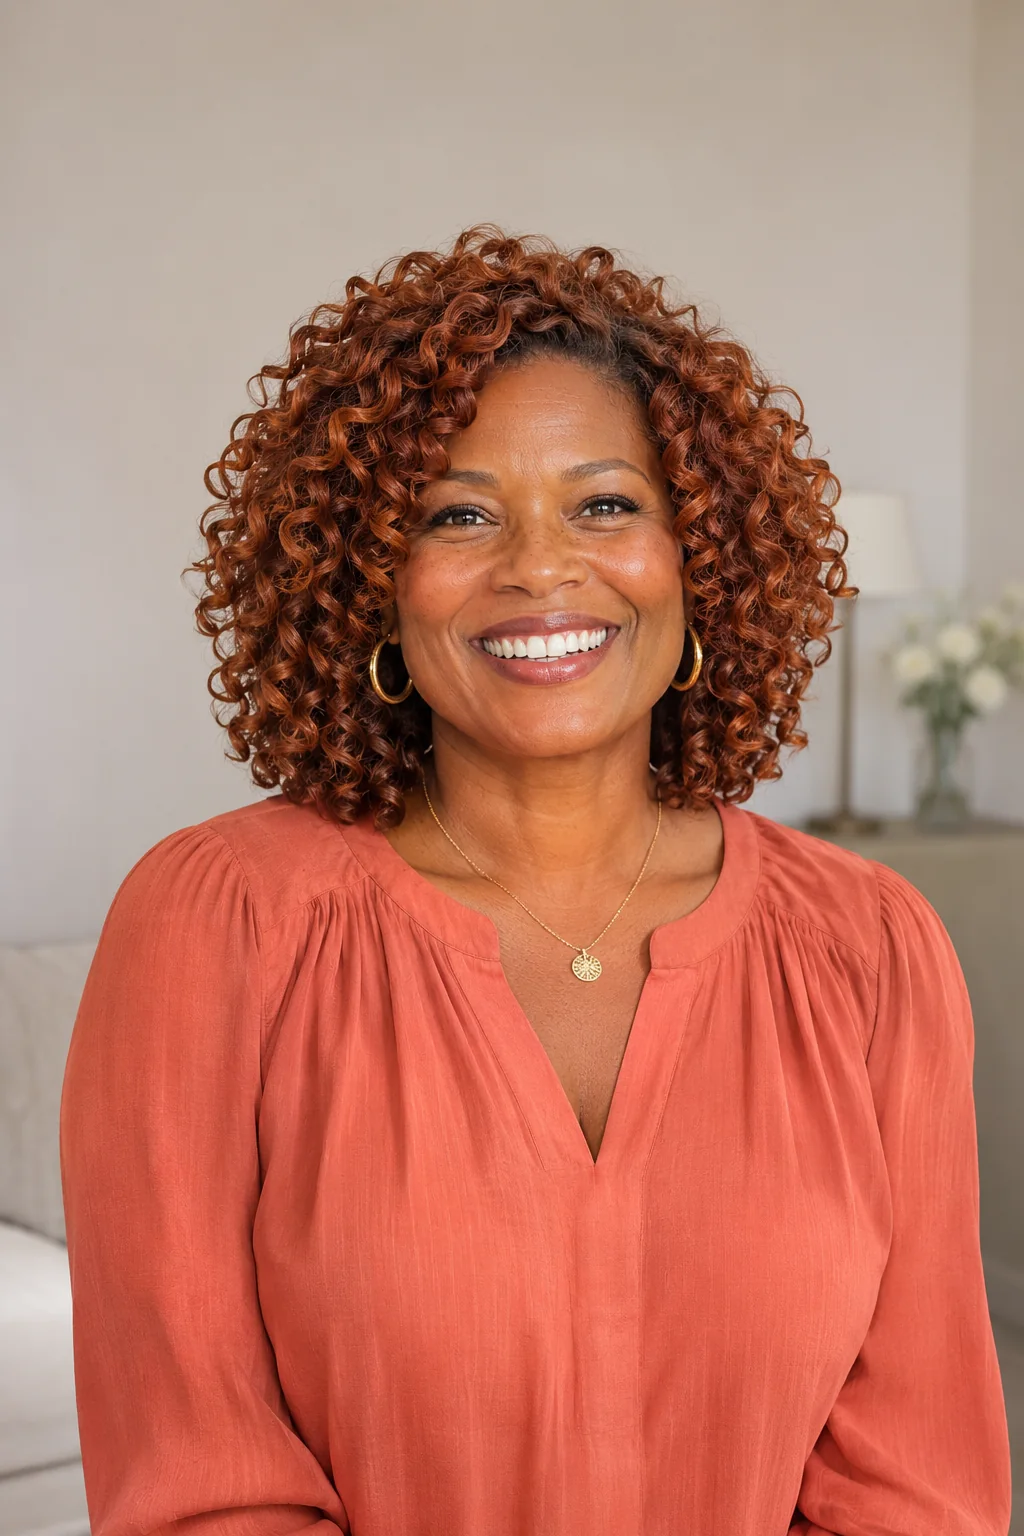
On naturally curly hair, the layers show up as arcs of ringlets rather than brush-set bends. Shorter curls around the cheekbones leave the face open, while longer outer curls round into a full shoulder-length hem that feels buoyant on wash day. The shape suits springy medium-to-dense curls, especially if the lower sides tend to spread when everything is one length. Diffuse on low without pulling the ends straight, and let the curl clumps cool before separating them. Ask for a dry shape check, cheekbone-length front ringlets and a full rounded edge at your actual dry shoulder length.
Ask your stylist for: Check my curls dry, place the shortest face-framing ringlets at the cheekbones and keep a full, rounded shoulder-length edge.
Before You Book the Appointment
A successful salon visit begins with the overall shape, construction and upkeep—not only the finished length. Use this quick reality check before choosing your final reference photograph.
- Fine or low-density hair: Try a full collarbone hem with a few face-framing layers. Ask the stylist to show how much hair will be left at the ends before adding layers at the back.
- Thick straight hair: Broad connected layers can relieve weight through the sides. Talk about where you want fullness and which sections need to stay long enough to tie back.
- Waves and curls: Show the shape your hair makes after air-drying. The stylist can place the shortest layer where the wave bends or check where ringlets land dry.
What to Ask for at the Salon
Bring one photo for the shortest front piece and another for the overall length. Point to where you want those lines to land when dry and show where you usually part your hair. On straight hair, ask to see the connections before a full blowout, when any abrupt steps are easiest to spot. If you tie your hair back most days, gather it before the appointment and show which pieces you want to keep in the tie.
Can You Get ’90s Layers on Short Hair?
Yes. On a bob, the rounded layer can start above the jaw and still settle into a substantial edge. If you want the fuller look of a lob, keep the shortest layers near the face and carry a stronger line around the back. Ask to see the side profile of the reference so you can tell how much weight sits behind the ear.
Styling, Trims and Growing Out Layers
For an everyday finish, work on the front first. A single round brush or two rollers can show the face frame while the rest air-dries. For more lift, let the roots cool in the position you want them to hold. Schedule a trim when the fringe starts covering your eyes or the face frame falls lower than you like. If you want to grow back toward one length, keep the shorter layers while trimming the longest ends a little at a time.
The Takeaway
Save the shape you’d want to see in the mirror the morning after you wash your hair. Then take one photo that shows its shortest layer and another that shows the edge. Those two details will help your stylist translate the cut to your own hair.
More Hair Inspiration
- ’90s Blowout Hairstyles — Explore roller and brush finishes once you’ve chosen your cut.
- Modern Rachel Haircuts for Thin Hair — See how to adapt the Rachel while keeping the ends full.