Shoulder-length hair sits in a lovely middle ground: enough length to play with, but not always enough to wrap around itself twice. A clever anchor can make getting ready feel much simpler—and give your everyday hair a fresh little mood.
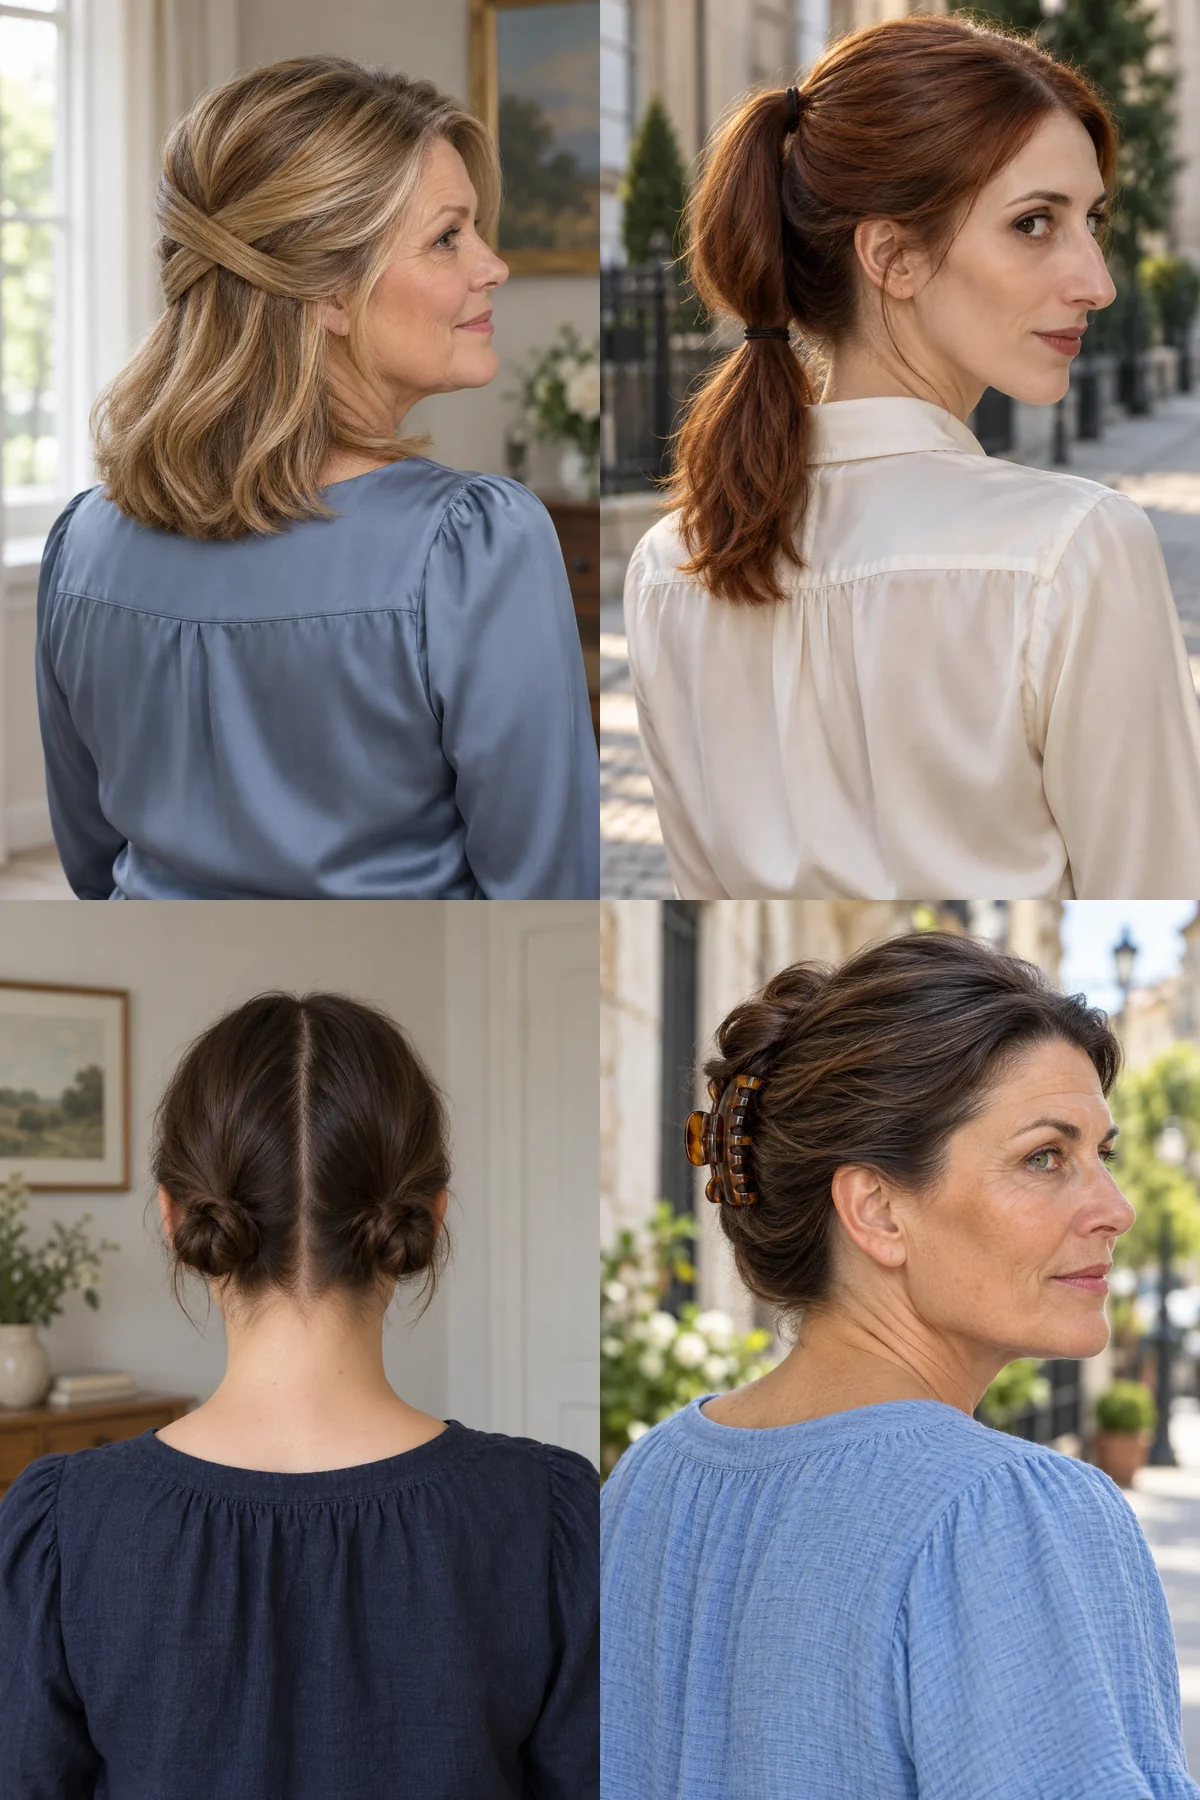
Here, easy hairstyles for medium hair means temporary arrangements on an existing shoulder-to-collarbone cut, rather than new haircuts. Their signature is a compact shape: shorter tails, small folds and separate anchors that do not demand waist-length hair. A half-up arrangement leaves the nape loose; a full updo must catch those shorter strands too. Easy also means a manageable construction, not a promise that every style works instantly on every texture. Check your shortest layers and try the shape without pulling before choosing it.
Find the one that feels like you: Start with the first look and let the photographs lead. Each style explains how the shape affects your features, the mood it creates and the exact words to take to your stylist.
Quick Facts
- Check the nape and shortest side layers before gathering your hair.
- Use a barrette or clip sized for the section, not the overall hair length.
- Start with styles you can see in the mirror; back-of-head folds may take practice.
- A secure style should feel comfortable at the scalp.
1. Flat Barrette Half-Up
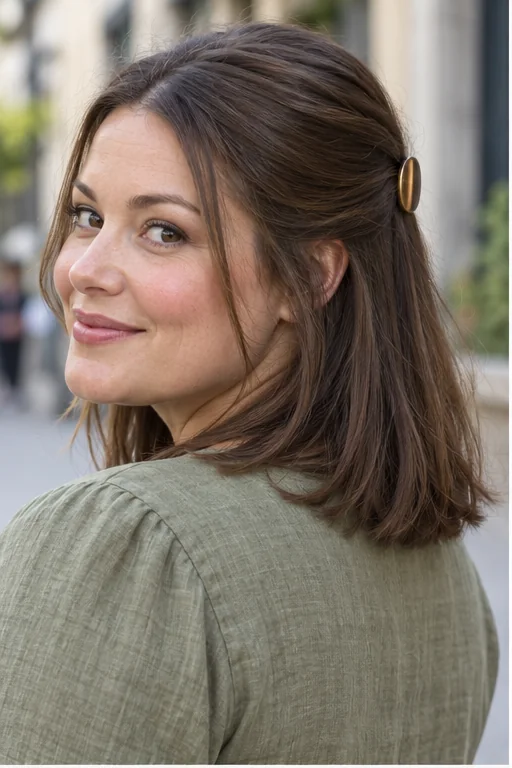
A flat barrette draws a narrow upper section back without building a knot or bump, leaving shoulder-length ends loose and softly mobile. The clean line opens your face while preserving fullness below, giving fine or medium-density hair a quietly polished workday mood without a bulky accessory. Take only the hair above the temples, bring it together without twisting, and fasten a light barrette that closes without pinching; slippery strands may need a little texture spray first. For a styling appointment, ask for a flat half-up gathering, a narrow oval barrette and loose ends, with the side layers left soft rather than stretched tight.
Ask your stylist for: A narrow flat half-up gathering with an oval barrette and loose shoulder-length ends.
2. One Side Rope Twist With a Hidden Anchor
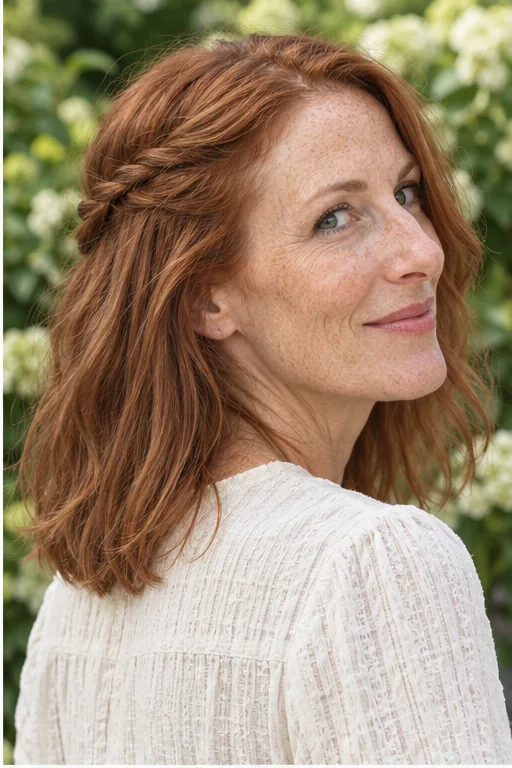
One narrow rope twist travels from the temple to just behind the ear, where its end disappears beneath the loose shoulder-length hair. That diagonal detail clears one cheek and adds a playful asymmetry, making an ordinary loose style feel considered without asking the shortest nape pieces to reach anywhere. Divide the side section in two, twist each piece in the same direction and cross them in the opposite direction, then pin the end underneath a small covering section; this may take a practice run. Ask for a single two-strand side rope with a concealed anchor, soft tension and the remaining waves left loose.
Ask your stylist for: One two-strand rope above the ear pinned beneath loose back hair.
3. Crossed-Section Half-Up
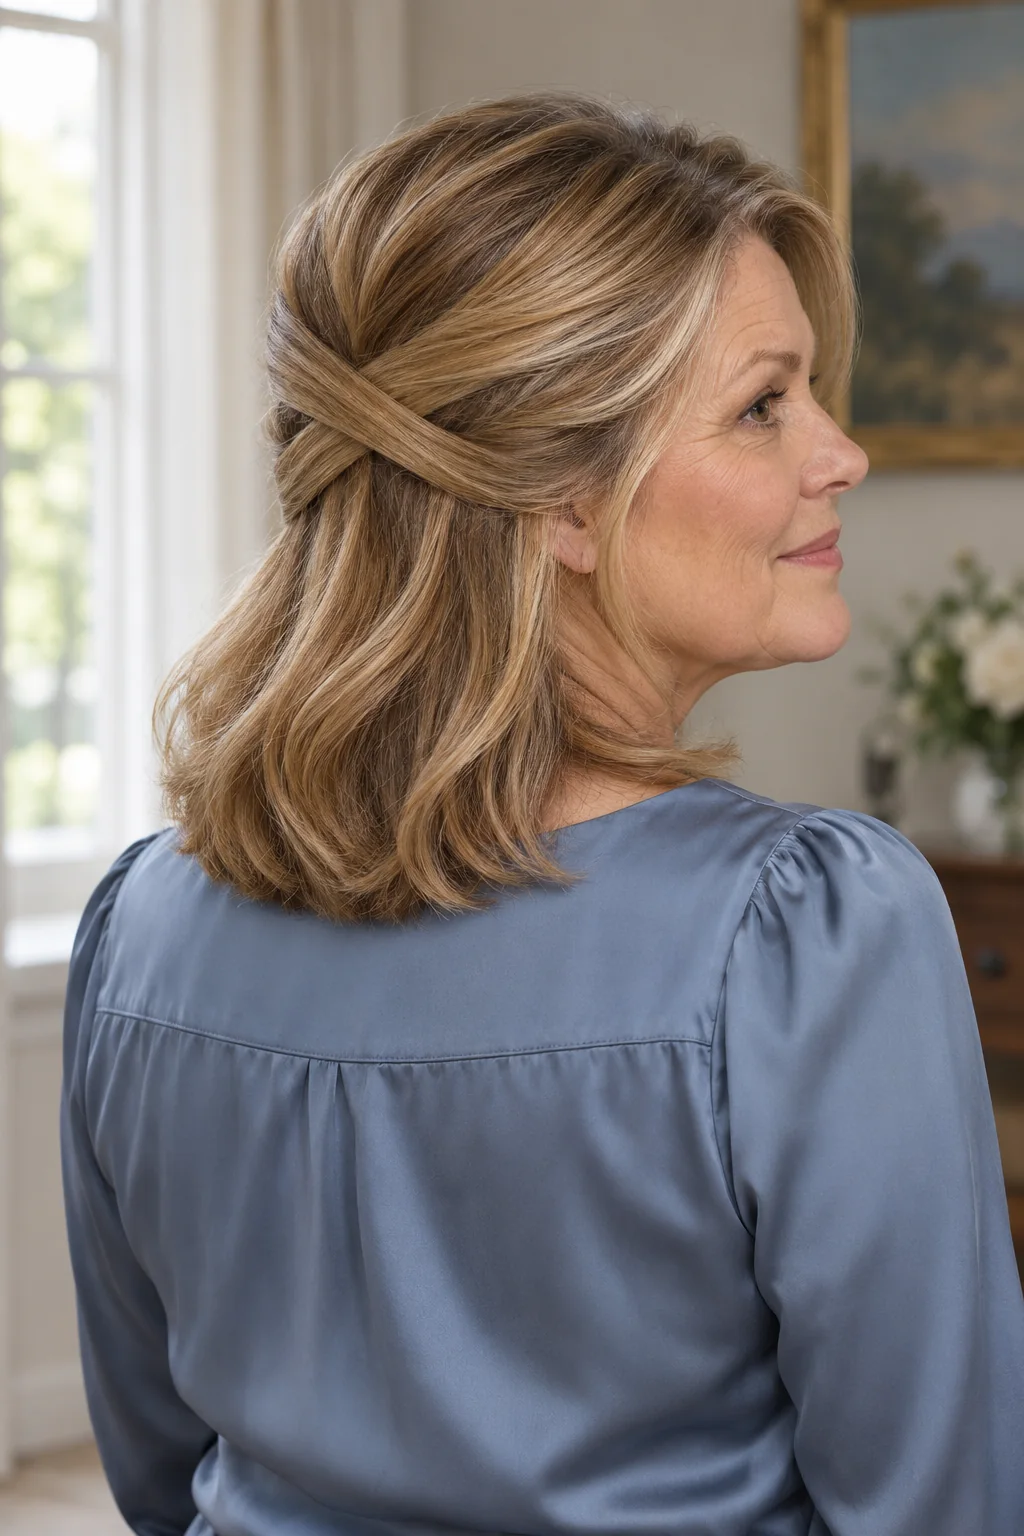
Two smooth side sections overlap in a shallow X at the back, creating a little woven-looking detail above loose collarbone ends. The flat construction keeps the crown understated while bringing lightness around the cheeks, so you can feel dressed for dinner without committing to a full updo. Bring one side across and pin it beneath the opposite loose hair, then cross the second section over it and hide its anchor underneath; shorter layers may need an extra small pin rather than more tension. Ask for crossed flat half-up sections with concealed pins, no rope twisting and plenty of loose hair beneath the intersection.
Ask your stylist for: Two flat side sections crossing in an X, separately pinned underneath.
4. Two Tiny Temple Clips
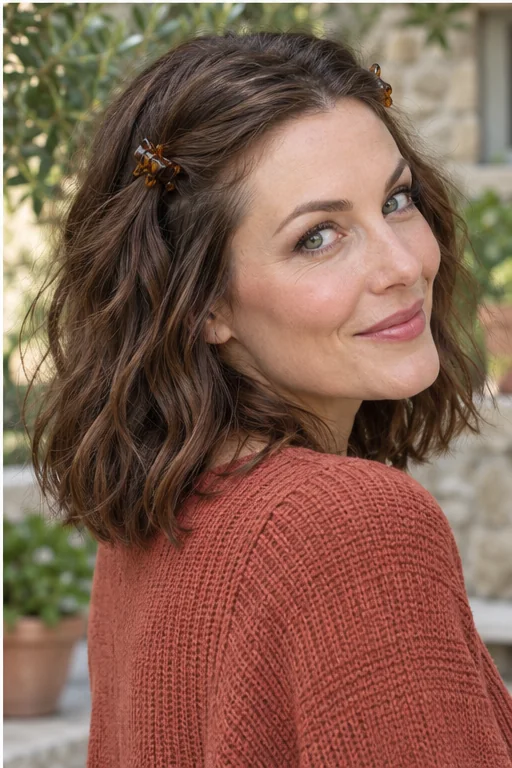
A miniature claw clip on each side holds a small temple section back while the crown and shoulder-length waves remain loose. The paired anchors create an open, friendly outline around the face and can make a busy morning feel lighter, especially when front layers will not reach a single back fastening. Lift each section gently toward its own temple clip, keeping the gathers small enough for the teeth to close fully without pressing into the scalp. Ask for two separate tiny temple gathers with natural root lift and loose lower hair; choose smooth clips and move them if they press against your glasses or feel uncomfortable.
Ask your stylist for: Two small temple sections clipped separately with loose crown and lower waves.
Pause and notice: Start with a half-up option if the nape keeps escaping. That leaves the shortest hair in its natural position while still changing the outline around your face.
5. Stacked Ponytail
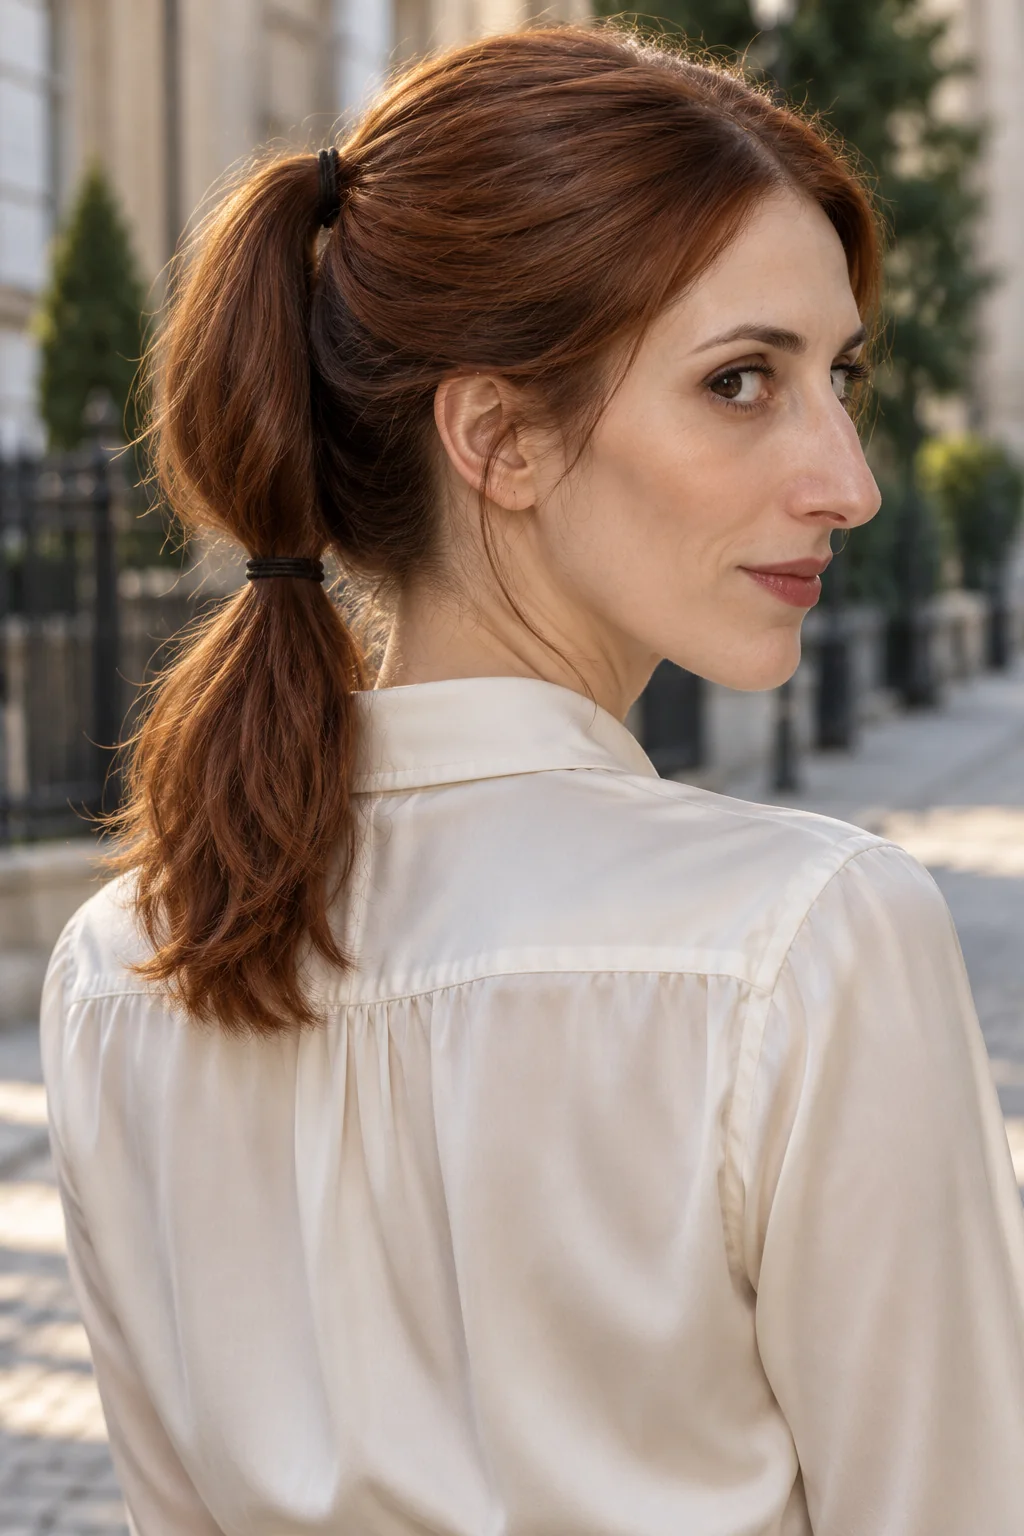
Two ponytails sit one above the other at the back, with the upper tail falling over the lower elastic to form one compact outline. Splitting the gather gives shoulder-length nape hair a nearer anchor and lifts the top section, which can make the style feel energetic while avoiding the strain of forcing everything into a high ponytail. Tie the lower section first, place the upper elastic close enough to cover it, and check the side view; sparse ends may show the lower fastening, so this works best with enough density to overlap. Ask for two stacked gathers with a softly lifted crown and no tight pulling at the temples.
Ask your stylist for: Two close stacked ponytails with the upper tail overlapping the lower anchor.
6. Low Side Pony With a Small Bow
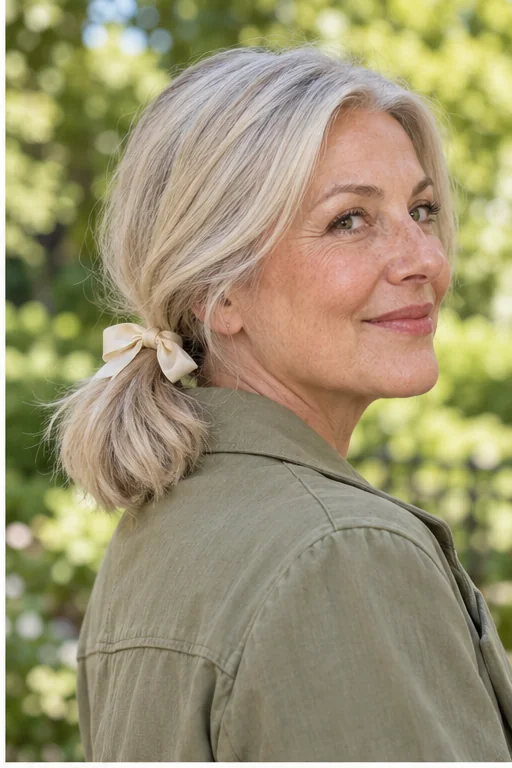
A low ponytail sits just behind one ear, finished with a small ribbon bow and a short tail that rests near the shoulder. Its off-center placement adds a gentle, romantic line and can make a simple lunch or coffee date feel special without a complicated weave. Sweep the hair toward the nearer nape corner, secure it with a covered elastic and tie the ribbon over that foundation; opposite-side layers may need a discreet pin, and a large bow can overwhelm the compact tail. Ask for a low side gathering with a small fabric bow, soft face pieces and a loose finish that does not pull across the scalp.
Ask your stylist for: A low side pony behind the ear with a short tail and small ribbon.
7. Two Low Knots With Short Ends
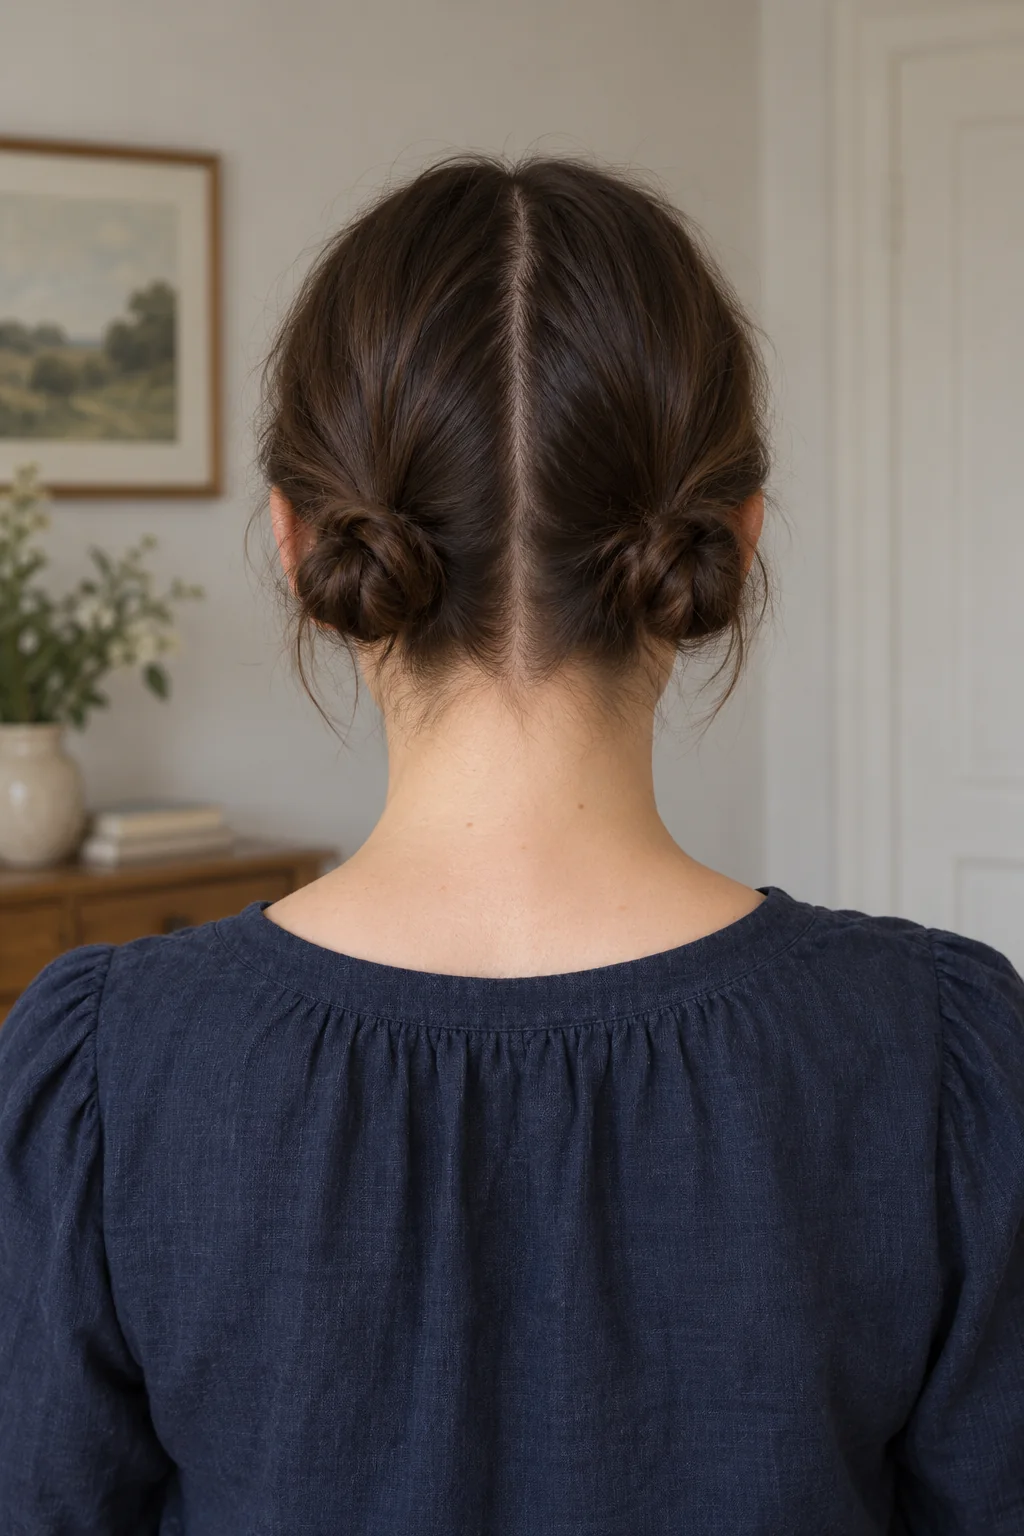
Two little knots sit low behind the ears, each formed from half the hair with a few soft ends left visible. Dividing the volume makes a shoulder-length updo more achievable and gives the outline a cheerful, relaxed balance that suits casual days when you want everything off your neck. Gather each side low, turn its short tail once around the elastic and pin only as far as it reaches comfortably; if it cannot wrap, a small folded loop is a better choice. Ask for two compact low knots with modest volume and an easy center part, keeping the hairline loose and the two sides similar rather than perfectly identical.
Ask your stylist for: Two compact low knots behind the ears with short soft ends.
8. Soft Headband Roll
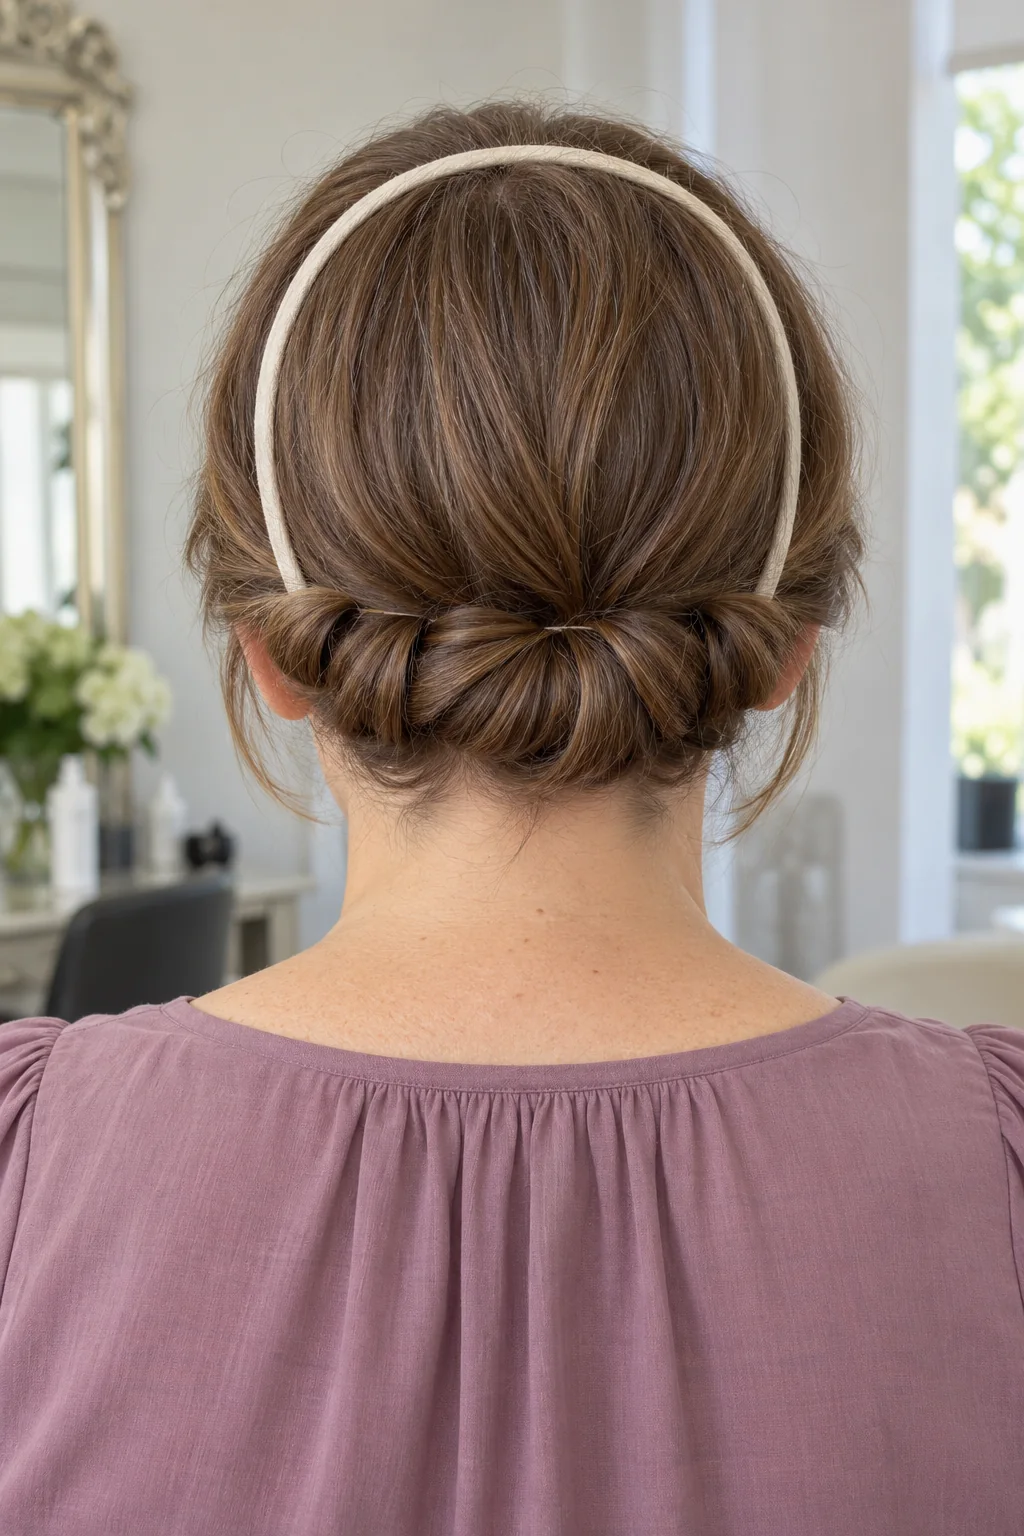
A soft fabric headband provides a foundation for a narrow roll along the nape, with shoulder-to-collarbone ends tucked around it in small sections. The rounded line feels softly dressed up and opens the neckline, offering a little occasion polish when a conventional wrapped bun needs more length than you have. Place a comfortable band over the hair, then tuck small sections around the lower band and secure any loose ends with pins; slippery layers or very thick sections may make this a practice-day style. Ask for a compact headband roll with gentle individual tucks, a low silhouette and soft face pieces rather than a tightly packed ring.
Ask your stylist for: A compact headband nape roll with individually tucked sections and soft face pieces.
Pause and notice: A smaller shape is often easier to support. Resist pulling a short tail tighter to make it wrap; change the anchor or choose an open-ended finish.
9. Open-Ended Low Knot
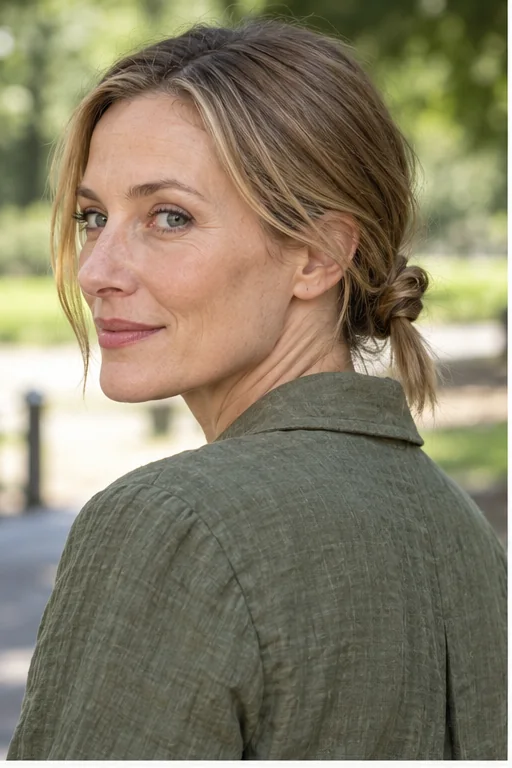
A small knot sits at the nape with a short tail left deliberately loose instead of hidden inside a larger bun. That open-ended finish feels modern and easygoing, keeping collarbone hair off the shoulders while showing that a polished updo does not need a long wrapped coil. Make a low ponytail, turn the tail into a small loose knot only if it passes through comfortably, and support the shape with pins; thick hair or short layers may be better in a folded loop. Ask for a compact nape knot with visible soft ends, gentle tension and an airy crown, without stretching the tail to force the construction.
Ask your stylist for: A small low knot with an intentional short loose tail held gently with pins.
10. Short Folded Claw-Clip Twist
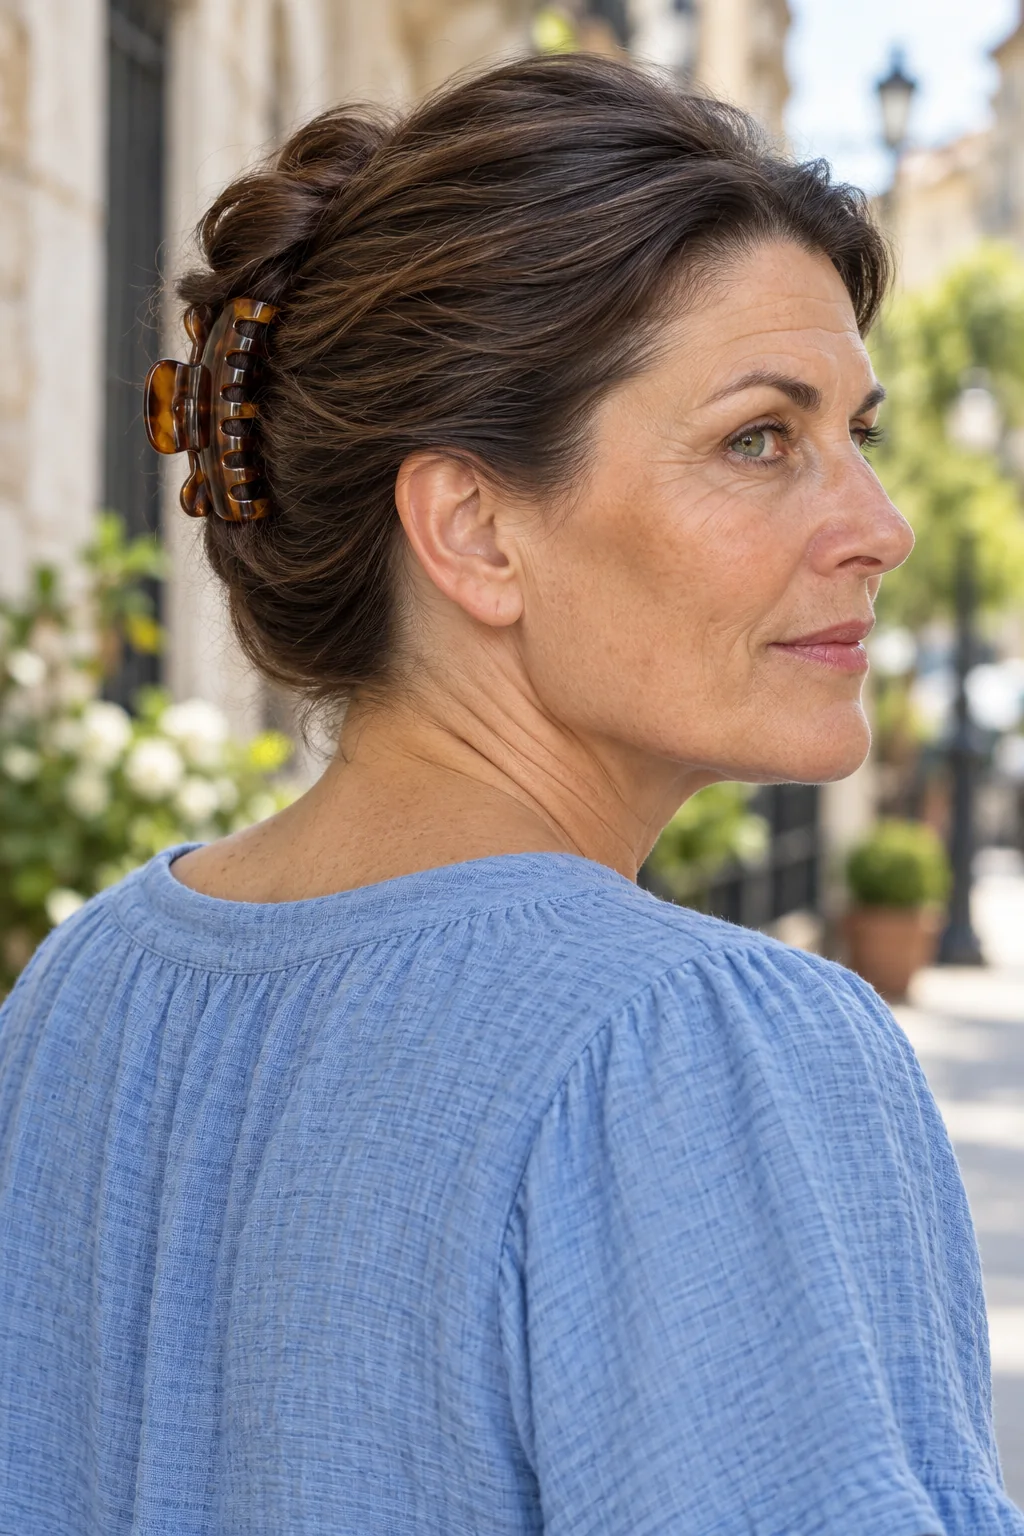
A short vertical fold runs up the back of the head, held by a medium claw clip with the ends tucked inside rather than spilling into a long cascade. The compact shape gives shoulder-length hair a clean, capable workday impression and clears the neck without asking a short tail to form a whole bun. Gather low, twist once upward and fold the ends into the center before clipping through the sides of the fold; dense hair needs a deeper clip, not a tighter twist. Ask for a short folded claw-clip updo with tucked ends, comfortable closure and a little soft crown texture, then check how it feels against your chair.
Ask your stylist for: A short vertical folded twist with a medium claw clip and tucked ends.
11. Front Pin-Curl Accent
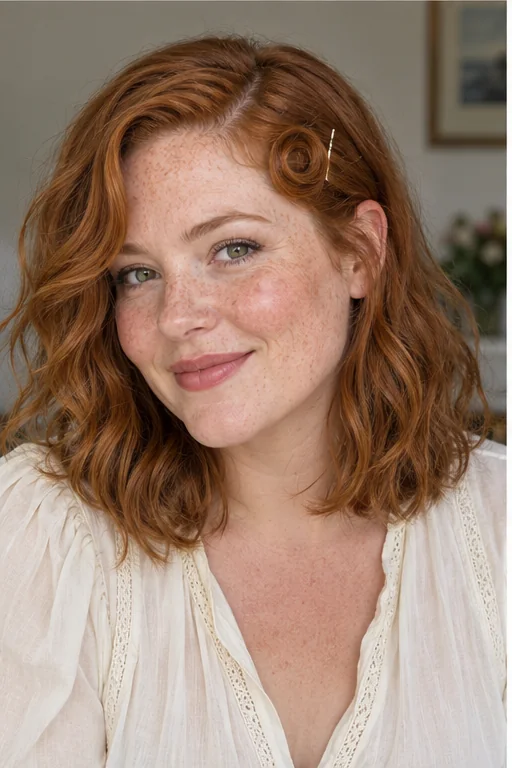
One small front section curves into a flat pin-curl beside the part, while the rest of the shoulder-length hair falls in loose natural bends. That little rounded accent draws attention toward the eyes and creates a playful hint of vintage polish, making familiar loose hair feel more expressive without a full set of curls. Shape a small section around two fingers, slide it into a flat curve and anchor discreetly through its base; resistant straight hair may need a gentle pre-shaped bend and light hold. Ask for a single soft front pin-curl accent with a visible curve, loose lower hair and no large rigid victory roll.
Ask your stylist for: One soft flat pin-curl beside the part with loose waves and no rigid roll.
12. Short Braided Ponytail
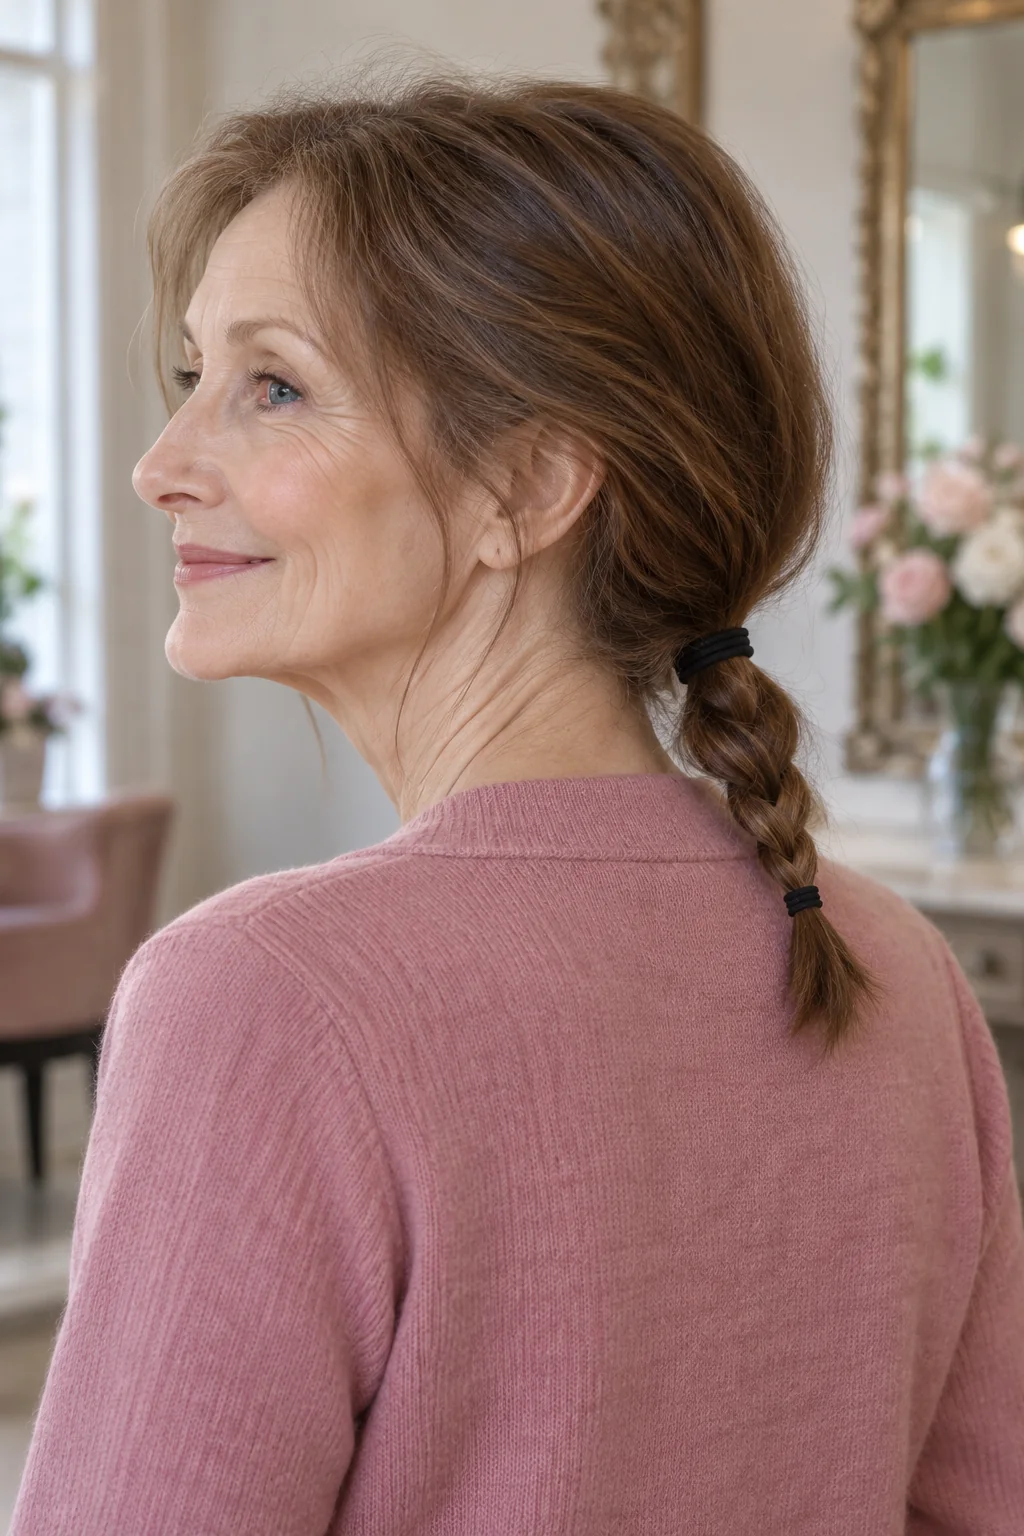
A low elastic gathers the hair first, and only the short tail beneath it becomes a three-strand braid with a small loose end. The separate foundation keeps the construction simpler than braiding all the way down the back, giving medium hair a neat, practical finish that can feel reassuringly together on an active afternoon. Make a comfortable low ponytail, divide the available tail in three and weave just the length that overlaps securely; very short or heavily layered tails may not supply enough turns. Ask for a low anchored ponytail with a short braid below the tie, two covered elastics and a soft crown, without tightening to catch every strand.
Ask your stylist for: A low ponytail with a short three-strand braid below the elastic and a small loose end.
Before You Book the Appointment
A successful salon visit begins with the overall shape, construction and upkeep—not only the finished length. Use this quick reality check before choosing your final reference photograph.
- Fine hair: Lightweight barrettes and small anchors help keep the loose section visibly full.
- Thick hair: Divide the weight or use a clip that closes comfortably around the fold.
- Waves: Leave some natural bend rather than straightening every strand first.
- Curls: Gather dry curl groups gently and allow for shrinkage when judging reach.
- Short layers: Half-up arrangements usually become possible before full updos.
Find your usable length before choosing a style
Shoulder-to-collarbone describes the loose outline, but the shortest layers determine what will stay gathered. Check the nape and sides separately. If a section reaches only when pulled, leave it loose or give it its own nearby anchor. A short tail may hold a fold before it can wrap into a knot; a braid needs enough overlapping length below the elastic to make several secure crossings.
Make the hold suit your hair
For fine hair, start with small gathers and lightweight accessories so the loose section retains fullness. With thick hair, divide the weight or choose a deeper clip whose teeth close comfortably. Gather curls in their dry shape and judge reach after shrinkage; avoid repeatedly separating curl groups. Straight slippery strands may benefit from a small amount of grip product, while waves can often keep their existing bend. More product does not fix an accessory that is too small.
What to say at a styling appointment
Explain that you want a temporary arrangement on your existing medium cut. Name the anchor position, the sections left loose and whether the ends should be tucked or visible. Bring a photograph of the back as well as the front, and ask whether your shortest layers can support the construction without extensions. Request comfortable tension and a demonstration of the section sizes and pin placement if you want to repeat the style yourself.
Which options are easiest to learn?
Start with a flat barrette, two tiny temple clips or the low side ponytail: you can see much of their construction in a mirror. Crossed sections, headband rolls and back-of-head folds may need a practice session and a second mirror. Set aside time for the first attempt instead of testing a new updo just before leaving. A style earns its place in your routine when you can make it comfortably and it holds on your hair.
Keep the style comfortable, then undo it gently
Reposition any clip that presses against your scalp or chair, and release an arrangement that pulls at the hairline. Add a nearby anchor for an escaping section instead of tightening the whole style. Remove pins one at a time, open clips fully and unwind covered ties rather than dragging them through the ends. If you use a hot tool to prepare a bend, work on dry hair with appropriate heat protection and avoid repeated passes.
Let growing layers open up new options
If you are growing your cut, preserve the length needed for your chosen gather at trim appointments. Side pieces may begin reaching a barrette before the nape can join an updo, so start half-up and let the shorter sections remain loose. As a tail grows, it may move from a small fold to a knot or short braid. Choose one visible, comfortable arrangement for ordinary mornings and one practice style for when you have more time—that is plenty of useful variety.