You might want to keep the length you can pull back, clear the hair around your glasses, or finally let your waves dry on their own. A good haircut starts with the thing you want your hair to do on an ordinary morning.
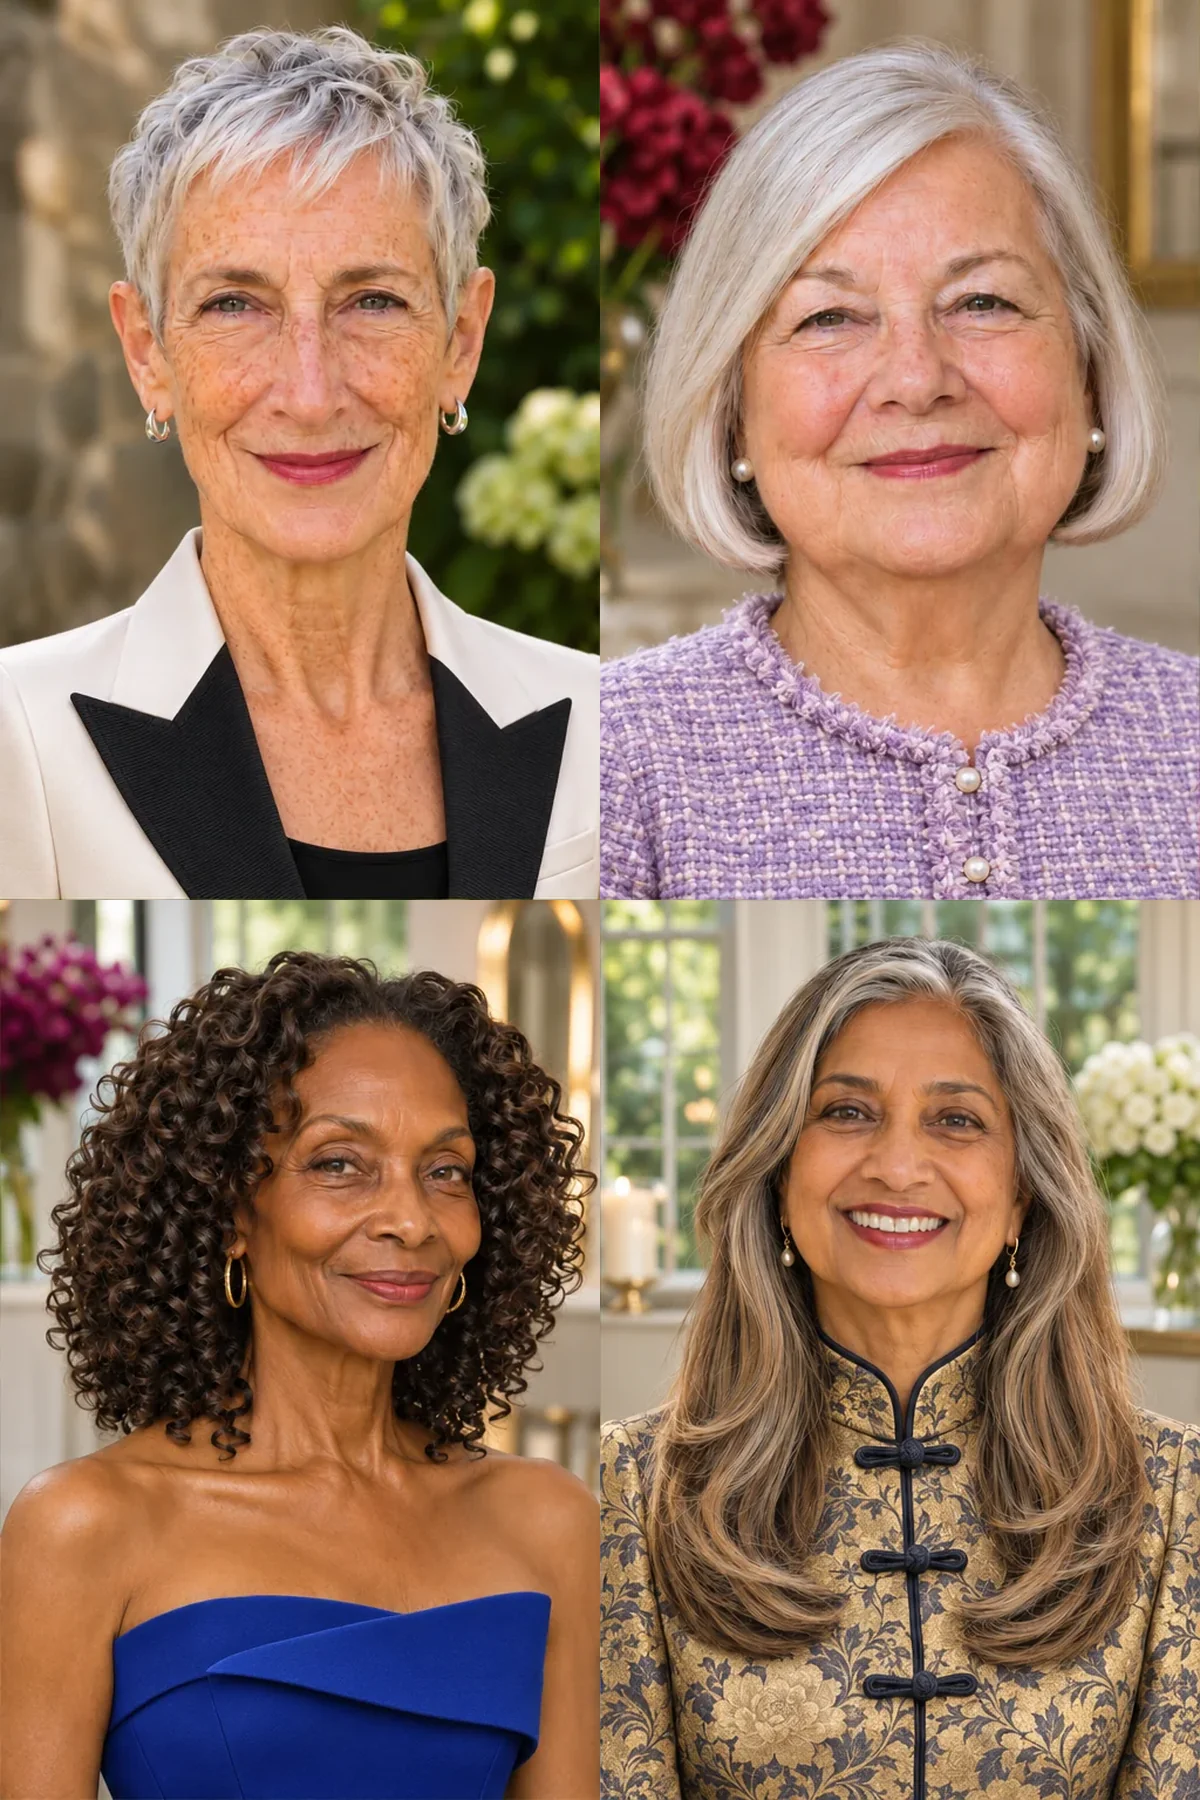
Haircuts for women over 70 range from short crops with exposed ears to bobs with a defined edge and long cuts that still tie back. It’s a guide to choosing a cut at this stage of life, with photos on women in their seventies. Each shape has a different job. A tapered pixie keeps the neckline clear, a bob puts weight into its bottom edge, and longer connected layers keep movement without giving up length. Start with your natural texture and the amount of coverage you like around your face and neck.
Find the one that feels like you: Start with the first look and let the photographs lead. Each style explains how the shape affects your features, the mood it creates and the exact words to take to your stylist.
Quick Facts
- Bring the glasses you wear most and check the temple pieces with the frames on.
- Compare how long a cut takes to style with how often it needs a trim.
- Agree on the dry length for curls and check your usual tie-back before shortening the front.
1. The Close Crop With Open Ears

If hair tends to snag on the arms of your glasses, an ear-clearing crop can make getting dressed feel a little simpler. The top lies forward in short, connected pieces, so fine straight hair can look neatly shaped without a high crown, and the open sides bring attention to your eyes. There’s a brisk, unbuttoned feeling to a haircut you can reset with damp fingertips, though the outline shows growth quickly. Ask for a soft scissor taper that clears both ears completely and just enough length on top to brush forward, with no hard clipper line at the nape.
Ask your stylist for: Keep the ears fully clear and the neckline softly tapered, with just enough length on top to brush forward.
2. The Long Pixie With a Side Sweep
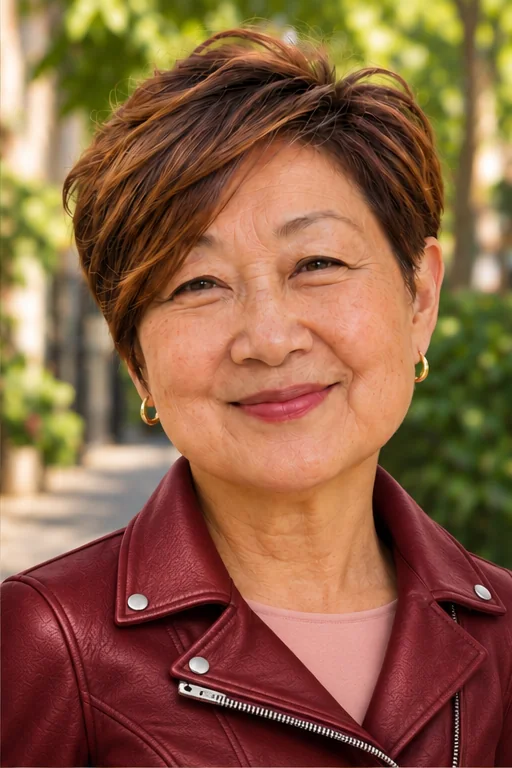
A long front panel can make the leap to short hair feel more familiar. This pixie leaves one ear open and carries a smooth diagonal across the other temple, giving the forehead some coverage while the close nape keeps your neck free. It feels quietly dressed up even on days when you tuck the front away, especially if your hair already parts to one side. Reset the sweep while the roots are damp, before a cowlick sets. Ask for a connected side panel with enough length to sweep over one temple and a soft, close scissor-cut nape.
Ask your stylist for: Leave a long connected front panel sweeping over one temple, a short tuckable opposite side and a close scissor-cut nape.
3. The Tapered Coil Crop
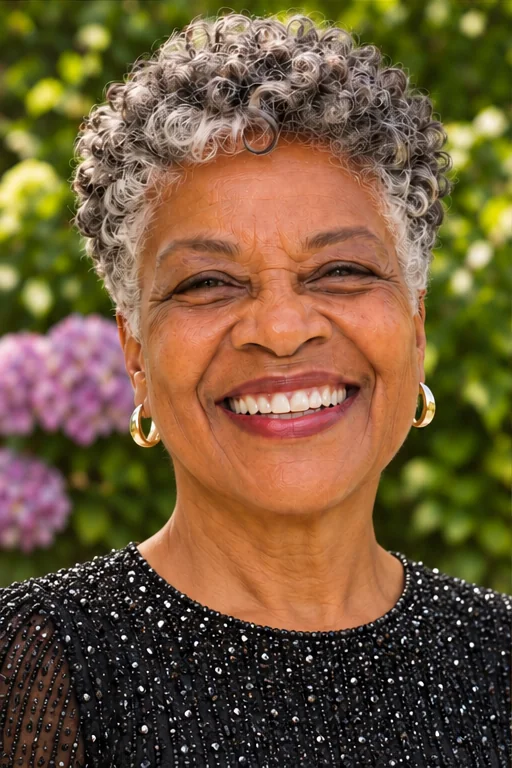
Short sides make the spring of the coils the focus of this cut. There’s still a rounded cushion at the crown, where the extra height draws the eye upward without asking you to stretch or straighten your texture. The neat taper can feel expressive and composed at once, especially if you enjoy a defined shape and prefer to spend your styling time on wash day. Refresh the top with damp hands and leave the side coils undisturbed between washes. Ask your stylist to shape the top dry, check both profiles and leave enough length at the sides for the curl clusters to stay intact.
Ask your stylist for: Shape the coils dry with a rounded top and softly tapered sides, leaving enough length for intact curl clusters.
4. The Rounded Short Curly Cut
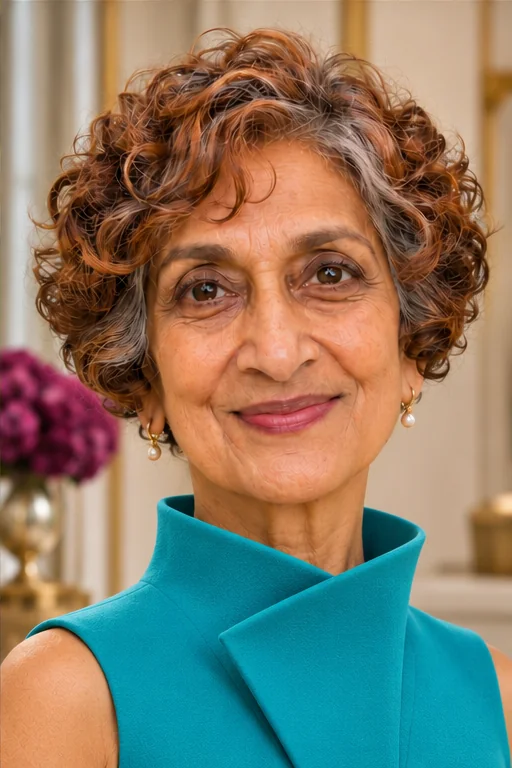
If your curls naturally settle out to the sides, try letting that width be part of the cut. Here the ringlets arc across the temples and skim the ears, then tuck inward toward the nape. That rounded frame can bring softness to a longer face and feels lively on days when the curl pattern falls a little differently. Apply a light hold product to very wet hair and judge the outline once the curls are fully dry. Ask for dry temple length on both sides, curls skimming the ears and a closer nape without a squared-off back.
Ask your stylist for: Leave dry curl length at both temples, skim the ears and trim the nape closer without squaring the back.
Pause and notice: If you like the short silhouettes, choose how much of your ears you want to see. That one decision can narrow the options before you think about layers.
5. The Full-Edge Chin Bob
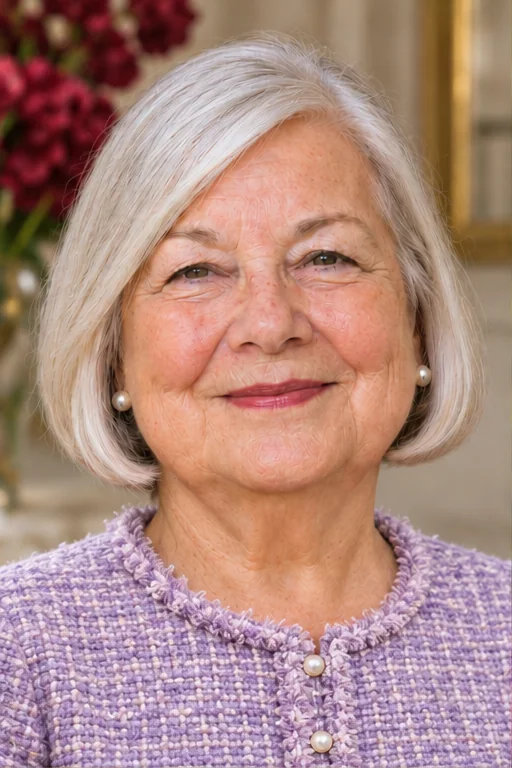
When fine ends scatter, a single chin-length line gives them somewhere to gather. This bob follows the jaw and turns under just enough to show the shape, making straight hair look fuller at the edge and bringing definition to the lower face. It can feel crisp and intentional with very little styling if your hair already dries smooth. Use a brush to settle the front rather than curling every end, and expect the line to shift as it grows. Ask for a solid chin baseline with minimal internal layering, checked with your usual part.
Ask your stylist for: Cut a solid chin-length baseline with little internal layering, then show me where it falls with my usual part.
6. The Below-Jaw Wave Bob
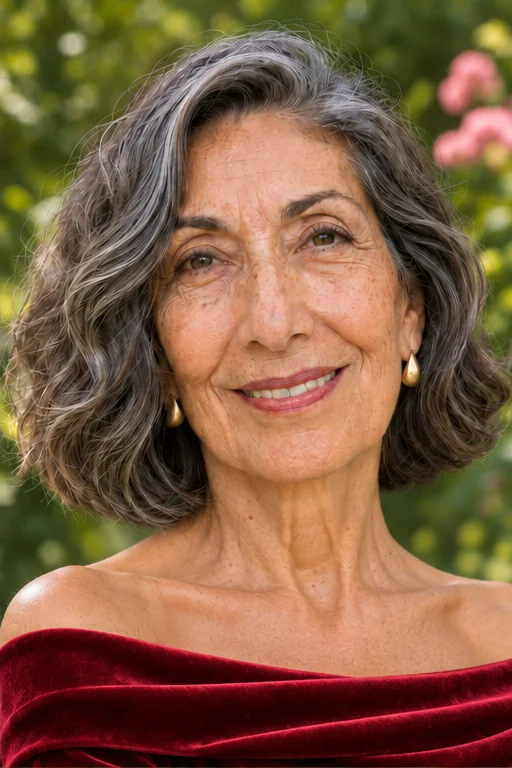
The appeal of a wave bob is the small change in shape each time you wash it. A dry edge just below the jaw leaves room for the first bend to open away from the cheek, while subtle internal shaping lets dense waves settle without making the ends look stringy. The movement feels relaxed and a little romantic if you prefer hair that still looks like yours after air-drying. Try squeezing water out with a soft towel and then leaving the bends alone. Ask for a below-jaw edge and restrained interior shaping, checked against your usual dry wave.
Ask your stylist for: Set the dry edge just below the jaw and use light interior shaping to let the waves bend without losing the outline.
7. The Neck Bob With a Narrow Fringe
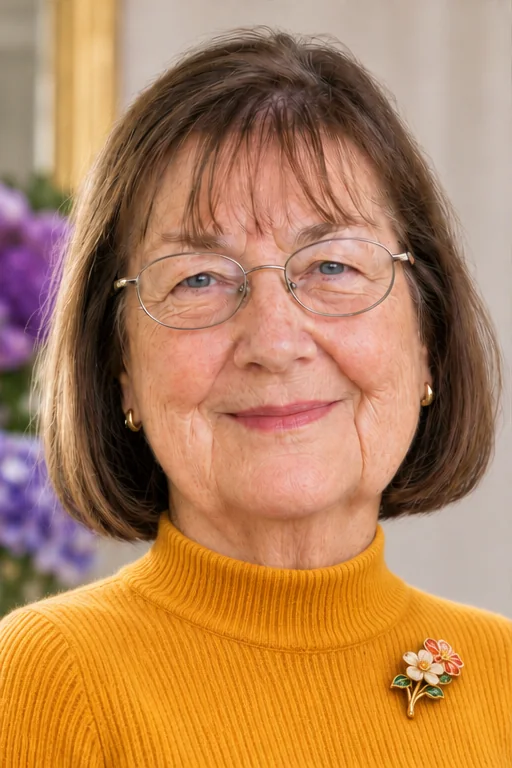
Bring your everyday frames to the appointment for this one. A narrow fringe sits near the brows and draws attention to the eyes, while longer temple pieces slide behind the glasses and leave the neck-length bob intact. It gives straight or softly wavy hair an easy, bookish polish, especially if you like seeing a clear line around your face. The fringe may need a quick damp reset in the morning, so check how it behaves with your part before cutting. Ask for a shallow fringe section and temple pieces that tuck comfortably behind your frames.
Ask your stylist for: Use a narrow fringe section that skims the brows, with temple pieces long enough to tuck behind my glasses.
8. The Neck-Length Shag

A little movement at the neck changes the feel of short hair. In this shag, shorter layers lift above the temples while a broken fringe opens over the brow and feathered ends touch the neck. The contrast can make dense waves feel lighter and gives a casual outfit a playful edge, though very sparse ends may look more substantial in a fuller bob. Work a little foam through damp roots and let the back bend where it wants. Ask for mid-neck length, connected crown layers and an open fringe, with enough hair left along the nape to keep the silhouette visible.
Ask your stylist for: Keep the nape at mid-neck, add short connected crown layers and an open fringe, and retain enough weight through the ends.
Pause and notice: Notice where the longest hair sits in each photo. If you regularly tie it back or tuck it under a scarf, try that movement before you settle on a length.
9. The Full-Ended Shoulder Cut
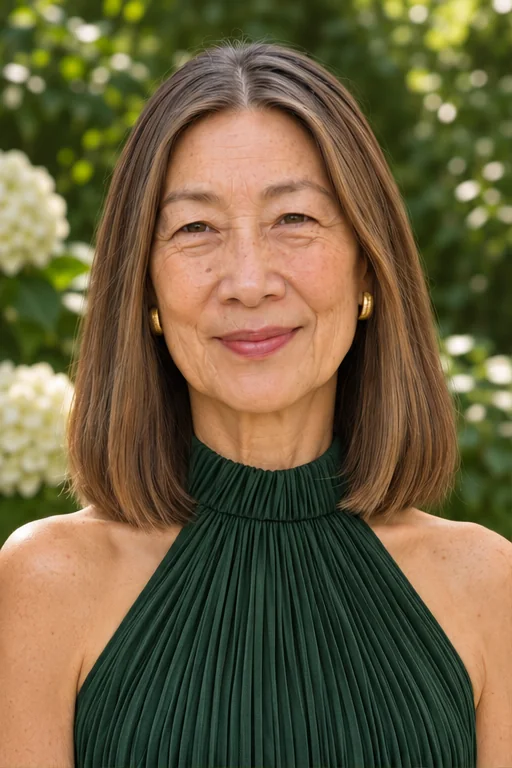
When you want enough hair for a small ponytail, shoulder length can be the useful middle ground. The full edge of this cut keeps fine straight hair looking substantial at the bottom, and the clean line feels composed with a jacket or tucked into a scarf. Ends can flip where they brush the shoulder, so show your stylist how the hair sits against the clothes you wear most. Ask for a full dry edge at shoulder level and very little layering, then check that the shortest front pieces reach the spot where you fasten a ponytail.
Ask your stylist for: Keep a full dry edge at the shoulders, preserve tie-back length and use minimal layering.
10. The Collarbone Curl Cut
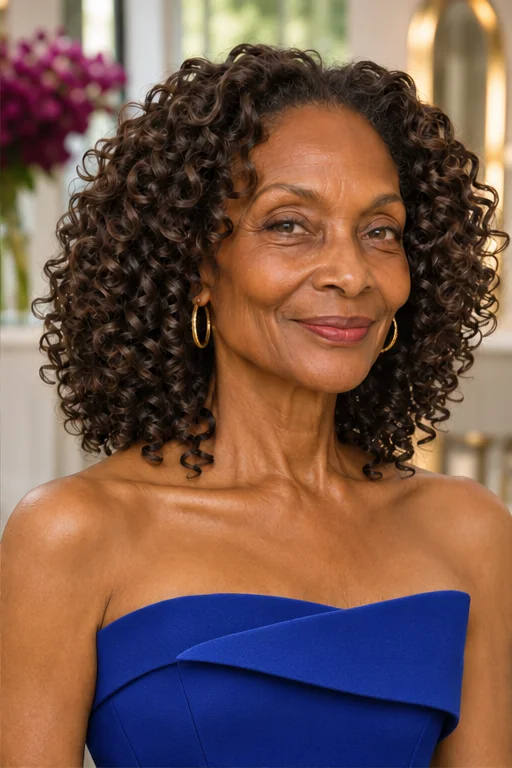
Collarbone-length curls have enough room to form a generous curve without piling all their width at the ends. Selective internal shaping lets the upper ringlets lift while the lower ones stay connected, so your face remains open and the shape feels buoyant without needing a blowout. This works especially well when your curls spring by different amounts around the head. Start with gel on wet hair, then let it dry before you break up any firm cast. Ask to check the collarbone edge dry and shorten only the curls that need room to lift.
Ask your stylist for: Check the collarbone length dry, and lift selected internal curls while keeping the bottom line connected.
11. The Shoulder Sweep With Face Framing
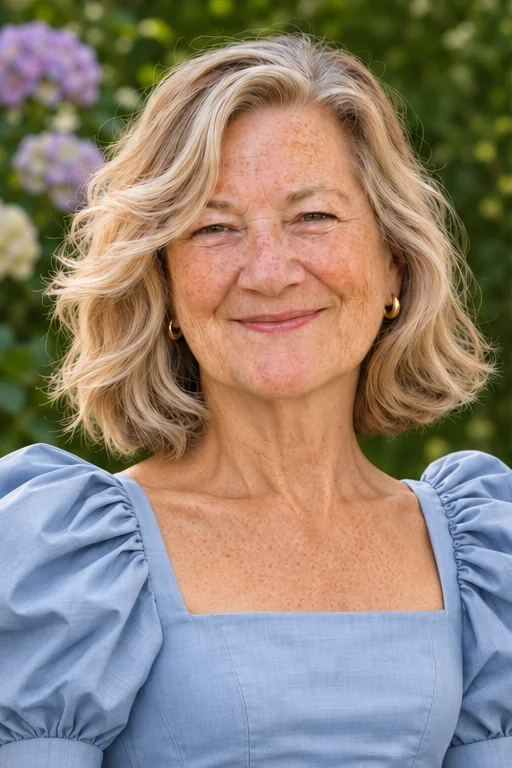
If you like your length but feel the front hangs heavily, change the first piece you see in the mirror. A cheekbone-to-jaw sweep opens the front while softly layered shoulder-length waves remain around the neck, giving the cut movement that feels graceful without a major chop. It suits hair with a little bend and makes sense if you can spare a minute to direct the front away from your eyes. Ask for a cheekbone starting point that blends below the jaw, and test the shortest piece behind your ear before committing.
Ask your stylist for: Start the front sweep near the cheekbone, connect it below the jaw and keep the sides long enough to tuck.
12. The Long Cut With Low Layers
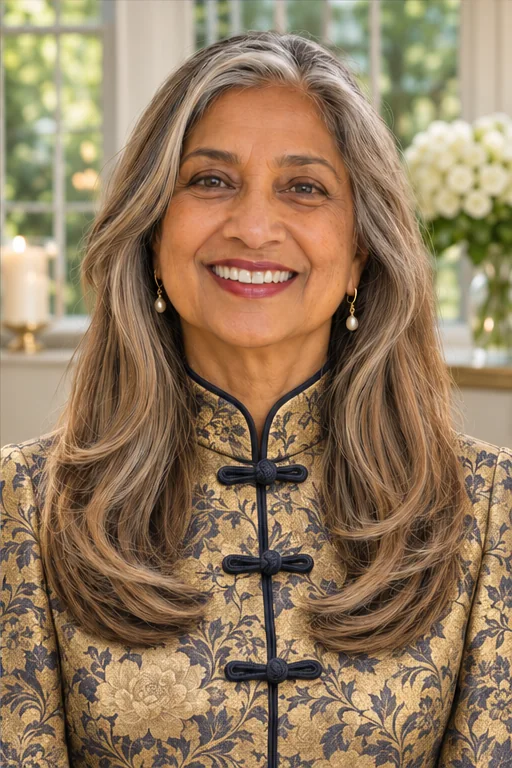
There’s room to keep long hair if the length still feels like you. In this cut, connected layers begin low so the ends can move, and a shallow U keeps the center full without turning the sides into short, disconnected pieces. The effect is soft and deliberate when worn loose, and there’s a satisfying ease to pulling the same cut into a low tie for a busy afternoon. If the ends are fine, ask for fewer layers and keep the longest edge substantial. Have your stylist check the front pieces against your actual tie-back point before cutting.
Ask your stylist for: Keep a shallow U-shaped hem, with connected layers starting below the shoulders and all front pieces reaching a low tie.
Before You Book the Appointment
A successful salon visit begins with the overall shape, construction and upkeep—not only the finished length. Use this quick reality check before choosing your final reference photograph.
- Fine or lower-density hair: A full bob or shoulder edge can make the ends look more substantial. If you prefer short hair, try a compact outline with a connected top.
- Dense waves: Leave enough length for the wave to bend. Consider internal shaping if the sides spread wider than you like.
- Curls and coils: Choose the amount of width you want at the temples, then agree on the dry length at the neckline and around the face.
Can I Wear a Fringe With Glasses?
Put your frames on before agreeing to the fringe length. A narrow fringe can sit just above the top rim while the temple pieces tuck behind the arms. If you often switch between frames, bring both pairs and check where they touch the hair.
What Should I Ask for if My Hair Is Fine?
Show your stylist where your ends look most see-through and where you want fullness to sit. Ask how much weight the cut keeps in the bottom edge and where the shortest layer will land. On a bob, a strong baseline often does more for the outline than layers throughout.
How to Keep the Cut Working as It Grows
If the crop starts to crowd your glasses, ask whether you can tidy the ears and neckline between full trims. On a shoulder cut, work with a natural flip or ask to leave the edge long enough to clear it. When growing out fringe, ask to blend the outside corners once they reach the temples and keep the rest of the length.
The Takeaway
Save one photo for the outline you want and one for the texture closest to your own. Tell your stylist the part of your current routine you want to keep, whether that’s a quick finger-dry or a ponytail you can put up without a mirror.
More Hair Inspiration
- Low-Maintenance Short Haircuts for Women Over 60 — Compare more short shapes by styling and trim effort.
- Hairstyles for Fine Hair — Find more ways to keep fine ends looking substantial.